
Hey ya’ll! Well it looks like it’s gonna be another day that I don’t have time for any fun stamping. Jeanne and I have been working on some projects that need to be done, and I’ve made more cards here in one day that I ever do back home. Jeanne is definitely a stamping machine! When I contemplated doing the Splitcoast Sketch Challenge yesterday, she shook her head at me and said I had assignments that needed to be done. Sorry Roxie, I’ll make it up later!
I didn’t want another day to go by without sharing something with you though, so before I left home I typed up a few posts to have on hand, and this is one project you’ve not seen before.
I needed an altered item for the 3D Swap at the Stampin’ and Pamperin’ Retreat in Cincinnati. I bought the Bind-it-All back in August and this was the first time I was able to play. I have to say, that I am hooked – totally hooked. I cannot stop making little altered books and journals. It is just way too much fun!
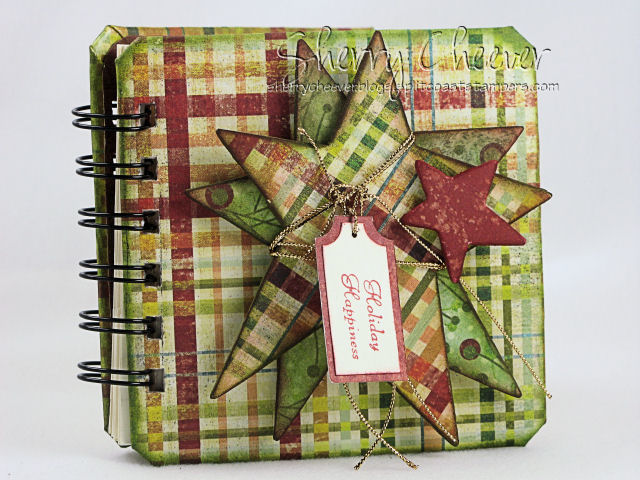
I covered chipboard coasters with Mod Podge and then covered both sides with Designer Paper. The stars were done the same way, except they are covered only on the front. After I cut the paper off around the stars, I sanded the edges and then covered the bare edges with distress ink. After getting the stars done, I thought the little book itself needed some sponging, so I then sponged the same distress ink along the sides of the coasters. The sentiment is stamped on Very Vanilla and then trimmed down to make a tag attached to the stars with gold cord. I wanted something different for the inside, so I made 6 pocket pages so that when a page is flipped, you have 1 bare page and 1 pocket.
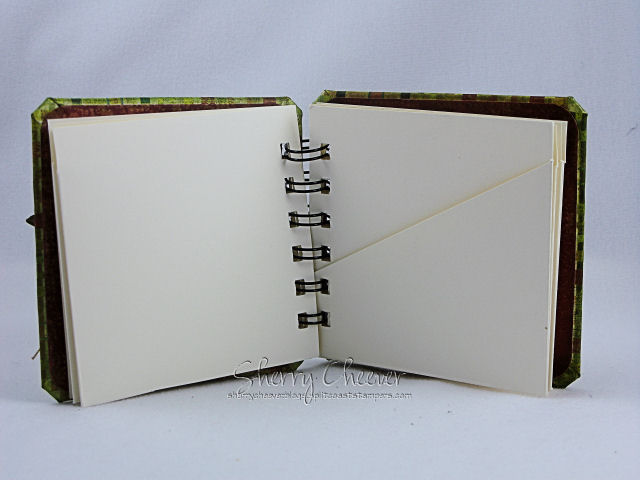
To make the pages, I cut a piece of 8-1/2″ x 11″ cardstock long ways in half. I then trimmed off the longer end to 7-1/2″. You should now have a piece of cardstock 7-1/2″ x 4-1/4″. Turning the paper so that the 7-1/2″ side is horizontal, I scored the sheet at 3-3/4″. Turning the paper vertical, I scored at ½”. Trim the bottom flap off on the left-hand side leaving a ½” flap to fold up and close off the bottom. To make the angle cut, I marked from ½” at the top and then 1-1/4″ from the bottom and cut along the diagonal. To finish the pocket, apply adhesive to the flap and when you fold over to make the pocket, join the 2 pieces together.
Stamps: SU Fancy Flexible Greetings
Paper: SU Very Vanilla, BasicGrey Fruitcake Collection
Ink: Tim Holtz Peeled Paint and Fired Brick Distress Ink
Accessories: Bind-it-All, Mod Podge, Mounting Tape, Gold Cord, Bare Chipboard, 4″ Square Chipboard Coasters, Sponge Daubers
Hope everyone has a great day and more later!


