Hey it’s that time of the week again – time for the JBWW Challenge! It’s my turn to host this week, and I’ve got a sketch for you that is so much fun! You can showcase those little stamps in a set or you can create a background using any technique and go to town. I myself chose to use individual stamps. Remember to come back and post a link to either my blog or Jeanne’s blog, Inky Paws. Oh yeah, and don’t forget to use keyword JBWW if you upload to you SCS Gallery.
Before I start with the deets of my sample card today, let me answer a question from yesterday. Julie (joypup on SCS) left this comment and question: “I love your card, Sherry! 3×3’s are dear to me, too… thanks for the heads up on the Distress reinkers — but could someone tell me why they are “distress” inks? What makes them special???”
I like the Tim Holtz Ranger Distress Reinkers and Pads because of the vibrant colors they have and the different tones they take when water coloring with them. Plus, you gotta love the names. If you have ever noticed when, water coloring with SU’s Classic Old Olive, the ink takes on different hues or tones. Well, all of the distress inks do, and the different hues they take on are so gorgeous. You can emboss with them as I found out this week, and they are the only ink that I distress the edges of my paper with. They stay wet a little longer than other dye inks and a little bit will go a long way. Here are a few facts about the Distress Inks that make them different from other inks and some of the reasons I like them:
- The color is stable and maintains it’s integrity. They won’t fade over time or break down when wet. In other words, they won’t fade like other dye inks.
- They are reactive with water, so when wet the inks actually travel out or “wick” across the surface. (I created a background panel the Friday where I completely soaked a piece of watercolor paper with water and dropped on little drop of reinker in the center. The ink spread completely across the panel. All I had to do then was take a wet paint brush and even out the color.)
- They can also be used to tint black and white photos. As I said before, a little bit of ink goes a long way and using a Cut-N-Dry nib allows you to get into small detail areas with just a little bit of ink.
I think that above covers the distress inks but if you have any other questions, don’t hesitate to ask.
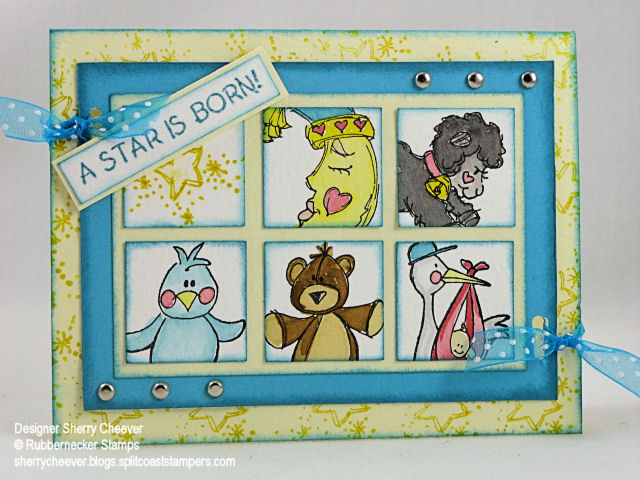
Moving on to my sample card today! As I said earlier in the post, I decided to watercolor my images today. All the images used are from Rubbernecker Stamp Company and are part of the baby collection.
I stamped each image on watercolor paper with Black Stazon and then painted the images. Well all except for the star square – I stamped that one. Using a 1-1/4″ square punch, I punched out the images and then sponged the edges with Broken China Distress Ink. To make the pattern of squares straight and even, I started with a larger piece of yellow cardstock and glued down the squares in the pattern eyeballing the space between the squares. This panel was then trimmed down leaving the same amount of space on the outer edges of the squares as on the inside. After the edges of this panel were sponged with the Distress Ink, I glued it down to a piece of turquoise cardstock. That cardstock was then trimmed to a 5/16th edge (I used my Perfect Layers for this). To add some dimension to the front of the card, I stamped the star image all over the front with Mustard Seed Distress Ink, and sponged the edges with Broken China. I added the brads to the main image panel and then placed it on the card front. (I didn’t want my brad butts to show – hehe). Using a slot punch, I punched two holes through all the panels and ran the ribbon through and tied it off. The sentiment was stamped out in the Broken China on watercolor paper, trimmed, sponged, mounted on turquoise cardstock and then placed on the top panel with a small piece of mounting tape.
Stamps: 88-01 Lamb, 88-13 Sleeping Moon, 88-09 Star is Born Text, 88-10 Stork, 88-06 Stuffed Bear, and 88-11 Stuffed Chick from Rubbernecker Stamp Company
Paper: Watercolor paper, Prism Iced Yellow, Turquoise
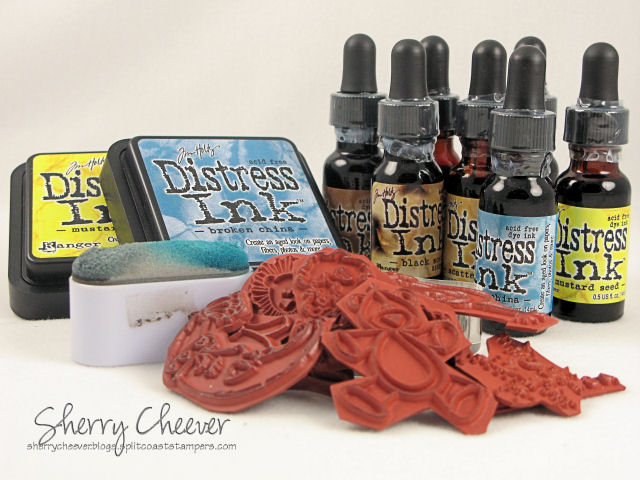
Ink: Stazon Black; Tim Holtz Ranger Broken China, Mustard Seed, Scattered Straw, Tattered Rose, Worn Lipstick, Black Soot, and Brushed Corduroy Distress Inks
Accessories: Watercolor Brushes, Perfect Layers, Brads, 1-1/4″ Square and slot punches, Tsukineko Oblong Sponge Dauber
Before I leave you today, and to follow along with the prior discussion of Distress Ink, these are all the products that I used today to make this card, and all of them can be found at Rubbernecker Stamp Company.


I can’t sleep tonight, so I’m probably the first one done. It’s only 4 AM LOL!
Thanks for a fun sketch for little stamps!
http://www.splitcoaststampers.com/gallery/photo/742411?cat=500&ppuser=37350
Cute card, Sherry. Looks like a fun sketch.
Cute baby card, Sherry. Great sketch. Maybe I can find time to play.
Such a cute card Sherry! I always love seeing your distressing now I know your tip…you have to use a good ink 🙂 I’ll be looking at getting those soon!
This looks like an interesting sketch! Hope I get time today before Chloe has curling.
Have a wonderful Sunday!
Fun sketch! Here is a link to my card: http://www.splitcoaststampers.com/gallery/photo/742702?cat=500&ppuser=83483
Cool card Sherry. Thanks for the hot tip about the re-inkers/distress inks. I’ve got some of the distress ink pads, but not the re-inkers. Never thought about watercoloring with them or even coloring photos with them. What an awesome idea. Wow! I’ve got some cool ideas now for Christmas. Thanks!
Now this card is just the Cutest Sherry!!! Lots of great detailed instruction too!!! Love the scoop on the distressing ink!! Wowsa!!!!
Did I mention I LOVE your New Banner!!!!!! Now THAT is BAD!!!!!!!!!
This card is adorable, Sherry, and thanks for the info on the distress inks–now I REALLY want them before I was just thinking about out . . . oh, Santa baby! 😀 lol
I love the yellow and blue you used on the card. It is just precious, and you did a terrific job eyeballing those squares. Thanks for sharing your tips. I might get to play later today, still a few things to make for Christmas. Uggh, 15 more days!!!!
Great sketch!!! I had to try it out…here’s my version…
http://www.splitcoaststampers.com/gallery/showgallery.php?cat=500&ppuser=86700
or here
http://militarywifestampinspot.blogspot.com/
{SMILES}
hehehe — Sherry, I don’t know what took me so long or why I clicked on “tool talk” in your sidebar today, but I finally read your answer to me — HOW DID I MISS THAT? Anyway, thank you VERY much for sharing your thoughts on the inks. I appreciate all your experience and inspiration!