
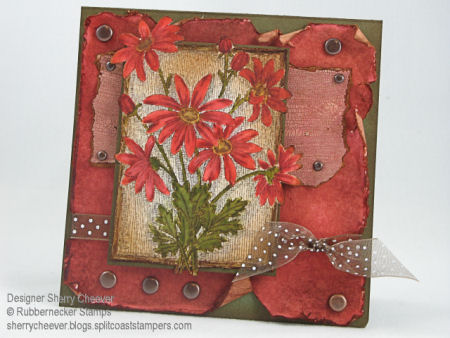
Distressing - Don't Get Distressed!
This tutorial will refer to different distressing techniques that I used in making a sample card.
I have worked with Tim Holtz Distress Inks throughout this tutorial because of their ability to highlight and work smoothly on the paper. With these inks, you can keep adding color on top of color without losing the hues of the colors in the layers of ink.
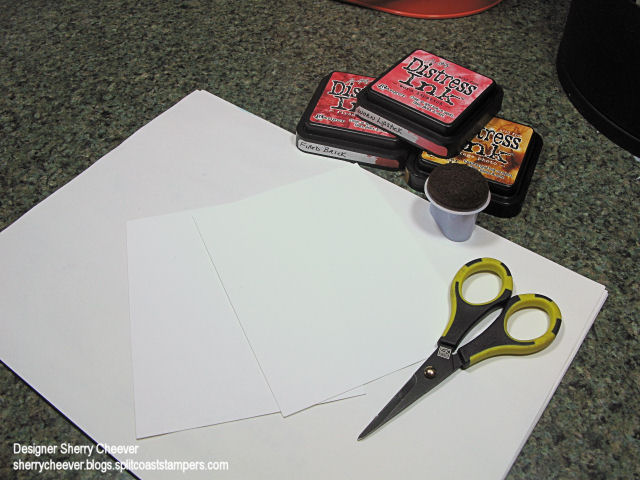
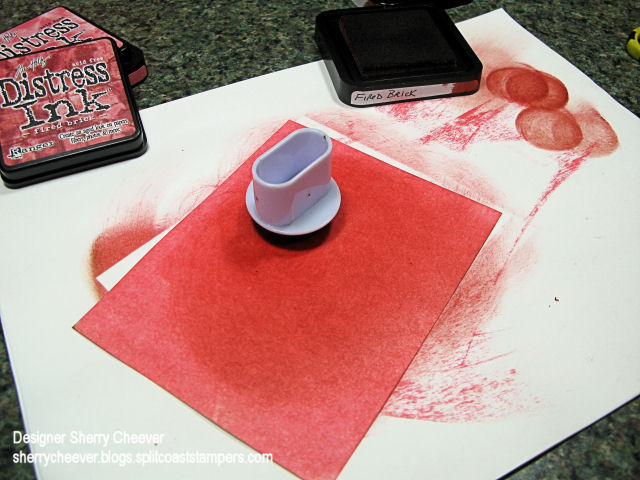
There are times when you want a background that fits a particular image you are working with and you have to make it. You will need to gather some white paper, a dauber and ink pads.
To start with, take ink pad to paper and run the pad across the surface of the paper completely covering the paper.
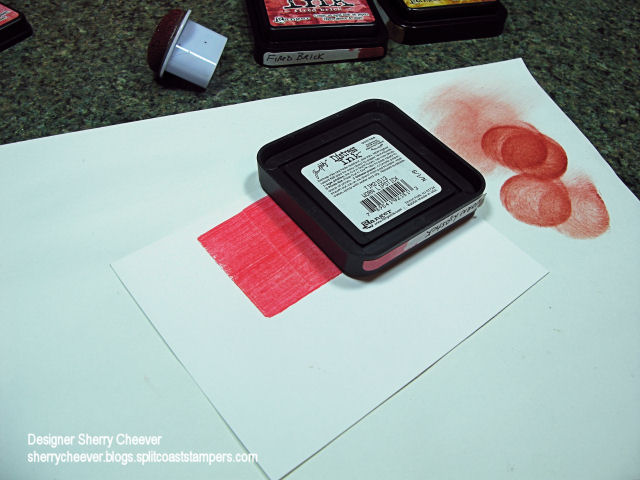
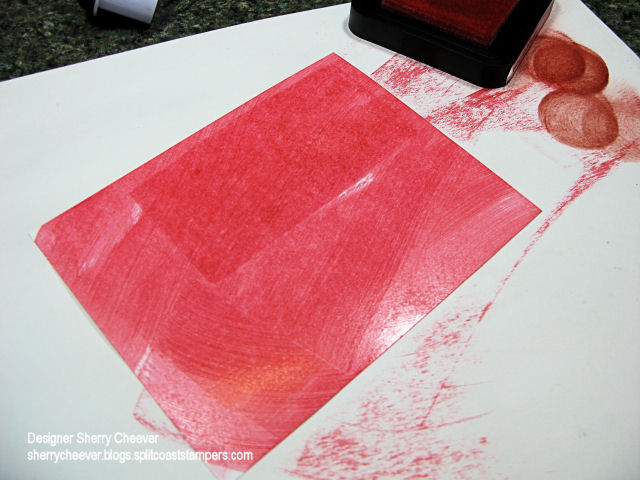
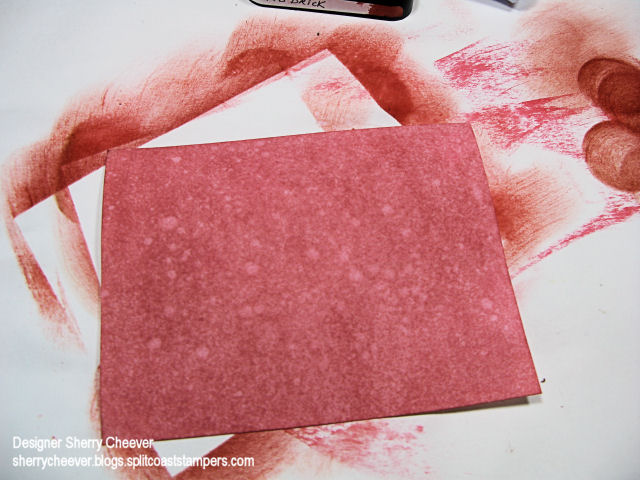
To make the ink smooth and cover your paper, use a sponge dauber and in a circular motion, work the ink around the paper.

To add more depth to the paper, now add a darker hue of the same color on top. To do this, use your dauber and in the same circular motion, work the darker color on top of the existing color.
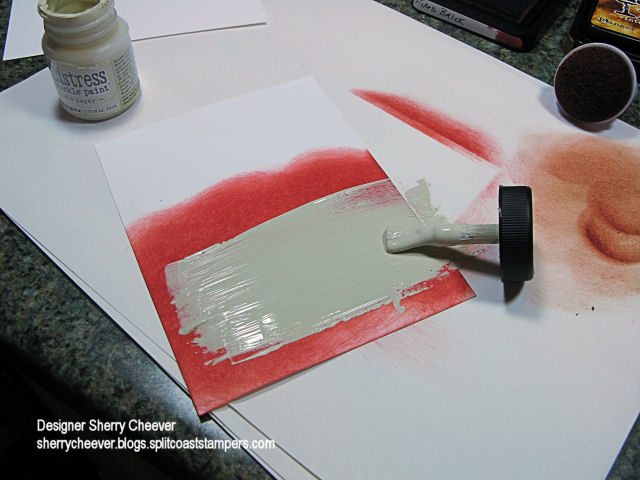
At this point, there are a few options you can add. Let’s start with crackle paint. I used Tim Holtz Scattered Straw Crackle Paint in this step on my sample card. Once you have your paper colored, paint on a layer of the Crackle Paint. The cracking achieved depends on how heavy you apply the paint. If your paint is heavy, the cracks are bigger and deeper. If you add a thin layer, there will be many smaller cracks.
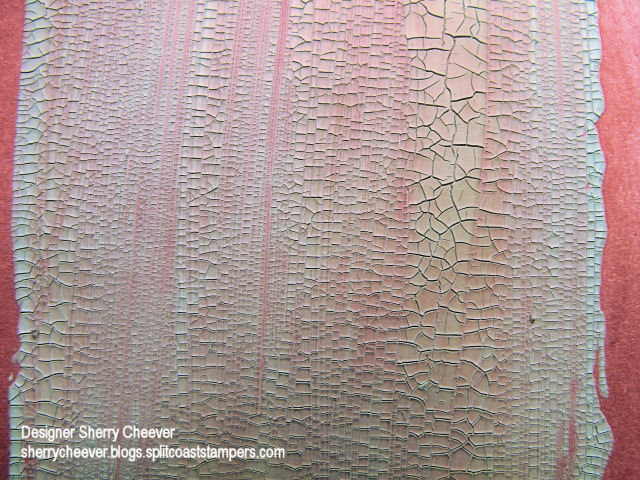
Once the paint starts to dry and the cracks begin to appear, you can speed the process up by using your heat gun.
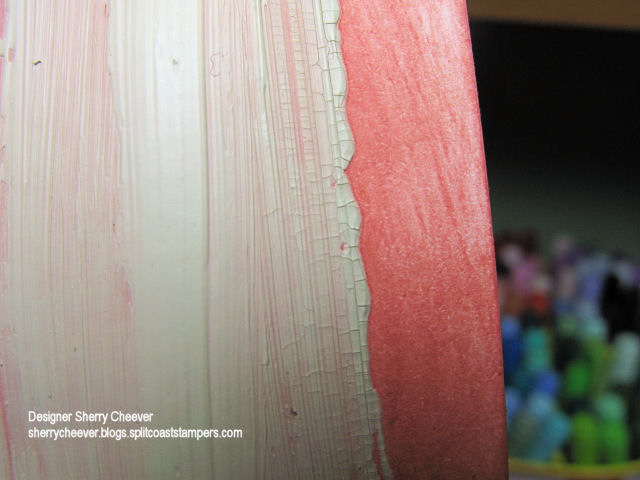
Once the paint is dry, it should look like this.
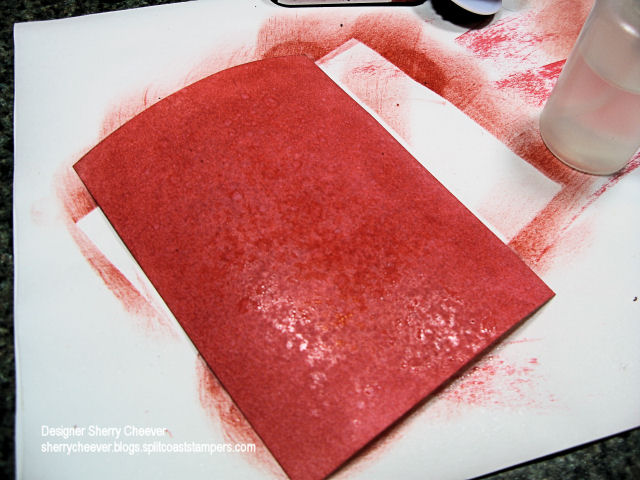
The next part is the fun part. One way to distress the edges is to tear the paper along the sides and then sponge on distress inks.

As you work the inks off the paper on, the edges will begin to curl for you if you add enough ink and work the paper enough. To make the crackles stand out more, as you work the ink onto the edges, you can drag the ink further onto the paper.

Let’s look at making the final background layer. The first steps of applying ink to the white paper are the same. As an option, you could spritz the paper with water leaving a blotchy specked look to the paper.
Typically when you spritz the paper with water, the paper will curl. Never fear! Pull out your heat tool and dry the paper. As it dries, the paper will once again lay flat.
For my sample card, I decided to add more depth. To do this, stamp the darker ink pad randomly on the paper.
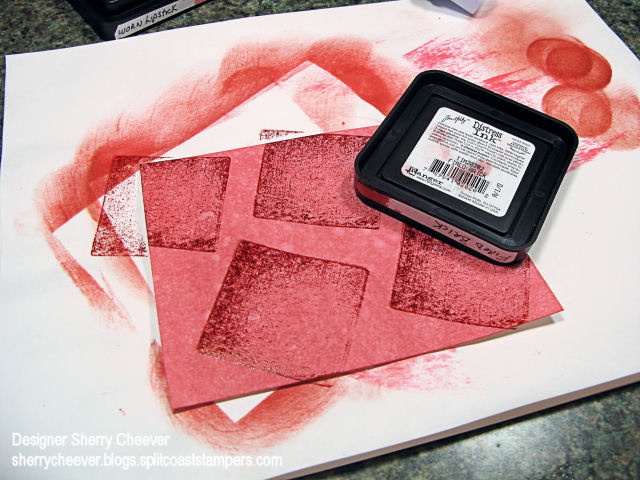
Then using a sponge dauber and working in a circular motion, even out the ink.
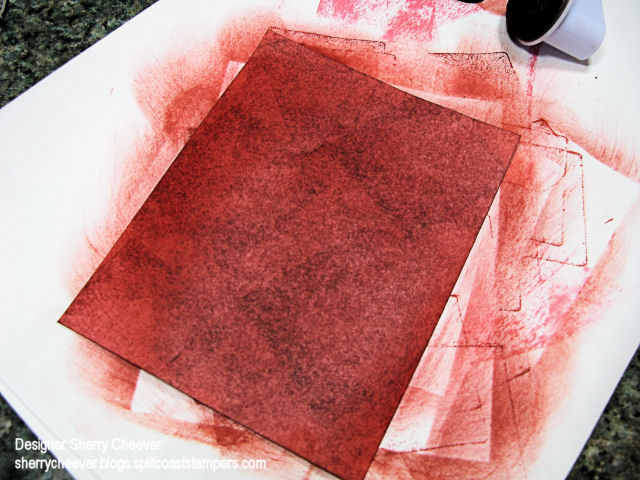
To distress the edges of this layer, (as in the sample card), use scissors. Scrape along the edges of the paper pulling the scissors toward you. It doesn’t matter if you accidentally cut the paper or tear it. To me, it just adds more character to the distressing.

When you start to sponge the edges, dragging in the ink from off the page, the edges will curl and form a shape of their own.

Distressing is one of my favorite techniques, and I hope you try these different styles of distressing. All of my Favorite Products can be found here at Rubbernecker Stamp Company.


[…] it occurred to me that is was an excellent opportunity to talk distressing. I’ve made a separate Distressing Tutorial, and it is the post immediately following this […]
What a beautiful card Sherry!!! Your Distressing ROCKS!!!
Hi Sherry ~ What a wonderful tutorial on distressing :0) Thank you so much for taking all that time to lay it out and take pictures, step by step. I’ve never seen nor used the TH Crackle medium, so I’m now going to have to find it online to use ~ it looks really aged and tattered and I’d love to see how it would look on a dark background, like a chocolate brown. YUMM
Your tutorial is now going to be printed and put in my Book Of Tutorials, for future reference. {grin}
Love your work, as always!
This is stunning stunning stunning!!! I can’t say it enough. So inspiring. I’ll get distressed if I don’t get these products! ;0) Thanks for sharing this, :0) Mel
Very well done tutorial. TFS.
Oh Sherry! I love that crackle paint and your tutorial is wonderful. I will definitely give this a try. You are such a inspiration to me.
Sherry, can not thank you enough for making the tutorial so user friendly; it’s easy enough to understand and can not wait to use the scissors for some distressing today.
Gigi
OMG Sherry, you make Distressed sooooo Beautiful!!! Thanks for a really cool tutorial and gorgeous, gorgeous card. Nancy
what a beautiful card and a great tutorial, thanks so much for sharing!
Oh what a beautiful card! And great directions too! Thanks!
Sherry, thank you so much and can you tell me where you purchased the daubers that you used? I have never seen those and I like the size of them. Great tutorial!
This is awesome information, Sherry! Thank you so much for the links to all the cool stuff. Love the look of that crackle paint. You sure made a beautiful distressed card!
Thanks a kazillion Sherry…..your tutorial really helped. And like, now I feel famous and stuff cos I got my name on your blog. I’m not sure, but I think that was my 15 minutes of fame!!!!! Now I just wanna go play in ink!
Pamm
HRSECRZY
beautiful card, Sherry! gotta try my hand at this … maybe over the Christmas break!
later, alligator!
– SueB of sueblondin.blogspot.com
Sherry your card is gorgeous! Distressing is one of my favorite techniques and your step by step is fab! Thank you!
Fantastic tutorial Sherry, Beautiful Card!!!
[…] More information on the distressing techniques used can be found in my Distressing Tutorial. […]
[…] then sponged the edges with Black Soot Distress Ink. (You can find these specific techniques in my Distressing Tutorial). Once these pages have dried, stamp the main images randomly using Black Soot. To add more texture […]
[…] Ink over the entire turquoise panel. The bottom panel started out as a manilla shipping tag that I distressed with Adirondack Mountain Rose, Broken China and Scattered Straw inks over. I stamped the blanket […]
A lot of good information here, fantastic layout too.
Hi~
This is a fabulous multi-tutorial. I love how you showed us many different ways and products to distress paper. I am a “tear-er” myself, but I will try your other ideas. Thank you for being so precise in your wording, and showing so many pitcures. I think that so many people that like to stamp are visual learners…and you made it clear for visual and auditory learners. The people that learn by doing…will do just that. This was a very inspiring tutorial.
Perhaps this is your forte`?
His,
Traci S.
I love to distress with Tim Holtz ink but have not been successful with crackle paint. Will try again thanks to your inspiration.