
Good Tuesday morning! Wow what a whirlwind of a weekend I had. I’m still dragging a bit, but there is so much to tell you today! First, let me say how exciting and fun it was to work the Rubbernecker Booth at the York Stamp Show this past weekend. I got to meet so many Splitcoaststampers, including fellow dirty girls Angie and Denise. I was lucky enough to have lunch with Angie and have a change to sit and chat with her! I have to say that it just makes my day when someone from SCS walks up to the booth and says hello! Some of you I have chatted with online or seen your work and I truly feel like I already know you! It just makes the entire weekend for me. The next one I’ll be at is in San Antonio, Texas in a few weeks.
Now you know it’s Tuesday, and that means it’s Treasure Hunt Tuesday at Rubbernecker.  You can find sample cards of one of the prizes today on the Rubbernecker Stamps Blog. You’ll also find a list of all the Design Team Members with their blog links so that you can hop around and visit them. I have Blog Candy today, and will be giving away two $10 Gift Certificates from Rubbernecker.
In order to win, all you have to do is leave a comment on this post. No special questions today – I’m too tired to think of one! I’ll pick two winners and post who they are tomorrow.
While working the show, I was demonstrating Ranger Alcohol Inks. Part of the demo included an embossing technique. While showing this technique to a group of women on Sunday, they were taking notes, trying to keep up with me. I promised them that I would have a brief tutorial on my blog today, just for them! So ladies, this one is for you.
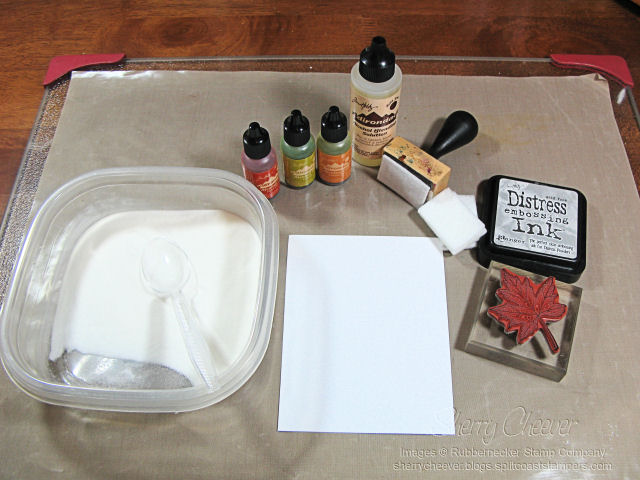
The products you will need are: Ranger Alcohol Inks (I have used Butterscotch, Lettuce and Terra Cotta); Alcohol Blending Solution; Ink Applicator with felt; Embossing Ink; Clear Embossing Powder; Heat Tool; Iron; White Glossy Cardstock; Plain White Cardstock. Stamps I used are from the Stamp Oasis Winter Holiday Collection Leaf Set SKU:868 869 870 SO. All product and images from Rubbenecker Stamp Company.
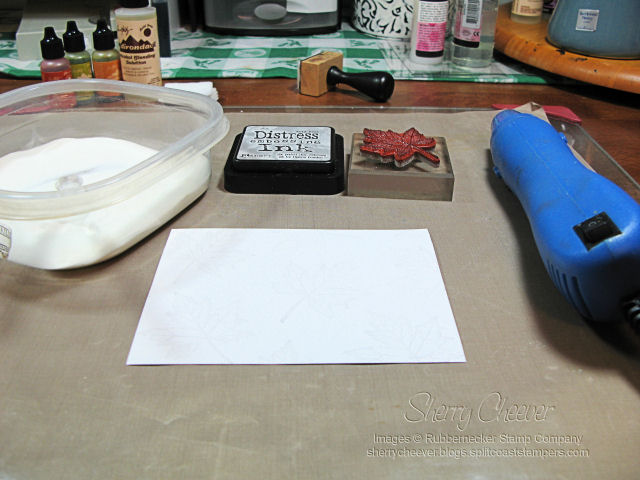
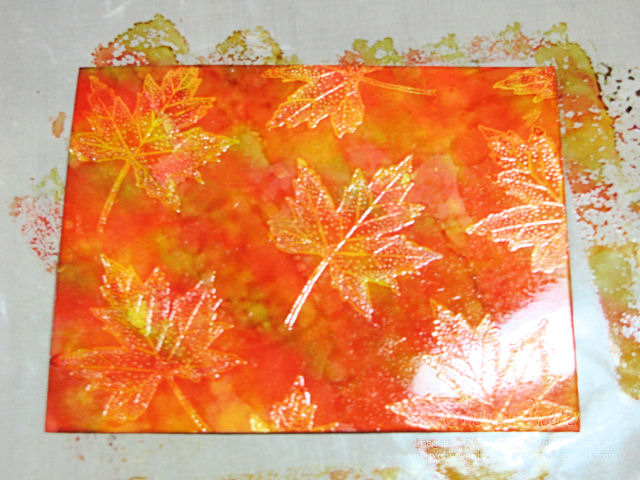
Stamp your image on the white glossy cardstock, cover with the clear embossing powder, and then heat set using your heat tool.
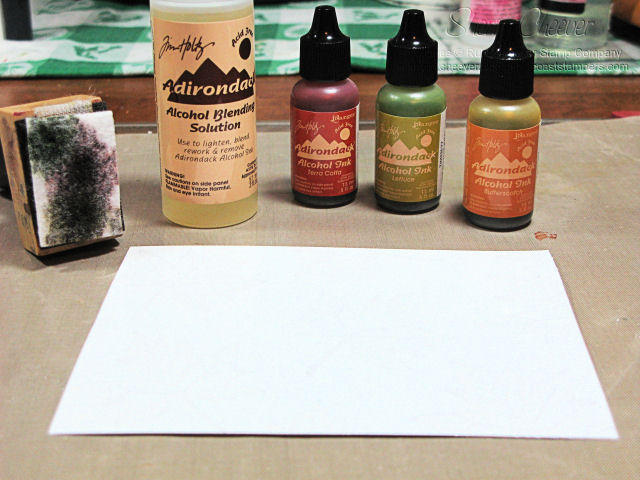
Apply the alcohol inks to your felt applicator by pressing in the point of bottle and give the bottle a good two second squeeze, allowing the ink to fill your felt.
Begin pouncing the ink onto your embossed glossy cardstock, covering the entire surface. To apply a second layer of color and blend the inks, apply a small drop of the blending solution to your felt, and go over your cardstock a second time.
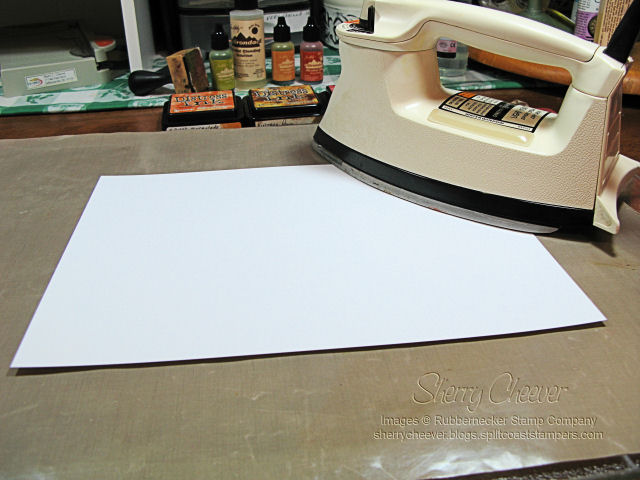
While the alcohol is still damp, lay your plain white cardstock over the top of the inked glossy cardstock, and then iron over your image. Your iron should be set on high with no steam.
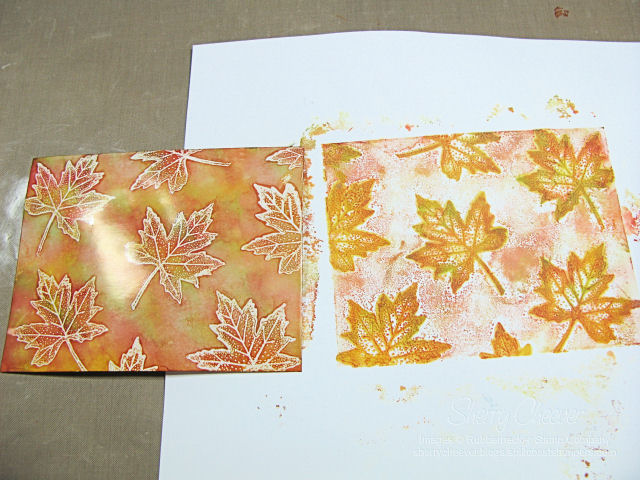
Once you see the embossed image come through the top layer of cardstock, you are done. Remove the white cardstock and you will have two backgrounds. The background on the left is the original alcohol inked glossy cardstock (Faux Bleach and/or Batik with Alcohol Inks) and the background on the right is the Alcohol Fresco.
Here is the fresco background trimmed and inked. You can also leave the second background as it is for more of a fresco look.
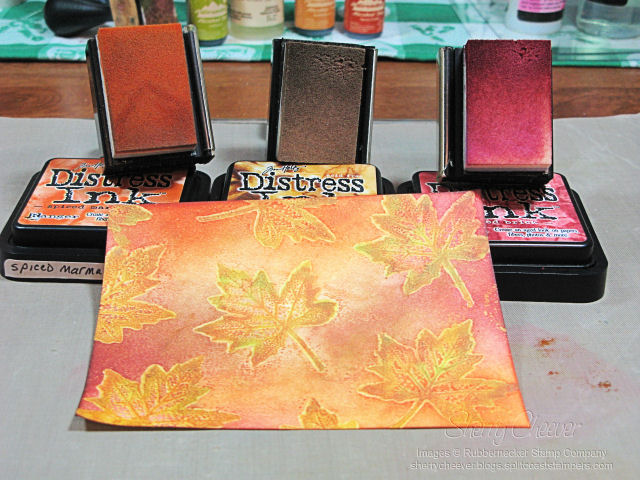
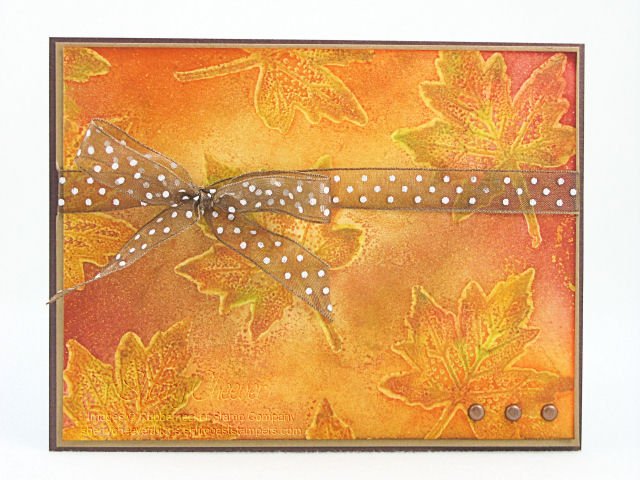
You can now make two cards with one technique. My first with the Faux Bleach/Batik Background.

The second with the Alcohol Fresco Background.
I look forward to seeing your designs now!


great tutorial on this technique Sherry! Such beautiful colors of ink!
Awesome tutorial! Thanks for the blog candy! Wish I could have gone to York; its about an hour from where I live. 🙁
Couldn’t make it tho!
Angie
wow that is gorgeous! I gotta try that technique! Thanks for sharing Sherrie!
This is my fav. season I love to watch the ” magic” of the leaves changing before my living room window 🙂 so this tutorial is awesome for me to see I can make my own magic Thank you sooo much!
WOW! Really cool cards and GREAT tutorial!!
I love the colors!!
Wowzers! Stunning work, Sherry!
Love your blog! You make everything look so easy. Thanks for a chance to win.
Kate
Beautiful cards! I knew there had to be a better use for my iron other than clothes!!
I love this technique! Someone else once said that if their husband saw them using the iron for crafting he would wonder why she couldn’t iron his shirts. I’m in the same position! So I’m gonna have to get me one of them mini irons to keep at my very small craft desk to try this. 😀
I have just started ‘accumulating’ these great inks and not used them yet, so am thrilled to see your tutorial. TFS
DianeL
Oh wow Sherry! Thank you so much for putting together this tutorial for us!!!! The results of this technique are absolutely stunning!!!!
Thanks for a wonderful tutorial!!! Your cards are amazing!!! Finally…I can find a positive use for the dreaded iron:o}
Hugs!
Carolyn
I love this style! I’m going to have to try it out. Thanks for sharing it with us.
I so love this technique, such a WOW!
Your tutorial, as always, is AWESOME!!! I don’t have any alcohol inks, but if I ever have money to get some, this is one thing I have seen on quite a few blogs that I can’t wait to try.
Can’t wait to try your tutorial, Sherry; the pics help tremendously. I love buying from Rubbernecker, so the money will come in handy to purchase more supplies (notice I didn’t write “stuff.”)
Glad to see you made it home. Thanks for the tutorial….Going to have to give this one a go (but, not this week…..we are going to be riding our bicycles down the coast. “Erma Bombeck” has decided to invade my body and has been putting off packing/cleaning to get ready…so!! The next two days are scramblin’!! LOL!!)
So very pretty, and so neat to get two cards out of one shot there!
Wow – cool tutorial Sherry! Thanks for sharing it! And for the chance at blog candy!!!
Thanks for the tutorial!! I bought some of these inks last year at the York show and have yet to use them. Maybe now I will!!!
I saw you at the show, but you were sooo swamped by people. Then when I came back, you were just leaving to take a break!!! Maybe next time you are there I’ll get to say “hi”.
Glad you are home safe and sound. Hope you get rested up!!
From the lady who asked you at 3:30 on Sunday afternoon in York. . .
Thank you!!
So much to take in at the show, I knew I would never remember. 🙂
What clear photos and directions!
Thank you, thank you for all the ideas and demos you gave us at Rubberneckers–
I had a party!
Karen
Beautiful Cards Sherry! I love the simple elegance these cards reflect! Plus, I’m such a sucker for leaves–need to add these Stamp Oasis images to my wish list! Thanks for the chance to win some candy!
Wow awesome tutorial Sherry, Beautiful cards!!
What beautiful cards Sherry! Thanks for the wonderful tutorials also!
Love your tutorial! Thanks so much – I know I can do this now!
Beautiful cards, Sherry! And great tutorial!!
Hush Uuuuuuup!
These are dual stunners, Sherry!
Faboo toot too!
Gorgeous, Sherry! I am off this week and will have to try this technique.
Beautiful backgrounds! Thanks so much for sharing the tutorial. I’ve wondered how to use alcohol inks. Now I’m ready to give it a try.
I spent quite some time with Sherry Saturday in York and really appreciate everything she showed me about using the Ranger inks. Sherry, I love your last Gettysburg picture. Hope to see you again soon, someplace.
Pat from Maryland
Sherry – I met you at the rubberstamp expo in St. Charles, Illinois and saw you do this technic and took one of your samples :o) I love all you girls at rubbernecker! I think I spend 7.5 of my 8 hours in your booth, not kidding either. You don’t get enough of looking and you don’t get enough of shopping. We really enjoy the Rubbernecker booth, it’s always swirming with people, and you girls do a great job at WORKIN’ IT! You go girls!
Cool beans!! Thanks for the tutorial Sherry. Hope you catch up on your rest!
This is fantastic!!!
Love this technique. Thanks for sharing.
Thank you for sharing the tutorial. I may try that this week! Your cards are beautiful too.
Hi Sherry,
Saw you on Saturday and Sunday in York. So glad you did this tutorial. I watched you but having step by step is a real help.
You all did a fabulous job this weekend. I had no idea who you were when I was at York. Wow what a great surprise for me. Love your work
Linda
WOW great cards! I love how you did that technique. The colors are gorgeous.
Sherry
thanks for the tutorial, I was trying to watch all weekend now I can try it, it was great working with you at the weekend
Alexandra
Wow, these backgrounds are stunning. I must try this. I’ve had some alcohol ink for about a year and never even cracked them open. Now’s my chance. Hopefully they come out as great as yours.
Fabulous backgrounds, Sherry…love the colors, stamps, techniques, ….sooo Awesome!!!
Thanks so much for the tutorial. I think I have all the supplies to give this a try. Beautiful finished cards too.
Yaaay for the tutorial! You rock 🙂 And are such an enabler for my Mom and I now! *L* I can’t wait to play with the alcohol inks, they seem really versatile. Again, it was great getting to meet you on Sunday. Hope you get rested up 🙂
Sherry, you are indeed a woman of your word! Thanks for the great tutorial. It was a pleasure meeting you on Sunday and watching your wonderful demo. I did buy some inks but have yet to try the technique. Next week, for sure! Hope to see you next year in York.
YOur cards are gorgeous! Thanks for sharing the technique!
Thank you for the tutorial, Sherry. Now I have another technique to use with the alcohol inks that I have. Gorgeous backgrounds. Beautiful cards. Thank you for sharing. Blessings…
Sherry, thank you for the tutorial. Your cards are an inspiration and have caused me to buy many of the Rubbernecker stamps and products. Keep up the great work and keep feeding my addiction.
I am a bit late, but not too late to tell you how much I enjoy the tutorials. You always make them so easy to follow and the pictures really help as it leaves nothing to the imagination. And since i don’t have much imagination, I am glad you do and that you inspire me! Thanks for sharing. Linda Crowder
Thanks for a great tutorial on faux bleach, I really learned alot.
Girl
You are the bomb. I cannot wait to try your awesome tutorial.
Cinnie
Beautiful! I love my alcohol inks and am always looking for new ways to use them. Thanks for sharing.
Love this…thank you so much!
Don’t you love this technique? We got to demo it at the Puyallup show. Wish you had been here, it would have been great to meet you. Now to find me an old iron so I can do this again at home.
[…] the fragment was done the same way. For more information on these steps, you can find my tutorial here and one with color wash here. I’ll be doing a video for these soon for […]
Great technique, I love it. Will try it soon. Thanks. Edna
AMAZING !!!!! WOW THANKS so much for this tutuorial I can’t wait to play!!!
ABSOLUTELY GORGEOUS!! I’m fairly new to stamping, but after that wonderful tutorial I feel like I can do this technique easily. I’m going to come to you to learn a lot more!!!
THANKS FOR SHARING, SHERRY!! :)~
Thank you Sherry, for this tutorial. I love it and will be trying this method out. Shirley, Comox, BC
[…] of the other things I thought of immediately was the Faux Batik Technique. (That link is to an old tutorial I did using alcohol inks . . . I think I need an updated […]