Smiley from millan.netSmiley from millan.netSmiley from millan.net We have two winners of yesterday’s Rubbernecker Bucks! I ran the post numbers though the sequence generator at Randon.org, and #9 was the first. That was easy, and since I have two gift certificates, and since the last person normally doesn’t get a thing, I went to the bottom of the list. #10 was on the very, very bottom.  Here’s what it looked like:

Random Sequence Generator

Here is your sequence:


  • 9
  • 10

Timestamp: 2008-10-08 21:14:15 UTC

Post #9 was made by Antoinette:  “I love this technique! Someone else once said that if their husband saw them using the iron for crafting he would wonder why she couldn’t iron his shirts. I’m in the same position! So I’m gonna have to get me one of them mini irons to keep at my very small craft desk to try this. -D

and Post #10 was made by Diane Loy:  “I have just started ‘accumulating’ these great inks and not used them yet, so am thrilled to see your tutorial. TFS”

CONGRATULATIONS ladies. Smiley from millan.net I have emailed you both with the necessary deets in order to claim your gift certificate.  If you see this and haven’t received my email, please email me.


Good morning!  Smiley from millan.net While I was traveling over the weekend, the Rubbernecker Design Team got together and conspired against me.  Unbeknownst to me until I got home and checked all my emails, they decided they would do the Rubbernecker Blog Challenge for today.  They have also given me the day off and told me not to stamp for the challenge either.  Why?  It’s my birthday and they are celebrating!  Which also gives me the excuse to use my favorite smiley.   Smiley from millan.net to me!

Just because they are celebrating, doesn’t mean that I’m not going to post a card.  I’m just not posting one for the challenge.   I have one last sample that I did for the York Stamp Show.

Bunny on Ladder

The image colored with Copic Markers and then die cut using Spellbinders Petite Oval Nestabilities.  While still in the die, the image was masked and the background was airbrushed with Copic Markers.  Gold and Red Spica Glitter Pens were used to highlight the ornaments, garland and star.  To add more dimension to the ornaments, a small highlight was drawn with an Inkssentials White Opaque Pen.

  • Stamps: Stamp Oasis Little Lovins’ Christmas Collection:  Christmas Mini #1 SKU:519 524 529 530 SO; and Rubbernecker Winter Holiday Collection:  Merry Christmas script Text SKU:255-03 from Rubbernecker Stamp Company
  • Paper: Neenah Classic Crest Solar White; BasicGrey Figgy; SU Old Olive and Riding Hood Red
  • Ink: Ranger Adirondack Pitch Black and Archival Jet Black
  • Accessories: Copic Markers, Airbrush System and Spica Glitter Pens; RangerSpellbinders Petite Oval Nestabilities; Venture Foam Tape; Ribbon Inkssentials White Opaque Pen;

I’ll be back a little later to post the winners of yesterday’s Blog Candy.  In the meantime, I hope you have a great day!

Good Tuesday morning!  Wow what a whirlwind of a weekend I had.  I’m still dragging a bit, but there is so much to tell you today!  First, let me say how exciting and fun it was to work the Rubbernecker Booth at the York Stamp Show this past weekend.  I got to meet so many Splitcoaststampers, including fellow dirty girls Angie and Denise.  I was lucky enough to have lunch with Angie and have a change to sit and chat with her!  I have to say that it just makes my day when someone from SCS walks up to the booth and says hello!  Some of you I have chatted with online or seen your work and I truly feel like I already know you!  It just makes the entire weekend for me.  The next one I’ll be at is in San Antonio, Texas in a few weeks.

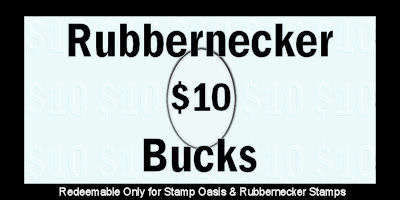
Now you know it’s Tuesday, and that means it’s Treasure Hunt Tuesday at RubberneckerSmiley from millan.net You can find sample cards of one of the prizes today on the Rubbernecker Stamps Blog.  You’ll also find a list of all the Design Team Members with their blog links so that you can hop around and visit them.  I have Blog Candy today, and will be giving away two $10 Gift Certificates from Rubbernecker.

Bucks

In order to win, all you have to do is leave a comment on this post.  No special questions today – I’m too tired to think of one!  I’ll pick two winners and post who they are tomorrow.

While working the show, I was demonstrating Ranger Alcohol Inks.  Part of the demo included an embossing technique.  While showing this technique to a group of women on Sunday, they were taking notes, trying to keep up with me.  I promised them that I would have a brief tutorial on my blog today, just for them!  So ladies, this one is for you.

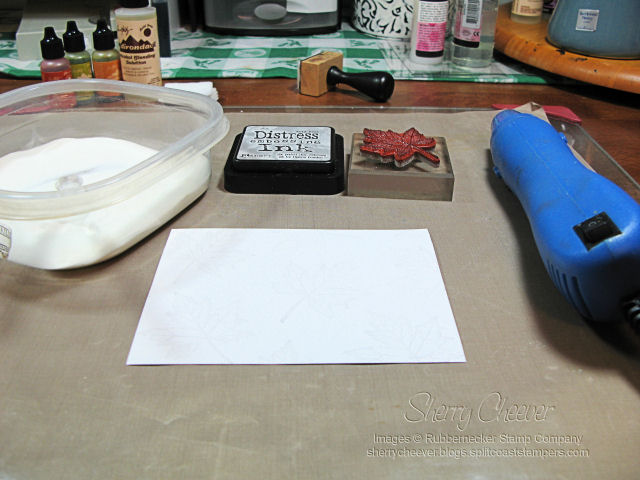
The products you will need are: Ranger Alcohol Inks (I have used Butterscotch, Lettuce and Terra Cotta); Alcohol Blending Solution; Ink Applicator with felt; Embossing Ink; Clear Embossing Powder; Heat Tool; Iron; White Glossy Cardstock; Plain White Cardstock.  Stamps I used are from the Stamp Oasis Winter Holiday Collection Leaf Set SKU:868 869 870 SO.  All product and images from Rubbenecker Stamp Company.

Fresco Supplies

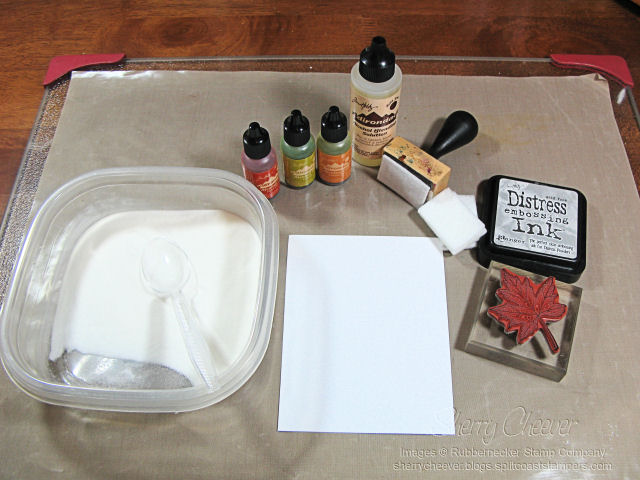
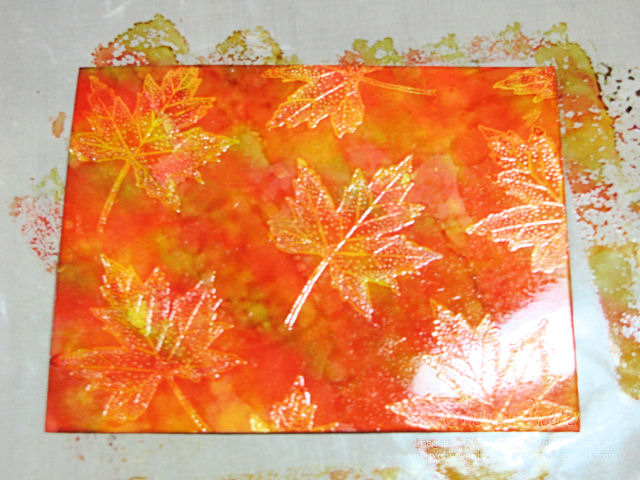
Stamp your image on the white glossy cardstock, cover with the clear embossing powder, and then heat set using your heat tool.

Fresco Clean Emboss

Apply the alcohol inks to your felt applicator by pressing in the point of bottle and give the bottle a good two second squeeze, allowing the ink to fill your felt.

Fresco #3

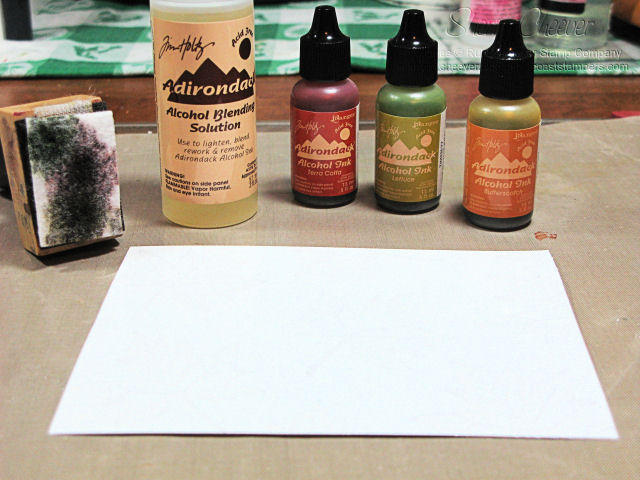
Begin pouncing the ink onto your embossed glossy cardstock, covering the entire surface.  To apply a second layer of color and blend the inks, apply a small drop of the blending solution to your felt, and go over your cardstock a second time.

Fresco #4

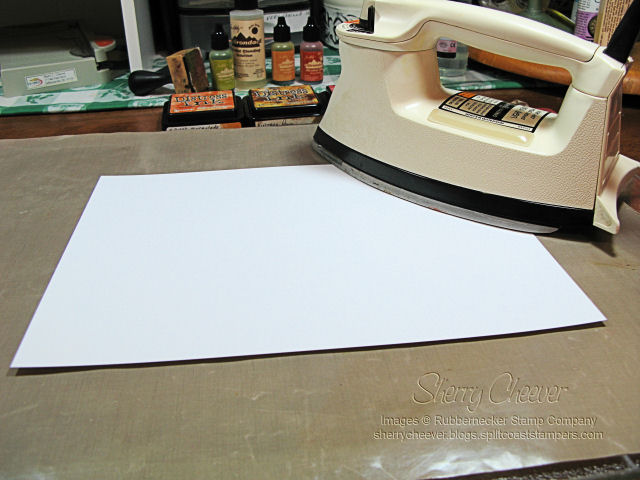
While the alcohol is still damp, lay your plain white cardstock over the top of the inked glossy cardstock, and then iron over your image.  Your iron should be set on high with no steam.

Fresco#5

Once you see the embossed image come through the top layer of cardstock, you are done.  Remove the white cardstock and you will have two backgrounds.  The background on the left is the original alcohol inked glossy cardstock (Faux Bleach and/or Batik with Alcohol Inks) and the background on the right is the Alcohol Fresco.

Fresco #6

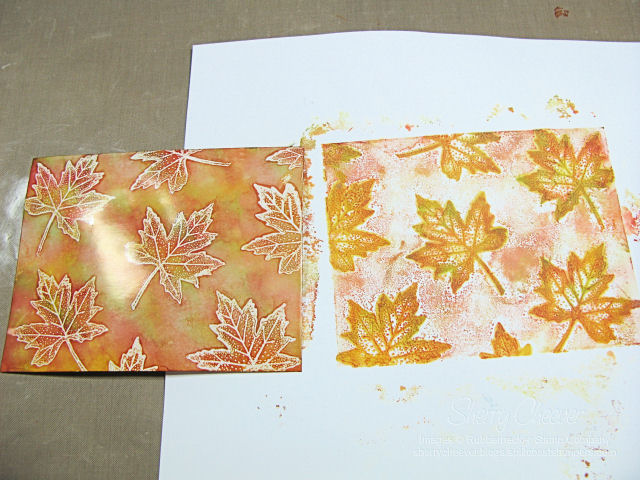
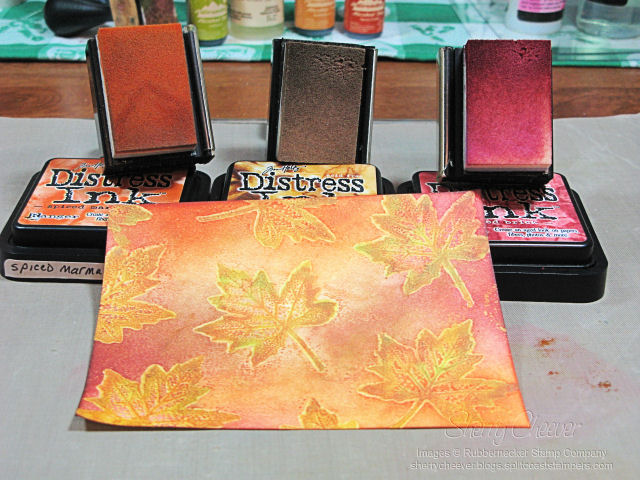
Here is the fresco background trimmed and inked.  You can also leave the second background as it is for more of a fresco look.

Fresco #7

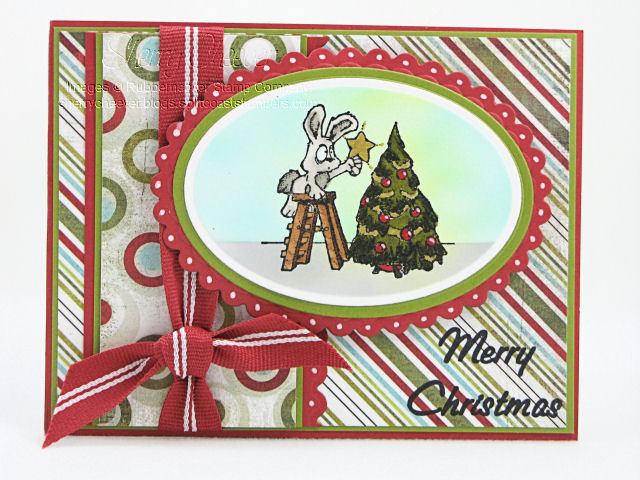
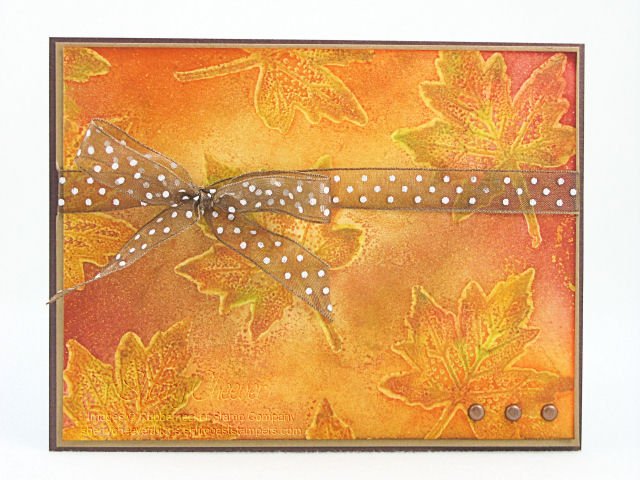
You can now make two cards with one technique.  My first with the Faux Bleach/Batik Background.

Fresco/Batik Background

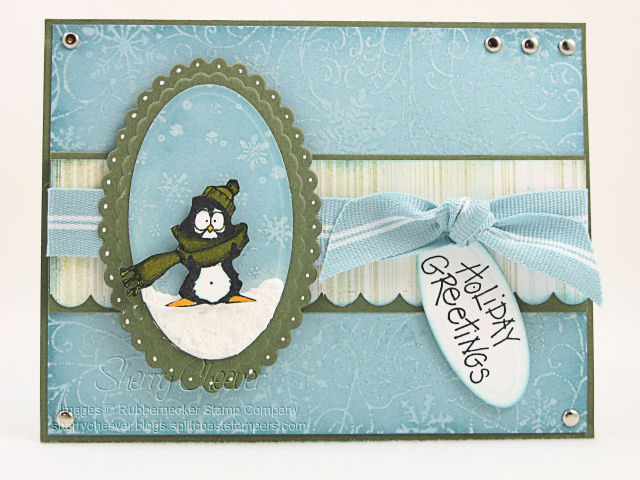
The second with the Alcohol Fresco Background.

Fresco Card

I look forward to seeing your designs now!

Good morning!  What a few days it has been.  I’m traveling with Dave, Mr. Rubbernecker, to the Heirloom Stamp Show in York, PA.  It has been quite an adventure, and I thought I would share our trip with you via pictures.

When leaving Kentucky the other day, I happened to mention to Dave that there was a castle in Versailles on the way to Lexington.  Off the interstate we went, in search of the The Castle Post f/k/a Lexington Castle.

Post Castle

We drove on into West Virginia that first day, making sure we the hotel we picked to stay at was not at an exit after our favorite breakfast spot

CB

aaaaaaahhhhhhhh pecan pancakes from Cracker Barrel!!!!!!

Yesterday as we traveled, there was a mission and a time frame that we needed to be in.

Gettysburg, Pennsylvania

battlefield

Dave is quite the history enthusiast, and always has an interesting fact to tell me about our nation’s history.  I couldn’t have asked for a better tour guide around Gettysburg.  My final shot before leaving  . . .

sunset at Gettysburg

seemed so appropriate.

Good morning!  Smiley from millan.net I’m still busy making samples to take to York.  I have until this afternoon to finish up just a few more.  I still need to pack, but other than that I think I’m good!   I sure hope to see some of you at the Stamp Festival!

Today is Rubbernecker Blogger Challenge #3.  The challenge today is to use embellishments – lots and lots of embellishments.   You can check out the Challenge and where to upload your own creations on the Rubbernecker Stamps Blog.

Oh my BADness, I almost forgot!  (sittin’ on the edge of the couch in excitement)  Check out the new Customer Spotlight on the Rubbernecker Stamps Blog too!  We are so excited to be showcasing our customers and the very first Customer in the Spotlight is Michelle Adams a/k/a shellapoo on SCS!  CONGRATS Michelle! Smiley from millan.net

I decided that since I was making booth samples, I might as well incorporate the challenge requirements.  This is another newly released Christmas image from Rubbernecker.

Little Lovins Chilly Penquin

The image was colored with Copic Markers and then cut out.  For both the card background and the image background, I stamped in Snow Cap pigment ink and then embossed with clear EP.  I wanted snow for the penguin to stand in, so I covered the bottom part of the image panel with Tulip White Puffy Paint and then heat set.  My embellishments are the brads, ribbon, the puffy paint, (and I’m even going to maintain that the embossing and white dots are too).

  • Stamps: Stamp Oasis Little Lovins’ Christmas Collection: Christmas Mini #2 SKU:516 525 526 527 SO, and Winter Holiday Collection:  Snowflake Background
    SKU:1200 SO; and Rubbernecker Winter Holiday Collection: Holiday Greetings SKU:22-05 from Rubbernecker Stamp Company
  • Paper: BasicGrey Figgy; SU Baja Breeze and Always Artichoke; Neenah Classic Crest Solar White
  • Ink: Ranger Adirondack Pitch Black, Archival Jet Black and Snow Cap Pigment; SU Baja Breeze
  • Accessories: Copic Markers; Spellbinders Petite Ovals; Ranger Clear EP, Inkssentials White Opaque Pen; SU Scallop Punch; Venture Mounting Tape; Tsukineko Sponge Dauber; Tulip White Puffy Paint; Brads; Ribbon

I hope everyone has a great day!  I don’t know if I’ll be checking in again until after the show, but who knows – maybe I’ll have something interesting to show you!

Smiley from millan.net

© 2015 Suffusion theme by Sayontan Sinha