All I can say is . . .  I hope today is better than the last few.  It was one hell of a weekend!  It started Thursday when our weather dipped to zero, and the cold water line to the kitchen froze.  Of course, I didn’t worry too much about it because it has happened before.  However, I woke to a note from my husband (lets just call him Mr. Stodgy which has been his unofficial nickname for many years) that the pipe was froze.  He came home early from work and started working in the basement to unthaw the pipe.  Now here is where my problem comes in.  Over the years the girls have put their unused junk in the old laundry room.  I also had some boxes of old paperwork in there that I pulled out of storage and never did anything with.  Of course for him to get to the pipe, he had to move some of this stuff.  Not thinking I told him to bring up those boxes of paperwork and I would start shredding it.

Saturday morning Mr. Stodgy started his chore.  He crawled under the deck to get to the air leak, insulated the pipes, cleaned the old laundry room and the workshop.  Bags and bags of junk were carried up and out to the garbage . . . something that we have needed to do for years.

I started my chore of shredding.  Oh my BADness!  30 years of accumulated paperwork from old bank statements (when they actually returned the checks to you) to our lease to our apartment when we moved to Lexington, KY in 1983.  I would work as long as the shredder didn’t overheat and then would have 30 minutes to sit and wait.  During those 30 minutes I found many things to get involved in . . . and none of them were stamping related.  I cleaned the front closet tossing out old worn our tennis shoes, jackets no one wore anymore, just more junk!  I think I shredded up until about 9:30 on Saturday night and still had more to do.

Sunday morning I was awoken by the dogs running in and then Mr. Stodgy making the announcement that we had more problems.  For pity sake . . . could I not even have a cup of coffee!  The water line in the garage to the outside faucet burst and the garage floor was covered with water.  Have you ever paid the hourly rate that plumbers get for emergencies?  Of course, we had to shut the water off at the main and then wait.  We waited until mid-afternoon for the plumber to get here.  He is such a great guy that we didn’t mind too much.  He kept calling us letting us know his time schedule and that he kept getting calls that were slightly more important than ours.  I took the plumber all of 15 minutes to cap off the line, which is all we needed done at this time of year.  We discussed the problems we had been having in the garage with water leaking, and all decided that he would come back in the spring to put a shut off for me at the joint, and fix the mess that was initially put in when the garage was built.

In the meantime, I was still shredding.  In all, Mr. Stodgy carried out two 39 gallon bags, four large kitchen bags, and I think five 30 gallon bags.  Yes, my shredder still works only now lacks a few parts that fell off.  It was a very productive weekend here!

I still have more paperwork I now want to go through.  I find it pointless to keep some of this stuff around any longer and actually feel a little lighter and a tad more organized.  I know that buried in the well closet is another box from 1978 to maybe 1983.  When I finally get the Christmas decorations put away, I’ll pull that box out!

Needless to say, I never ventured into the studio all weekend, but I do have a few more ideas for altered projects now!

Oh and it’s snowing!  A pretty, wet snow.  I’m hoping that I’ll be able to get some great pictures later today.

Happy Friday!  Smiley from millan.net I hope everyone is staying warm and cozy with all this cold weather across the nation.  We’ve had no accumulating snow here, but the highs are in the teens . . . .  Good days to stay inside and stamp!

Yesterday I mentioned that I had a second project in mind and believe it or not . . .  I got it finished!

When I was making the monogrammed notebooks at Christmas, I used lined filler paper for the inside pages.  When I trimmed the paper down, I kept the sides that I cut away (3-1/4″ x 9-1/2″).  As I stood there looking at this pile of paper I was making, it occurred to me that I could make my book with it instead of tossing it in the garbage.  While I had the Bind-it-All out, I went ahead and punched the pages and put them to the side.

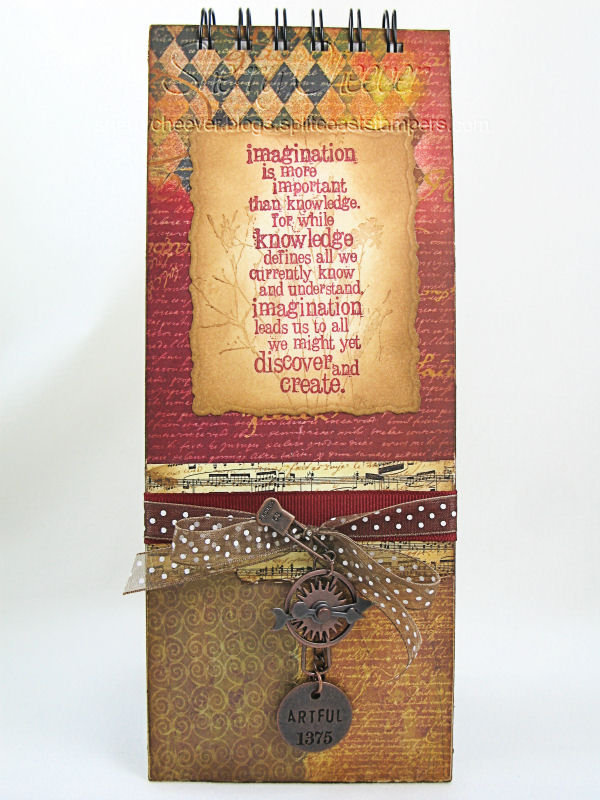
When Mallory took the 2008 calendar down from the fridge (one of those medium size desk calendars), I had her put it on my desk.  While cleaning off my desk last week, I realized that the cardboard on the back would be the perfect outer covers for my own book.   WOO HOO!  Take a look at what I did with some of my favorite papers, stamps and embellishments!

SLC Tall Journal

I cut the cardboard to size, then covered both pieces with some of my fave 7 Gypsies paper.  I have learned that the best way to glue anything down to cardboard or chipboard is Ranger Matte or Glossy Accents.  I used the matte for this project – it dries clear, quickly and the matte doesn’t have that sheen.  I sanded away the excess paper from the sides (so I would have a worn look) and then sponged everything down with Vintage Photo Distress Ink.  Once I had the sentiment panel the way I wanted, I die cut the panel out using the soon to be released Spellbinders Large Deckled Rectangles.  To finish off the book, and since I was using some of my favorite things, I decided to layer a number of Tim Holtz idea-ology embellishments.  Way too much fun!

To give you an idea of the size and the filler paper, here are a few pics of the inside:

Inside Cover Tall Journal          Tall Journal Inside

That’s all I have today, but while working on this project and idea came to mind for another.  I know.  It’s scary!  I hope you have great adventures today . . . whatever they may be!

Happy Thursday!  I’ve had a few ideas running around in my head (yes it hurts) for the last few days.  All of them revolve around notebooks.  I know, I know!  But all of a sudden I’m finding that when I need something to jot a note on, there is never anything close at hand.  I’ve recently organized the desk area in the family room, moving the desktop computer to the actual built-in desk and eliminating the computer hutch.  This has given us some much needed space to walk around the breakfast bar, but it has also caused confusion in other parts of the house.

I’ve set myself up in my little sitting room, with laptop on a TV tray and a table next to me.  However, that table has become a major catch all for all my junk. . . . Coffee cups, remotes, calendars, pencils, pens, papers and never can I find a piece of scratch paper to jot a simple note on.  I have solved that problem!

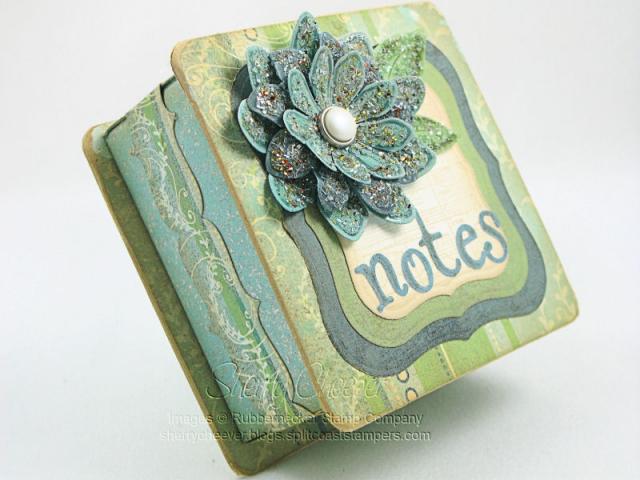
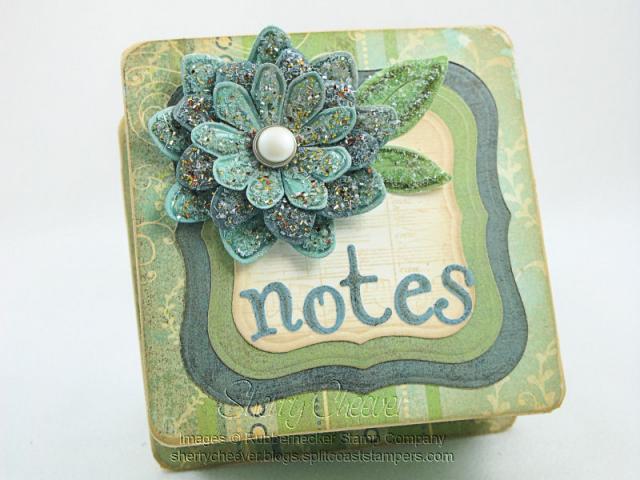
I made myself a little box to hold post-it notes!  I followed the instructions for the origami box in this week’s Try a New Technique Challenge on SCS, and then made a bottom and top out of coasters.

Notes Origami Box Side

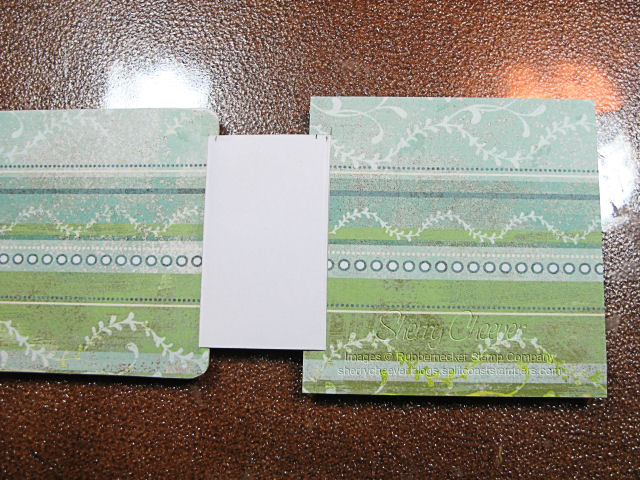
Instead of using a 12×12 sheet of paper as specified in the instructions, I used a 10×10 instead.  This gave me the right size so that the coasters I used for the top and bottom would hang over the edges of the box.  In order to cover the coasters and make a hinge for the lid, I decided to hide the hinge layer under the designer paper.  In order to do this, I needed to cut a slit in the paper used for the cover and then slip the hinge piece through so that I could glue it down.

inside unfinished

It was a little more work than what I had anticipated, but I’m very happy with the results.

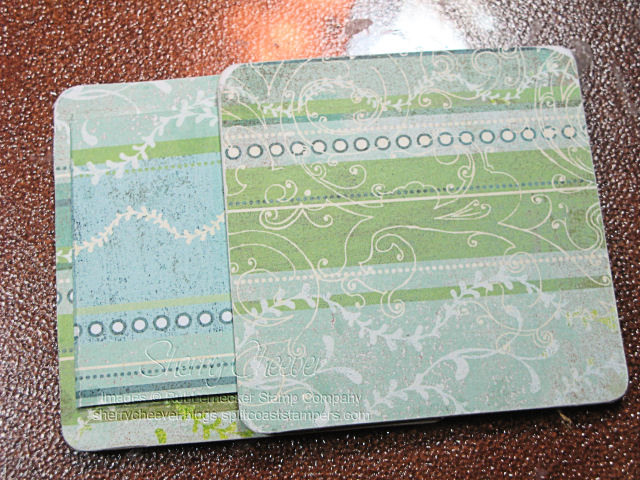
origami box lids

I would easily affix the bottom of the box to the bottom coaster, tape the hinge to the back of the box and then have my lid just flip open.

Origami Box Front

To decorate the top of the box, I finally settled on the Spellbinders Daisy Delight Shapeabilities.  I die cut and embossed the shapes, sponging the embossed areas and then covered the whole darn thing with Ranger Glossy Accents and different types of glitter.  To have something to put the daisy and my little word notes (made from Spellbinders Mystic Alphabet), I decided to cut layers using the Spellbinders Labels One Nestabilities.

One project down and one to go!  I’ve been thinking about this last one since I made the notebooks for family at Christmas.

I hope you enjoy the adventures that this day brings  . . . I know I will!

Well Smiley from millan.net  Have you missed me?  I can’t believe that I haven’t been back in the studio since last week.  When Mallory finally left Sunday morning to head back to school, I was able to finally get into the laundry room.  It was much easier just to let it all pile up instead of fight a coed over the washer and dryer.  Needless to say, the last time I did laundry was before Christmas . . . it took all day Sunday and then part of Monday morning.  Just when I thought I had it caught up yesterday, Miss Ellie decided to go out and dig in the old sandbox.  When I went to check on her, there was a hole as big as her face and her beard and front paws were a nice sandy color.  Hmmmmm baths for both dogs!!  I turned my back just for a second to grab a towel for Miss Ellie, and the little shitz, snuck out of the tub and took off running.  I decided those spots on the carpet needed to dry before they were cleaned . . . . maybe later today.

Anyhoo, now that I’ve filled you in on my exciting days . . .

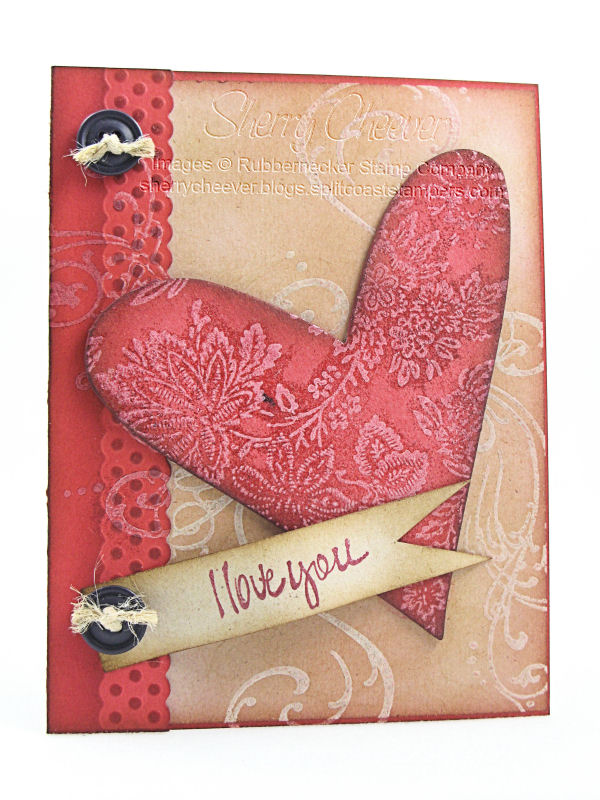
I was browsing through the Rubbernecker site yesterday and noticed some new heart images that were up in the Stamp Oasis section.  I was really taken with one made with the White Floral background and since I don’t have it, decided to replicate it using a chipboard heart and the background stamp itself.  My layout is from this week’s CPS Sketch Challenge.

RN White Floral Chipboard Heart

Stamping the background in white pigment ink, it was then embossed with clear EP.  To have some fun with the card, a flourish was stamped on the kraft background in the same white and clear embossed.  I let the flourish overlap on the side panel that had been cut and embossed with the Spellbinders Petite Deckled Scalloped Border.  I found a few dark buttons and tied them off with twine, thinking the card might be nice to send to a guy even with the floral heart and flourishes.

I hope you enjoy what’s rest of the day, I’m heading down to the studio to clean up and regroup!  Oh and by the way, before I could even finish this post Miss Ellie was once again found with her face buried in the sandbox.  I need to change into dry clothes now!

I would like to personally thank each and everyone of you who entered the Spellbinders’ 5th Anniversary Party to win my Die Template release. My part of the contest is over but there are still more to come from the other designers.  Here’s the schedule for the rest of celebration:

Jan. 10:  Becca Feeken – Amazing Paper Grace
Jan. 11:  Jennifer Ellefson – Created from Paper
Jan. 12:  Sharon Harnist – Paperfections
Jan. 13:  Jeni Calkins – Studio Jeni
Jan. 14:  Wendy Weixler – Wonderful Creations
Jan. 15:  Beth Pingry – Cookies for Breakfast
Jan. 16:  Keri Lee Sereika – Pink Lemonade
Jan. 17:  Sally Lynn MacDonald – Inky Heart
Jan. 18:  Donya Schroeder – Donya Schroeder
Jan. 19:  Linda Duke – Linda’s Works of Heart
Jan. 20:  Trudee Sauer – Follow your Bliss

Daily winners will be announed on the SPELLBINDERS BLOG

The Grand prize winner will be announced on January 30th

© 2015 Suffusion theme by Sayontan Sinha