
 Happy Thursday! A few months ago, Beate from Splitcoaststampers asked me to write a tutorial on that “inky thing I do.” It was published yesterday on Splitcoaststampers and can be found under the Resources section as “Wrinkle-Free Distress.” I contacted Tim Holtz and asked his permission to recreate the tutorial for SCS, and what he actually called this technique . . . I didn’t want to get it wrong!
Here’s the card I created as my sample for the tutorial.
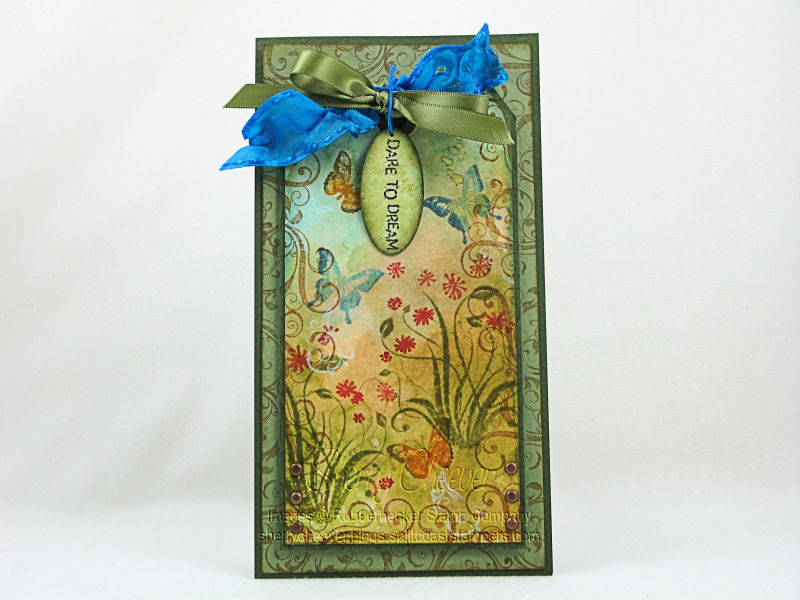
Instead of letting the tag stand alone, I decided to incorporate it into a card. Once I had finished the tag, and had the layout for the card, I stamped the flourish images on both the card front and the tag. I lined the flourishes up, and raised the tag with mounting tape. Some of the images on the card, i.e., the butterflies and small flourishes are a sneak peek of what’s coming next from Rubbernecker Stamps.
- Stamps: 427 Butterfly Inchies, 467 Floral Silhouette, 461 Scraps & Scuffs, 436 Flourish and 423 Flourish Inchies from Rubbernecker Stamps
Paper: Manila Shipping Tag and Prism Herbal Garden Dark and Medium
Ink: Ranger Archival Jet Black, Adirondack Snow Cap Pigment, and Broken China, Vintage Photo, Peeled Paint, Antique Linen, Spiced Marmalade, Black Soot and Faded Jeans Distress
Accessories: Ranger Non-Stick Craft Sheet, Glossy Accents, Mini Mister, Cut-n-Dry Stamp Pad Felt; Venture Foam Tape; May Arts Ribbon; Copic At You Red Spica; DMC Embroidery Floss; Brads; Oval Punch; Candle Lighter
All product and images from Rubbernecker Stamps
I hope you try this technique and have as much fun with it as I do! Have a great day and thanks for stopping by!


I’m absolutely in love with this card; your technique is great. There are a lot of happy crafters who will enjoy your tutorial; thanks for doing it.
Wow, this is absolutely stunning Sherry! BTW, are the tags different from regular c/s? I’m wondering since the tag looked a bit glossy in the tutorial. I don’t have tags, but I have regular c/s so I am wondering if it would matter to substitute for the tags? TFS!
This is just absolutely beautiful, along with all the other beautiful work that you do..Thank you so much for the wonderful tutorial, and the inspiration,right now I’m unable to work in my craftroom due to the fact that I’m in the hospital, but can’t wait to get home to try it, had surgery yesterday, so Im on the road to recovery…God Bless
(did I mention on my other comment that I LOOOOVE this?!) I’m so going to CASE your idea of using the tag on a card!! GENIUS!!!
This is gorgeous! I love your work 🙂
This is gorgeous…love it! I checked out your tutorial…great technique and easy to follow! Thanks for sharing!
Oh, my gosh, this is gorgeous! Now that’s what I call stamping! If that was designer paper, I’d buy it in a heartbeat. But, of course, then I wouldn’t want to cover it up, and I’d never use it…sigh… I’ll have to go check out your tutorial!
I keep coming back to this card. I love the blue ribbon and colors and the whimsy of it. I went out and purchased some tags to make one!! Thanks for the tutorial.