Happy Saturday! I hope all you are doing well and not missing me too much 
Let me tell you what’s been going on. I was having issues with my old computer editing videos and by the time I finished one, it had taken me all day to tape, edit and upload. The longest part was editing because the picture and voice weren’t in sync and I tried to edit from my voice hoping it all fit together when I uploaded to YouTube. So after my bitching for a few weeks, Mr. Stodgy decided to ask his tech guys at the office about it. I printed out all the specs from my computer and sent along a print out of the software I wanted to download and run. The techies suggested I needed more memory. Okay, Mr. Stodgy bought me more memory, I installed it and yes . . . pictures finally loaded much quicker than before. However, the video software still didn’t work. You see, I KNEW I needed a new computer with updated technology. But what the hell do I know . . . since my life doesn’t evolve around online work, etc. I sent my old laptop to work with Mr. Stodgy for his techies, and he called me around noon’ish on Wednesday and said “go shopping, you need a new laptop.” WOO HOO, his idea!!!!!!!!!!! It never fails. 
I have spent all my free time since then downloading software, transferring files, cussing because my iPhone won’t sync without me loosing everything. . . . well I’m sure you understand if you yourself are a techie!
I finally walked into the studio this afternoon and felt a little creative and know I need to do this week’s JFF Color Challenge. I’m not feeling the pink and blue today apparently, since I can’t seem to get anything to come together. (Do you hear the Fab Four . . . come together, right now, over me?)
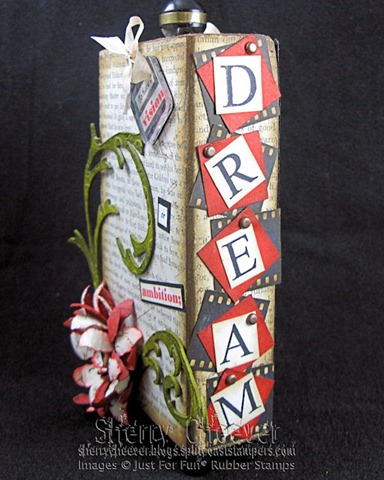
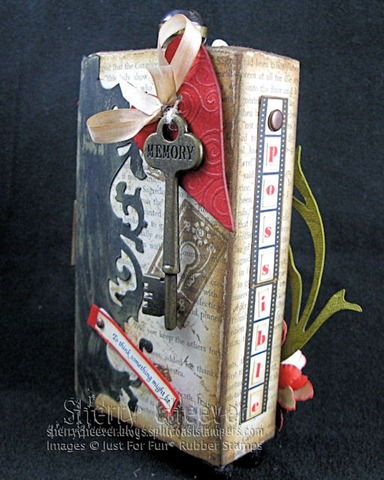
So, I have decided to show you one of my projects from last week. I worked on a class sample for Orlando, and even though it’s not in its final form (still lacking product I’ve ordered to work with) I thought I would give you a sneak peek.
Here’s what I started with . . . a 2×4.
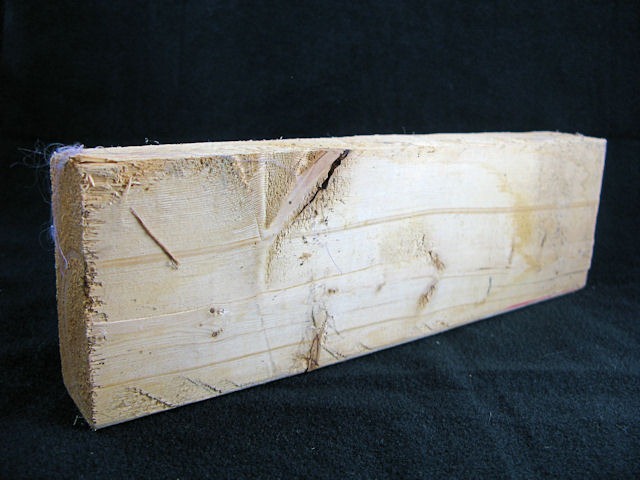
I cut it down to six inches, the size of a manila shipping tag. I sanded the edges to make them smooth and then covered all four sides in pages from an old book I picked up at a second-hand shop.
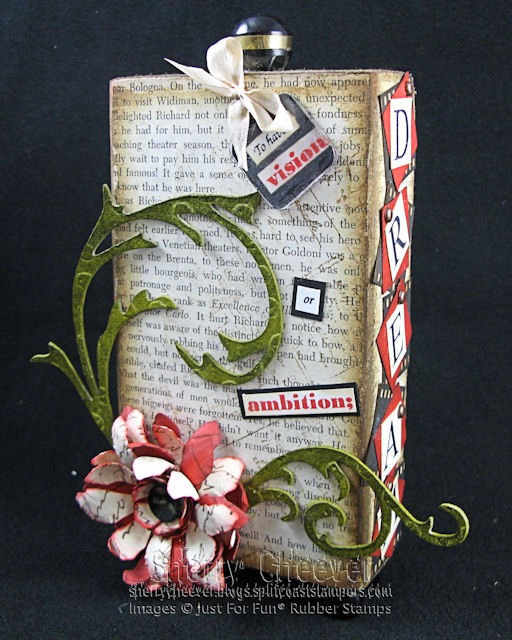
The flowers were die cut with Tim Holtz Alterations Shabby Flowers and Elegant Flourishes. There is a JFF sentiment that goes around the project, starting on the front. Actually, it’s a definition that reads:

I stamped it out, cut it apart and used the pieces in different ways on the project.
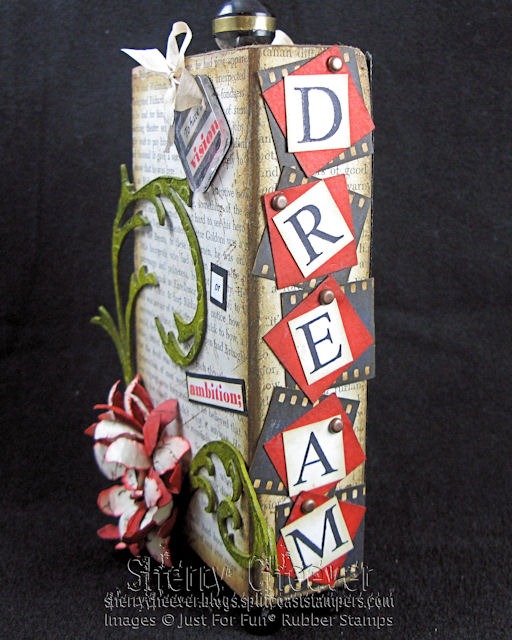
The back side uses a Grunge Board heart and a border cut from Sizzix Tim Holtz Alterations On The Edge Scrollwork.

All I can say is this . . . these chunky things sure are addicting. My neighbor is fixing a fence today and I saw pieces of 2×4 in his driveway. Of course I made a bee line over there and said “If you are throwing any scraps away, please throw them my way.”
- Stamps: Ums7011 Keys & Keyholes Unmounted Set, UMS7005 Correspondence Unmounted Set, G2552 Sketchy Grid, E3096 Dream, A3198 Film Block, B3202 Film Strip and F1872 Long Script from Just For Fun® Rubber Stamps
- Paper: Old Book, Red, Black, Cream, White
- Ink: Ranger Old Paper, Barn Red, Vintage Photo and Black Soot Distress Ink; Ranger Archival Jet Black and Coffee
- Accessories: 2X4; Tim Holtz Alterations Shabby Flowers, Scrollwork and Elegant Flourishes from eclectic Paperie; Tim Holtz idea-ology Grunge Board, Fragments, Key from eclectic Paperie; Silk May Arts Ribbon from Stamp Simply Ribbon Store; Brads; Beads; Button
That’s all for now folks! Thanks for stopping by and I hope you enjoy the rest of the weekend. I’m off to my big adventure of the day . . . . cleaning the studio!


 I’ve got to tell ya, Little Elle is sick with a corneal ulcer. This is the second time this has happened and we don’t know why. Her little eye has looked like it has a cataract and she hasn’t been able to open it. Thankfully today she looks better and her eye is open. We went to the vet this morning for a follow-up and the eye is still not healed so I’ll continue with the drops and pain meds. We go back on Monday for another follow-up.


