Good Sunday morning! I hope everyone has had a fab weekend so far. I was finally able to get my long 4 inch locks cut yesterday . . . . woo hoo . . . and don’t have to gunk it all up with product now. Amazing how much I got used to having no hair and the natural look . . . it’s just way to easy to take care of!
After I came home from mom’s, where we all get haircuts together . . . yes, we have a family friend come in and do a salon day with us . . . I headed straight to the studio with ideas brewing!
First, let me tell you this. When I first saw the new Spellbinders™ Grand Nestabilities® at CHA my wheels started turning. Surely you can guess where this is going, right? I immediately saw wall hangings made from GrungePaper and guess what . . . it works!
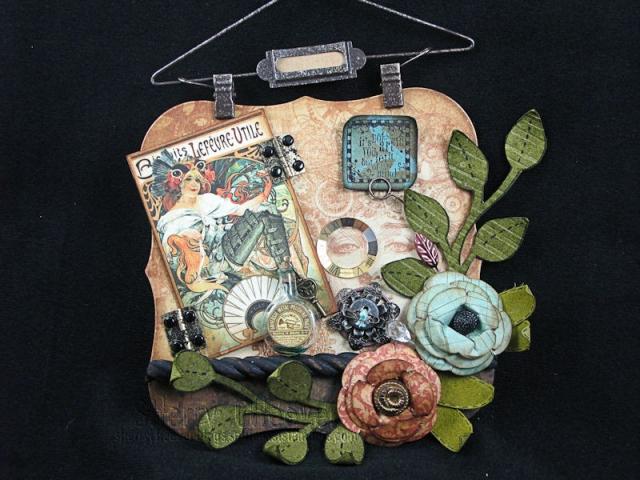
I cut my own backing from GrungePaper for this wall hanging
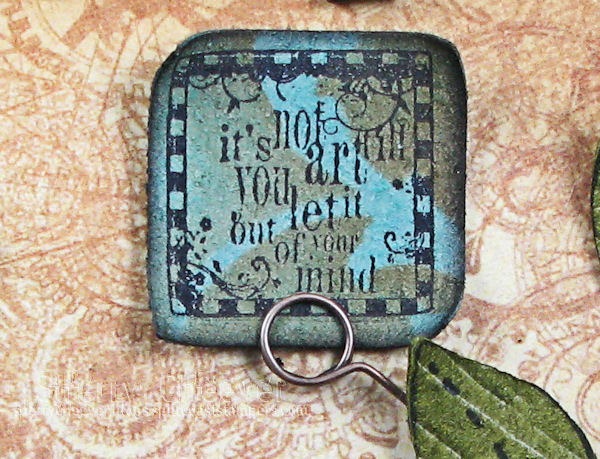
Yes, I surely did! I am so excited to have different shapes now that will work for wall hangings . . . way too much fun. Anyhoo, there is much to talk about and to look at here. First that hanging itself. The back is GrungePaper and then I die cut the Graphic45 Designer Paper to fit the Nestie. I had some wood rope trim that I cut down to size and painted black to separate the two papers (flip side of the top). While we are talking about the paper on the top, check out the lady in the background on the right. I point this out because I had already picked the sentiment I was going to use for this project, this inchie from Artful Illusions,
stamped on a piece of GrungePaper, sponged with Broken China and then, using on of Tim Holtz’ mini masks, sponged on Vintage Photo. As you can see, it was attached to the project with a Memo Pin.
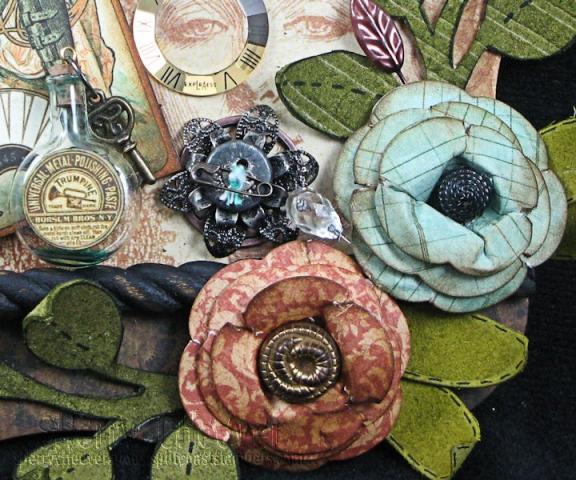
The image on the left was added for some color. It was mounted on illustration board and then attached to the backing with small hinges. The hinges were really gold and bright, so I tapped them into some embossing ink and then embossed with Black Soot Distress Stickles. I did the same for the metal flower on the bottom. I couldn’t resist adding a watch facet from on old watch to the lady’s eye . . . . oh yeah, too much fun!
The flowers were die cut with the Blossom Nesties, and then curled and glued together. Vintage buttons were added to the center of them. Everywhere I saw open space something else was tucked in . . . like the trinket pins.
I think that’s all I have to tell you about the project. Just keep looking for little things added here and there.
- Stamps: Studio 490 Ticket to Art by Stampers Anonymous from eclectic Paperie; #2268 Inchie from Artful Illusions
- Paper: Graphic45 Steampunk Debutante Collection from eclectic Paperie; Tim Holtz idea-ology GrungePaper from eclectic Paperie
- Ink: Ranger Embossing, Peeled Paint, Black Soot, Vintage Photo, Crushed Olive, Tumbled Glass and Rusty Hinge Distress Inks and Archival Jet Black
- Accessories: Spellbinders™ S4-109 Flower Creations Three, S4-192 Blossom Nestabilities, S4-128 Classic Squares – Small and LF-161 Grand Labels One; Tim Holtz idea-ology Jump Ring, Memo Pin, Long Fastener, Mini Fastener, Foliage, Sprocket Gears, and Mini Regal Mask; Mini Hanger from Crafty Secrets; Vintage Buttons; Hinges; Black Brads; Maya Road Trinket Pins; The Twinery Caribbean from eclectic Paperie; Old Watch Part; Copic Markers Black Multi-Liner; Mini Key; Ranger Black Soot Distressed Embossing Powder
Thanks for stopping by today and remember . . . . life is short, make the most of the adventures that come your way!


