Happy Tuesday to you!  After a great weekend, it’s time to get busy . . . as if we weren’t over the long weekend.  I had a great time working in the yard, grilling for the girls and getting some time in the studio.  I even got to puppy sit Kate and Will’s new lab . . . I call him moose for Chocolate “mousse”, they call him Peyton.

Yesterday when I posted about my Graphic 45 Steampunk Frame I mentioned that the instructions weren’t on their blog . . . I was wrong.   They were there! Smiley from millan.net

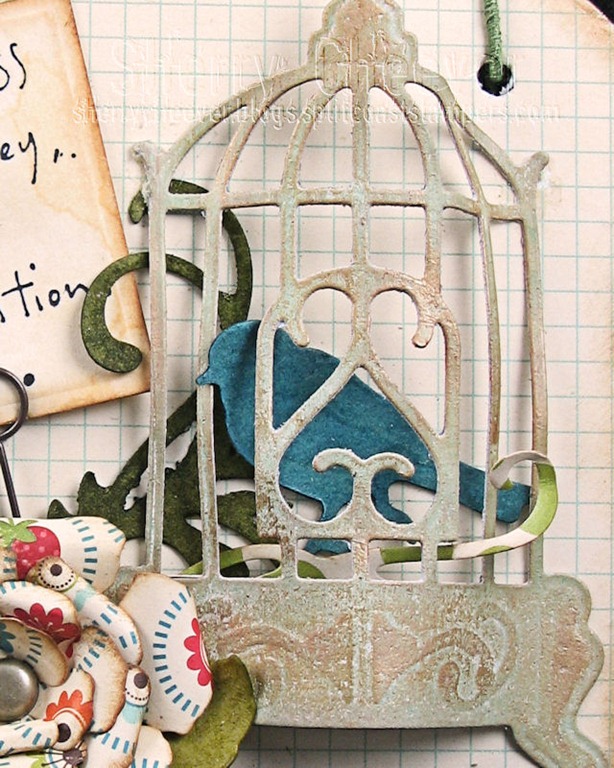
I’m still going to repeat them here for anyone that missed the Graphic 45 Blog post.

SherryCheeverSteampunkFrame1

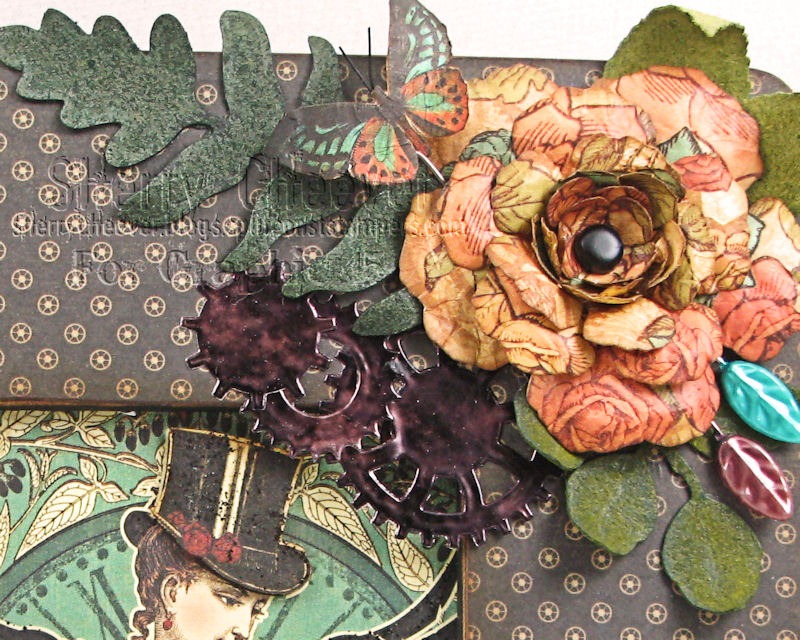
The frame was painted black and then covered with Steampunk Debutante paper. The paper was glued down with Multi-Medium matte and the excess was removed by sanding away at the edges. Vintage Photo Distress Ink was then sponged on the edges of the frame. The middle image was centered and the wings were painted with Black Soot Distress Stickles. An extra hat and dress were cut out, the edges sponged with Vintage Photo and raised over the image with foam mounting tape. The hat was also painted with Black Soot Distress Stickles.

Craft Foil was die cut with Sprightly Sprockets and then covered with Black Soot Alcohol Inks with a drop of Copper Mixative added.

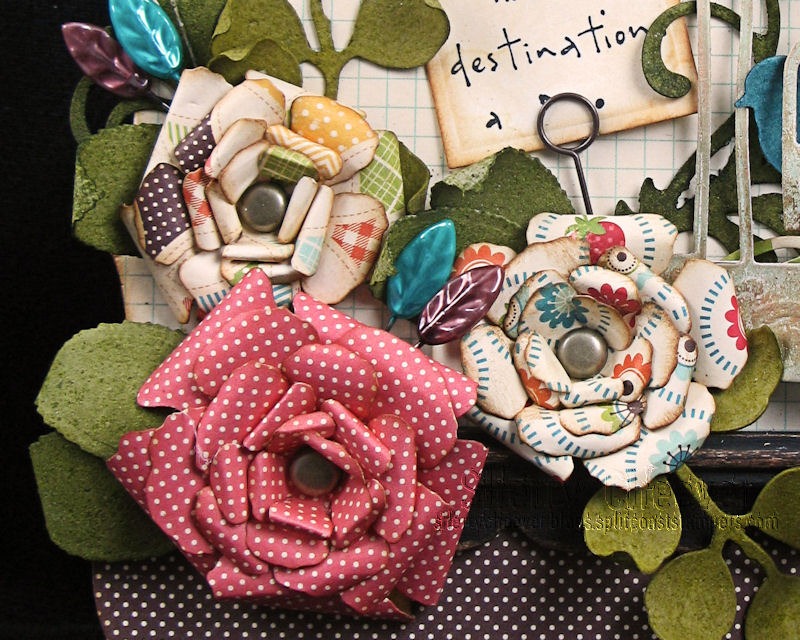
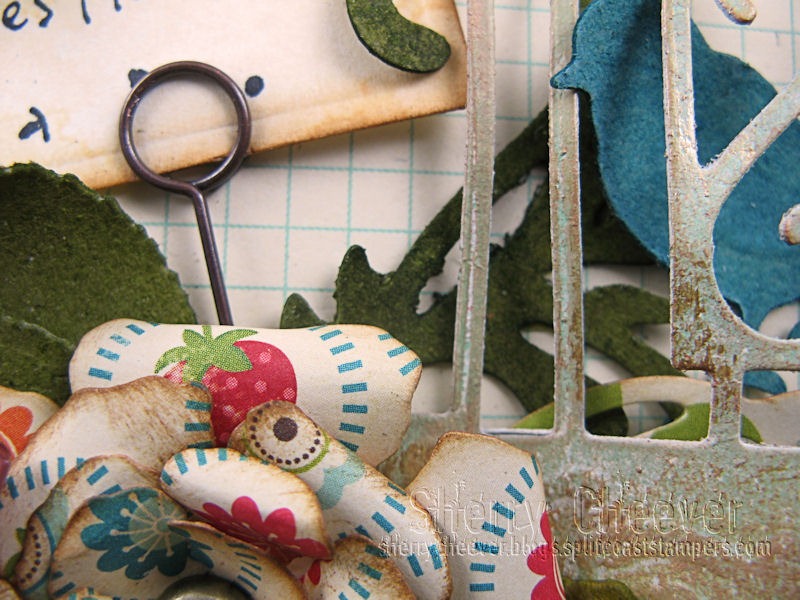
The flowers were made by die cutting/embossing Steampunk Debutante paper with Rose Creations and Carnation Creations. The flowers were shaped with a petal roller and a foam pad (Video Tutorial here). All the leaves were die cut with the Foliage Die Template and then colored different hues of greens.

The butterfly in the top right corner was glued to a piece of Clearly for Art, heated with a heat tool and the wings were shaped with the Clearly for Art was still warm.

I guess that’s all I have for today.  I need to go and run some errands for a meeting tonight and then get to work in the studio.

Thanks for stopping by and remember . . . life is short,Smiley from millan.net the adventures of the day!

SHERRY SIGNATURE

Supplies/Product:


Happy Memorial Day (or as my grandfather called it, Decoration Day Smiley from millan.net)!

Do you remember this Graphic 45 Sneak Peek I shared with you earlier?

SherryCheeverSteampunkFrame3

Today is Steampunk Monday over on the Graphic 45 Blog, and you’ll be able to see the entire project.  You won’t see the directions, but I’ll give those to you at a later date.  I think this is one of my all time favorite projects!

Thanks for popping in today!

SHERRY SIGNATURE

Good morning.  I hope your holiday weekend has been off to a good start!  I was able to finish up the planting yesterday morning.  I think I planted 3 more large containers and 4 small.  I ran out of dirt with a flat and a half left, and decided at that point I was done.  I walked the flats down the street to my neighbor and left them as a surprise on her patio.  I’m sure she’ll find something to do with them.

I’ve been holding onto today’s card for a couple of days, so I could fill in between Graphic 45 Projects.  Because . . . I have another project being showcased on the Graphic 45 Blog tomorrow .

I needed something fun last week and decided get back in the groove with this card.

ChickChatterMay29

The image and sentiment if from Heartwarming Vintage Creative Scrap Farm Fresh and the background paper is Melissa Frances Kitschy Kitchen.  I couldn’t help myself . . . I had to use the chicken paper with the chicken image!  To make the yellow in the chickens on the paper pop a little, I decided on a seam binding ribbon dyed with Scattered Straw Distress Ink.

Well, that’s all for me today.  Thanks for stopping by and remember . . . life is short, embrace the adventures that come your way!

SHERRY SIGNATURE

Product/Supplies:

Smiley from millan.net Happy Memorial Day Weekend!  How many of you have big holiday plans?  I think we will be working in the back yard some and I plan on spending lots of time in the studio getting inky!

Today I get to share with you the directions on how I put my Bird Sanctuary wall hanging together.

SherryCheeverBirdSanctuaryMINE

The background was die cut with Grand Labels One from illustration board.  Because the board was so thick, I die cut/embossed the background paper (October Afternoon – Fly a Kite) and then glued it down to the illustration board.    Of course, all the edges had to be sponged with Antique Linen.  The shelf is hobby wood trim that was painted black, sanded a bit, and then highlighted with Vintage Photo Distress Stain.

SherryCheeverBirdSanctuaryFLOWERS

The flowers were die cut/embossed from Fly a Kite with Rose Creations and the edges were sponged with Antique Linen.  All the petals were curled and then glued together before inserting the brad in the middle.  All the leaves were die cut from GrungePaper with Foliage Die Template (inked in Peeled Paint, Crushed Olive).  You can see some of the new Floral Flourishes tucked away behind the leaves and the bird cage.

SherryCheeverBirdSanctuaryBIRDCAGE

The birdcage and bird were die cut from GrungePaper with the Bird Sanctuary Die Template.  I chose GrungePaper for this because I wanted the flexibility of the GrungePaper so that I could curve the birdcage.  The birdcage was inked with Snow Cap pigment, highlighted with Juniper pigment ink and then with my finger, some gold paint was added for highlighting.  There might even be a little terra cotta in there . . . I kept playing with the ink colors before I got what I wanted.  Lots of ink layers.  The bird was inked with Broken China Distress Stain.

The sentiment is an old Penny Black stamp from my stash, The Journey.  The hanger is made with floral wire.

Well, I think that’s about all.  I didn’t write these when I finished the project and without it sitting in front me . . . well, I hope I didn’t leave anything out!

Thanks for stopping by today and remember . . . life is short, embrace the adventures of your day!

SHERRY SIGNATURE

Product/Supplies:

You’re invited to a Party!

Summer-Suprise
On the Spellbinders Paper Arts Blog!

Spellbinders Paper Arts, and participating stores in the Crafters Home Buying Group, are excited to introduce five new die template sets sold exclusively through July!

This is a sneak peek of my S5-033 Bird Sanctuary card; to see the complete project, awesome prizes, and participating stores, visit the Spellbinders Paper Arts Blog.

SherryCheeverBirdSanctuarySneakPeek

One lucky winner each day will receive all five of the Summer Surprise die templates, both of the actual projects featured today on the Spellbinders Blog, and a Nestabilities® Basics and Beyond book!

Go to the Spellbinders Blog now and enter to win!

SHERRY SIGNATURE

© 2015 Suffusion theme by Sayontan Sinha