Good morning!  How are y’all today?  Winter has finally come to the Ohio Valley.  I will admit that I was a tad bit spoiled with the warm weather into November (which meant it was still short weather for me) and as of yesterday its cold here . . . dammit I had to wear jeans (and socks)!

I guess my project today is well-timed  . . . snowflakes . . .

Actually, I made this project a few months ago and Graphic 45 showcased it on their blog yesterday (which you should hop over there and see Nicole’s fabulous flowers if you haven’t seen them yet).

ChristmasHangingFULL

The paper is Believe, A Christmas Carol, Happy Holidays and Tags 1 from the Graphic 45 Christmas Emporium Collection.

ChristmasHangingCloseUpLeftSnowflakes

The snowflakes were were die cut from Spellbinders Create-A-Flake Three, stenciled, covered with Glossy Accents then Vintage Glass Glitter was sprinkled on the wet accents.

ChristmasHangingCloseUpRightSnowflake

That’s all I have for now.  Thanks for stopping by and remember . . . life is short, embrace the adventures that come your way today!

SHERRY SIGNATURE

Project Supplies:

Hey y’all!  How is everyone this morning?  I had a great Holiday weekend spending time with my girls and family.  I even got most of my Christmas shopping done during Black Friday and Cyber Monday and yesterday I got the Thanksgiving decorations put away.  However, the Christmas stuff is still in the closet and more than likely won’t be put up for another week or so.  Typically I get them put up Thanksgiving weekend, but instead of helping Mom, my girls were out shopping and running around.  I decided to wait!

Now that Thanksgiving is over and CHA is looming in the near future, it’s time to get crackin’ in the studio.  New product has been pouring in like crazy and it’s now time to start playing and trying things out.  However, before we get too deep into that stuff, let’s talk about Christmas wrappings.

I have a few small gifts that don’t need heavy wrapping, but they do require something (remember . . . good things come in small packages).  For one of these gifts, I decided that a small box would do and this is what I came up with.

GIFT BOX

The box was die cut/embossed with Spellbinders™ Hexagon Pinwheel Top Box using Under the Mistletoe from Graphic 45’s Christmas Emporium Collection.

Here’s the box when it’s been scored and folded together.

GIFT BOX OPEN

You’ll notice that I made the poinsettia from the flip side (inside the box) of the paper.

When the box is closed, the flaps overlap leaving very little space to decorate the top.

GIFT BOX CLOSED

I decided to die cut two large circles from Spellbinders Classic Circles.  The poinsettia is glued to one.  To tie the poinsettia to the top of the box, seam binding (dyed Antique Linen and Scattered Straw) was glued to the the circle attached to the poinsettia and then the other circle was glued to that one.

GIFT BOX FLOWER BOTTOM

Hopefully the above photo shows you what I was trying to say.

GIFT BOX FLOWER BOTTOM W RIBBON

A small tag was die cut and attached to the seam binding . . . just in case I decided to write a name on the package.

GIFT BOX FLOWER WITH RIBBON

The seam binding was tied offset to the side for no particular reason . . .

GIFT BOX

The center of the poinsettia was made from floral beads dyed with Lemonade Alcohol Ink.

All in all, the box is 1” high and 2” square . . . perfect for a pair of earrings, a necklace . . . well you get the idea!

Thanks for stopping by and remember . . . life is short, enjoy the adventures that come your way today!

SHERRY SIGNATURE

Project Supplies:

Good Monday morning!  I hope your weekend was a good one.  I had some play time in the studio and then some quality butt time watching the final races in NASCAR.  I’m sad that this was the last racing weekend, but I only have a few months until Daytona!  I think I can handle it.

The last time my darling daughter, Mallory, was home it was major crafty time for us.  There was one project that she left for me to finish on my own . . . or should I say . . . there was one project that I refused to do at that time because of time restraints with other pending projects.  I don’t think she was that upset that we didn’t work on it then  either, because she knew I would make the project when I had time.

The story of the project is . . . I send some of my projects with Mallory back to school.  One of her roomies, Megan, loves my vintage flair (which I found out that last trip home when Mallory was looking for things to take back to Megan), so Mallory offered ME, her momma, to make a recipe box for Megan.  Mallory’s approach . . . Mom I told Megan that I would work on this while I’m home this week . . . knowing full well that I would end up doing it.  Sly little fox she is!  Now don’t get me wrong because it sounds like I didn’t want to make this project at all . . . I find Mallory’s ways of manipulating hilarious.  In my heart I’m totally flattered that Megan likes what I do and I wanted to take my time on her project so it would be worthy.

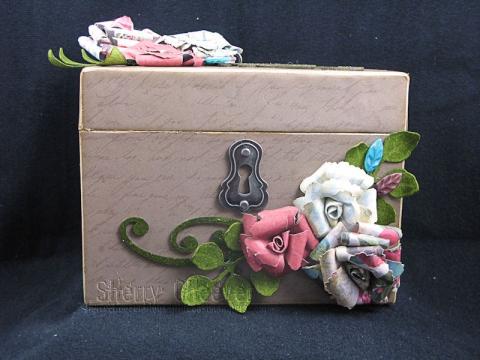
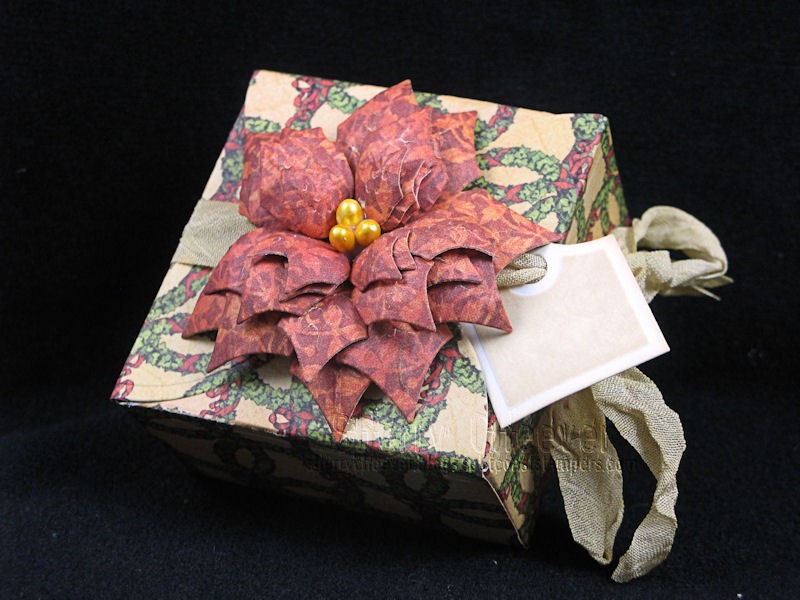
What she sent was a blank chipboard recipe box and a pad of Prima paper that she really loves.  You can see these in the Project Supply list at the bottom of my post.  My problem was the paper was 6×6 and the box was much wider . . . I ended up using some extra paper I had here that would match her paper (to a point).  The box was covered in my paper, sanded at all the edges, and then sponged with Antique Linen Distress Stain.

MeganRecipeBox

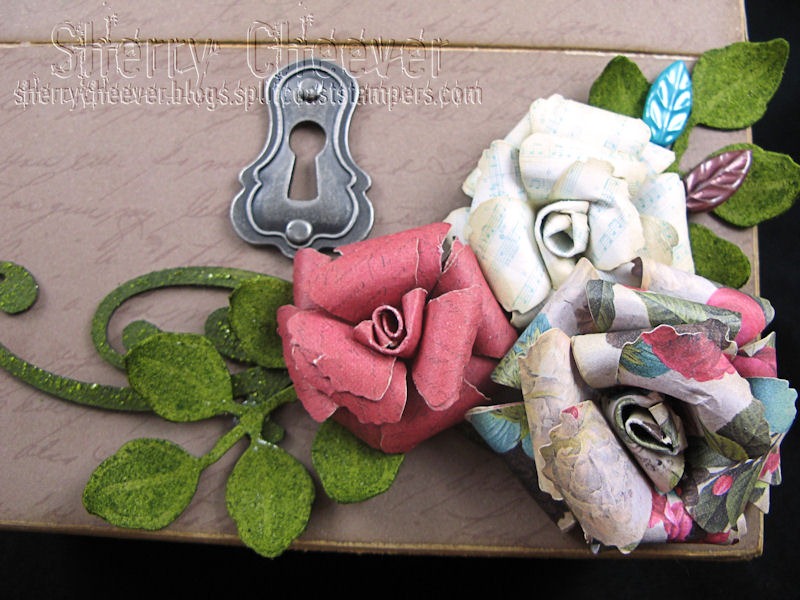
and then from the top looking down . . .

MeganRecipeBox2

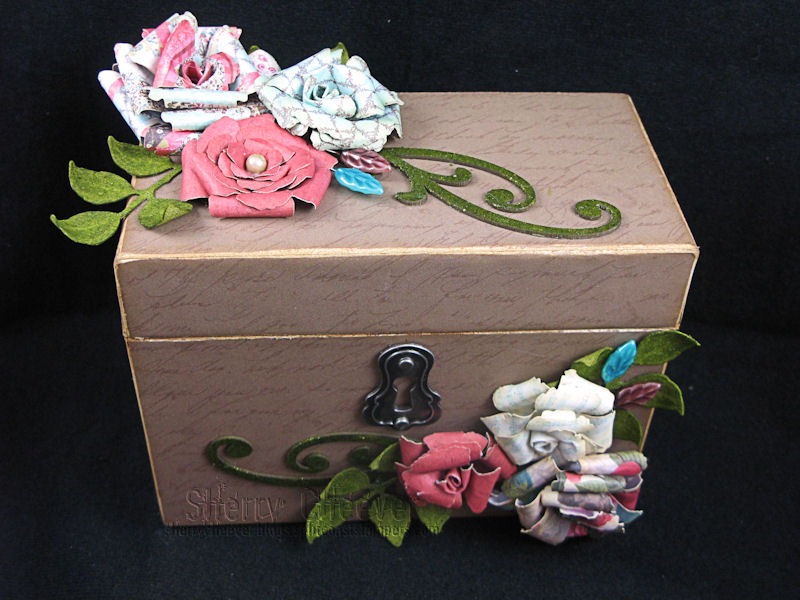
I added a keyhole to the front just for the fun of it, but left off all other metal embellishments (i.e., feet, knob) so the box could sit flat and be opened easily.

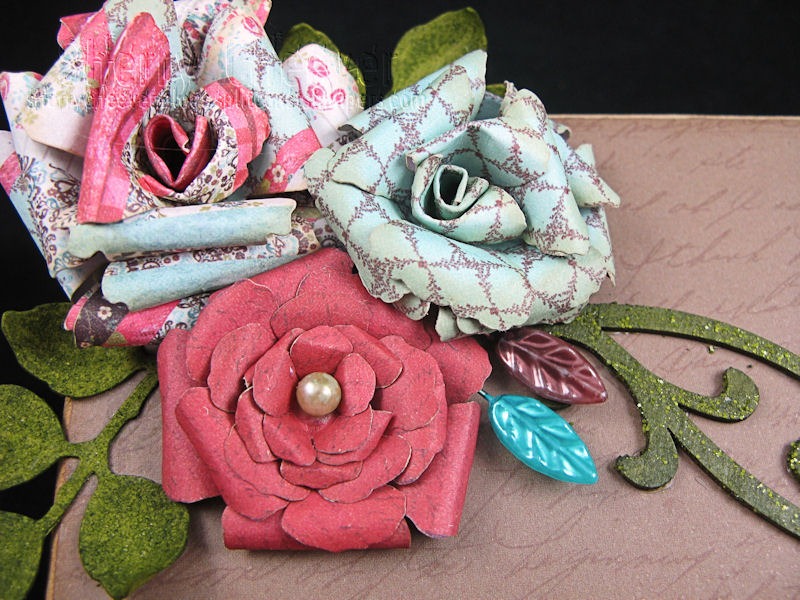
The flowers were die cut with Spellbinders™ floral die templates (details in Project Supplies) from the Prima paper that Megan sent.  The leaves were die cut from GrungePaper and the flourishes are from Want2Scrap.

MeganRecipeBoxTop

Even though it’s hard to tell in the photo, all the edges of each petal of each flower were sponged with Antique Linen Distress Ink.  The leaves were covered with Peeled Paint Distress Stain, then the edges were highlighted with Crushed Olive Distress Ink.  The center of the red flower above is a corsage pin that was covered with Lake Mist Alcohol Ink.

MeganRecipeBoxFront

The chipboard flourished were painted with Peeled Paint Distress Stain, then wen dry covered again with Peeled Paint Distress Stickles.   I must stay that sitting across the room and looking at this side of the box, the flower appear to be part of the paper . . .  it’s so cool!   To finish off the flowers, turquoise and brown leaf Trinket Pins were added.

I hope Megan likes what I’ve done and I can’t wait for Mallory to take it to her after the Thanksgiving break.

Thanks for stopping by and remember . . .  life is short, embrace the adventures that come your way today!

SHERRY SIGNATURE

Project Supplies:


Happy Friday!  I meant to have this post up before now, but I had a few unexpected errands this morning  . . . well on unexpected, but oh so fulfilling.  My sorority, Sigma Phi Gamma International Sorority – Delta Phi Chapter, decided to buy some bicycles for our local Safety Town.  I met some committee members over at the Schwinn store this morning and we decided on eight 16” bikes with training wheels!  It’s going to be so much fun presenting these to Safety Town.  Needless to say, I didn’t get my project done until a little later this morning.

I started working on this card last night, picking my paper first and then coloring my snowman to match.

UnitySnowmanNovember18

When I was working on the ticket, I remembered I had some old rusty bells from a couple of years ago, and just had to add them.

UnitySnowmanBellsNovember18

The seam binding was dyed to Aged Mahogany Distress Ink and Stain, with a little Vintage Photo tossed in for good measure.  The bells are tied to the memo pin which is holding the ticket.

I really love this paper, My Mind’s Eye Lost and Found Christmas, and was glad I finally got to open it this season.

Here are the Copic Markers that I used:

UnitySnowmanCopics

That’s all for now!  Thanks for stopping by and remember, life is short . . . embrace the adventures that come your way today!

SHERRY SIGNATURE

Project Supplies:

© 2015 Suffusion theme by Sayontan Sinha