Good morning!  The other day I was planning what I wanted to do for my last few cards this month, and I realized that I haven’t been taking advantage of all the images available at my favorite site . . . Twisted Papers.  If you are new here and haven’t seen references to Twisted Papers before, you must check them out for top-quality downloadable vintage images at very reasonable prices.  Another plus, in my book, is that Russell and Stan who own the company, are so great to work with!

SO . . . a few nights ago I went shopping and downloaded three or four images that I thought I might use in some projects.  The first one is a fabulous Thomas Nast Santa!

TwistedPaperSanta

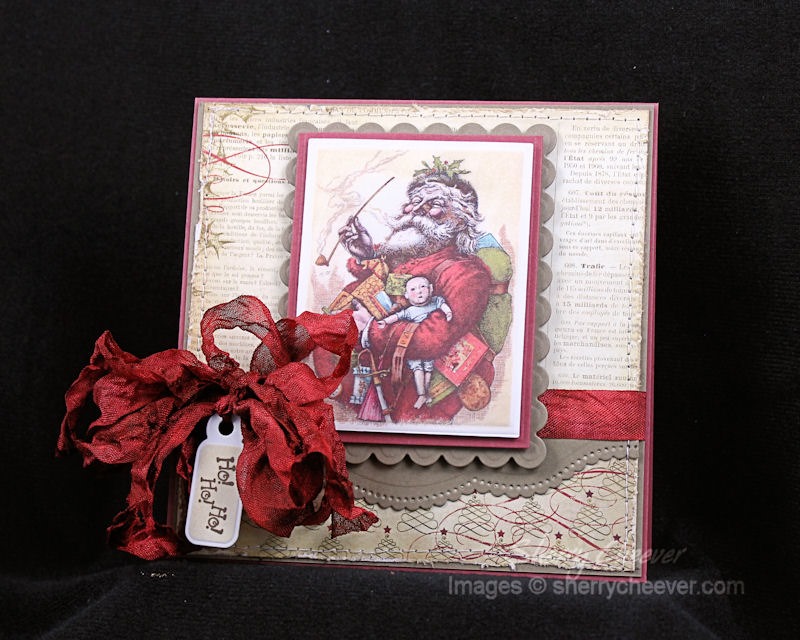
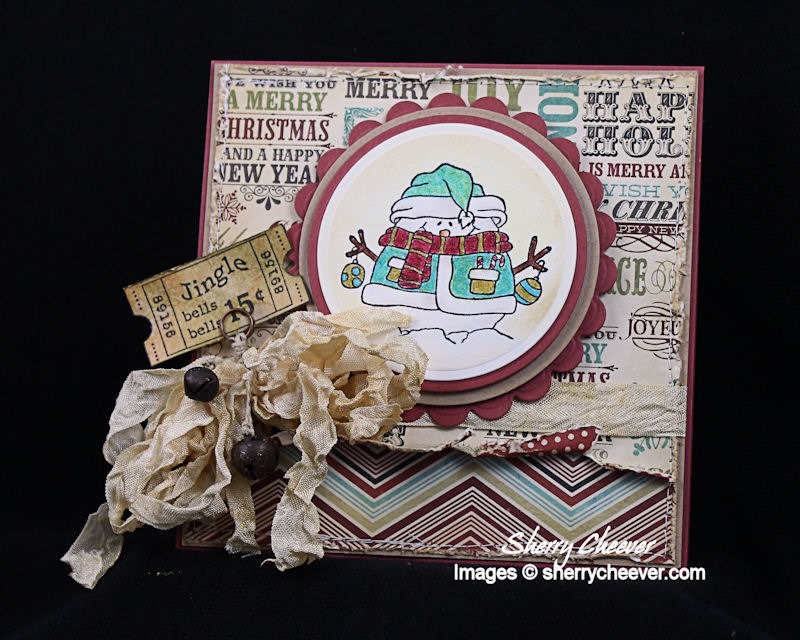
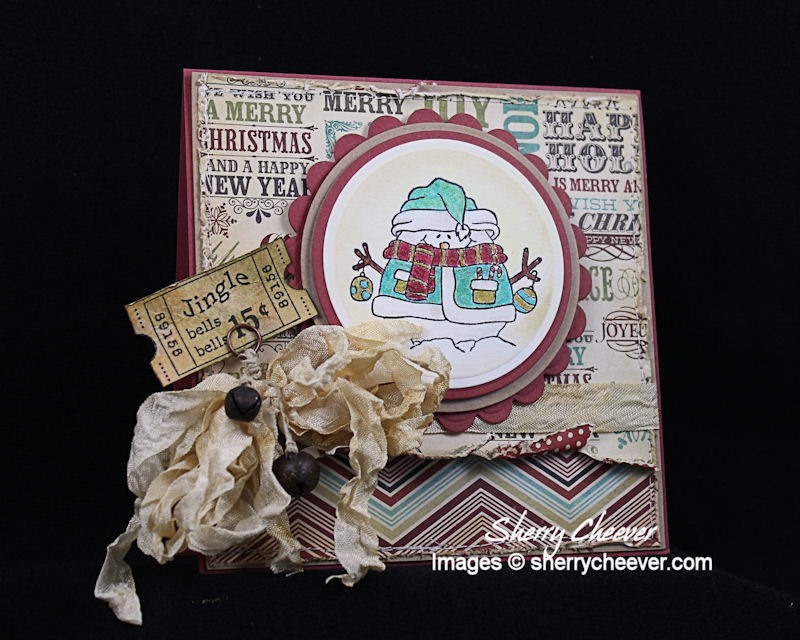
Because the images are digital, you have the freedom after downloading to open them in photo software and change the size.  I worked with this one starting at 800, down to 600 and then again at 700 (which is where I settled out).  I like to resize, print them out and then determine what will fit in a specific die template that fits the image.  The Spellbinders® Rectangles were perfect for this image, I just needed to get the sizing correct.

TwistedPaperSantaCLOSEup

The image was printed off onto white heavy cardstock, then die cut/embossed.  While the image was still in the die template, Antique Linen ink was sponged/stenciled onto the image leaving that beautiful white border around the outside.

TwistedPaperSantaLeft

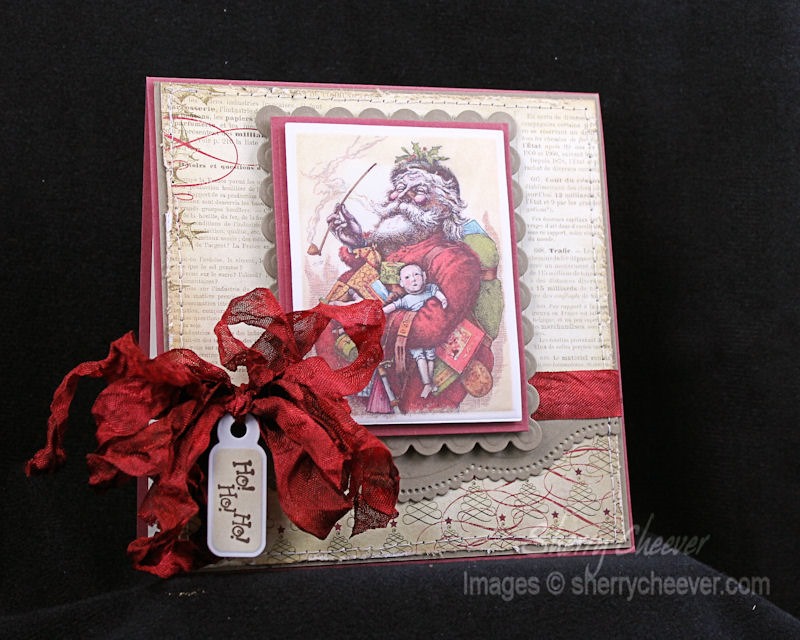
The paper used is some old cardstock I had on hand and, I think, last year’s My Mind’s Eye Lost & Found Christmas collection.  Don’t hold me to that one . . . but it is one of my favorite Christmas collections.  I wanted to add a little tag to the ribbon and found the “Ho! Ho! Ho!” in a very old stamp set in my cabinet.  As a matter of fact, I think it might have been the very first Christmas set I ever purchased back in 1997, give or take.

I’ve got a few more ideas to share over the next few weeks so I hope you’ll stop back in and visit!

SHERRY SIGNATURE

Project Supplies:

I hope everyone had a Happy Thanksgiving!  We spent the day with the Cheever Brothers and their families again this year.  It’s always fun to get together with them all and catch up on what everyone has been up to the last year.

It’s been fairly quiet around here today and I took a few moments to busy myself in the studio.  After I had started today’s project, I decided to change it up so it is nothing like what I initially started to make.

For this one, I decided to go the clean and simple route as well as make a card that could be easily mass-produced.   It’s not bulky (even through there are a number of layers) and will easily fit into a standard 5×7 envelope.

PeaceCardleft

The sentiment is Peace & Joy from Unity and one I’ve had for a number of years.  It was embossed with Queen’s Gold and then die cut/embossed with Spellbinders® Labels Four.  The layers behind the sentiment were die cut/embossed with 5×7 Elegant Labels Four.

PeaceCard

The base of the card was die cut/embossed with Matting Basics B.  If I’ve not explained how I do this before, I used a sheet of 8.5×11” cardstock, scored and fold the paper in half and then lined the folded edge of the paper up with the inside edge of the die.

The edges of the paper were all trimmed with 18 kt gold leafing pen.  When assembling the card, I thought to myself . . .  hey let’s leave off the foam mounting tape and see what happens.  Okay . . . one card that can be mailed flat in a plain (not padded) envelope!

That’s it for me today . . .  thanks for stopping by!

SHERRY SIGNATURE

Project Supplies:

I don’t know what it is with me this week, but I’m absolutely being drawn to white with a pop of color!  Perhaps it’s because everything else around me is in total disarray and the lack of choices in color is calming for me.  Whatever it is . . . I’m hooked!

For those of you who have followed me for a long time know . . . white, clean and simple is just not my thing!  I think I might have a fever!!

ReindeerCard

From the moment I first saw the Spellbinders® Frosty Forms Die Templates, I’ve been wanting to do something with the reindeer.  Believe me . . . I’ve tried!  I’ve never been able to make it work . . . until now.  All white!

All the paper for this card is watercolor, and every other layer has been embossed with polysparkle embossing powder.

ReindeerCardCLOSEup

To give the card some dimension, each oval section is raised with foam mounting tape.

For added bling, a small pearl was colored with R59 Cardinal Copic (I can’t find my rhinestones in all my chaos).

ReindeerCardAngle

Maybe tomorrow I’ll be out of my white mood . . .  or then again, maybe not!

Thanks for joining me today!

SHERRY SIGNATURE

Project Supplies:

in the Magic of the Season!  My sister and I both share a fondness for the word “Believe.”  For her birthday in April, I made this canvas for her with the word “Believe” and then in October she gave me a little knick knack with the word “Believe” and Tinkerbelle!

For me during this time of year it’s ever so important to Believe in the Magic of the Season!  If you stop and think about it, there are so many things that can go with the word “Believe.”  Such as believe in yourself, believe in your faith, believe in miracles  . . . it’s just one of those words!  I believe . . .  don’t you?

Carrie and I have always insisted that we believe in Santa  . . . and its a good thing too, or else he would never leave us anything under tree.

So the other day when I was digging out my holiday stamps, I found it!  I found my favorite holiday sentiment stamp . . .  Believe by Inkadinkado!

BelieveCard

After embossing the background panel with Spellbinders® Holiday Magic M-Bossabilities, I thought it needed just a little more sparkle.  I rubbed my VersaMark pad across the top of the embossed areas and sprinkled on Holographic embossing powder.

BelieveCardCLOSEup

The base of the card was die cut/embossed with 5×7 Matting Basics A and B.  I knew I wanted a longer sentiment across the front of the card and after stamping it, decided that I could also die cut it with the Matting Basics.  Even thought the paper was narrower, I could die cut one side and then slide through to the other.  A couple of hole punches for the ribbon and I was all set.

If you left the bow off this card, it would be excellent for mailing and quite easy to mass produce!  It’s a shame I’ve already had Mallory buy our Christmas cards this year.

I’ve had so much fun looking through my older holiday stamps (they have to be older, because I haven’t purchased any new ones in a very long time)!

Thanks for joining me today!

SHERRY SIGNATURE

Project Supplies:

Good morning y’all!  Don’t be shocked or anything . . . but I actually worked in the studio yesterday.  I know . . . don’t faint!   We’ve been getting in the holiday spirit around here lately.  The girls have been making wreaths and I’ve been rejoicing that Hadlee is finally taking her first unassisted steps and hopefully will be in full walk mode by Christmas!

I went on the hunt for all my Christmas stamps yesterday, pulling out my favorites to start the season with.  The first one I pulled out is my favorite little snowman from Unity Stamp Company.

SnowmanCard

The image was colored with colored pencils and then die cut/embossed with Spellbinders™ Large Circles.  The layers alternate between small and large, ending the large scalloped circles.

The paper is some My Mind’s Eye Lost & Found Christmas Special that I picked up at Michaels.  The edges were distressed, sponged with Antique Linen and sewn to the base kraft cardstock.

SnowmanCloseUp

I’ve had these rusty jungle bells for years and thought they would be a fun embellishment to add along with the ticket stub.  The seam binding was dyed with Antique Linen and the bells are tied to a memo holder with twine.

SnowmanCardAngle

That’s all for my project today.  Just want to remind you that my contest is still up on the Spellbinders Blog from yesterday.  I believe the winner will be announced on Tuesday so you still have time to enter.

Thanks for joining me today!

SHERRY SIGNATURE

Project Supplies:

© 2015 Suffusion theme by Sayontan Sinha