Good morning and happy Monday!  Are you ready for 2013 to be over?  I know I am!  It’s been a pretty tough year around here but I’m happy to report that things are finally on an upswing.    Now I just have to get my mojo going in the same direction!

I’ve worked in the studio all weekend and sadly only ended up with a couple of cards.  One I showed you Saturday and the other I have today.  I had these great ideas but when I started to get them going, everything ended up in the trash.  Saturday night I walked away from it all and just threw my hands up.  Sunday afternoon I headed back in with nothing in mind at all and decided to go through my paper stash to find some inspiration.

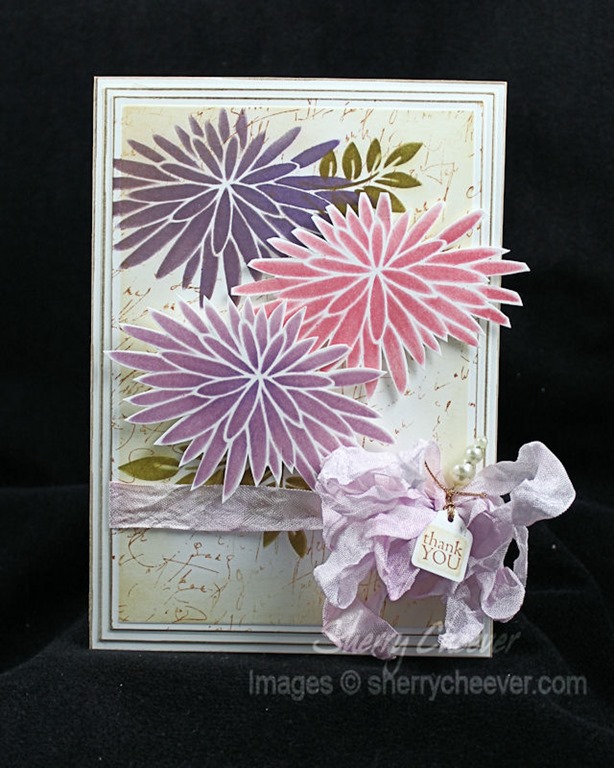
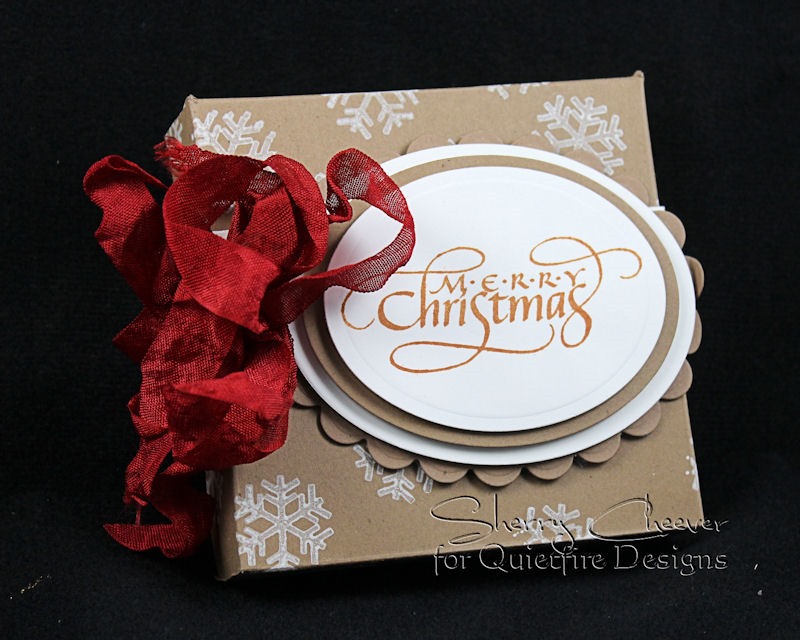
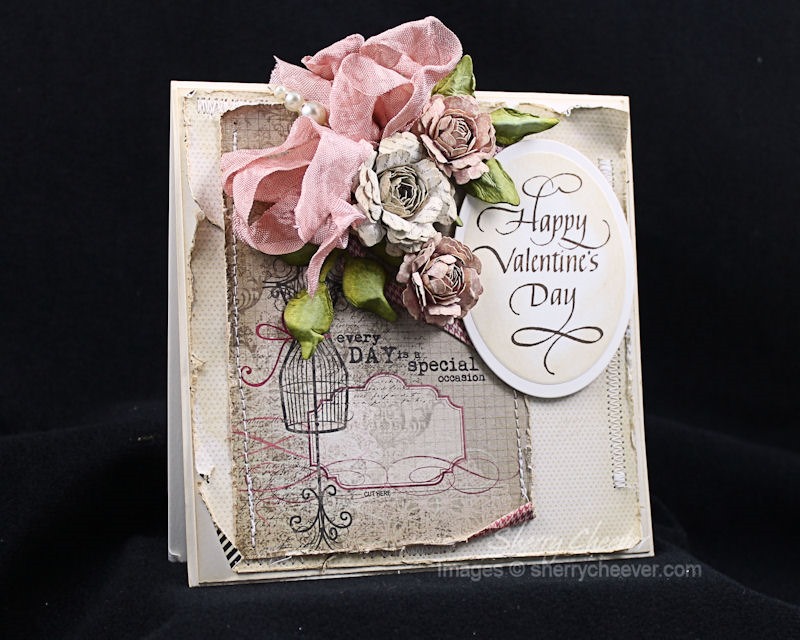
Here’s what I came up with . . .

QFD Valentine

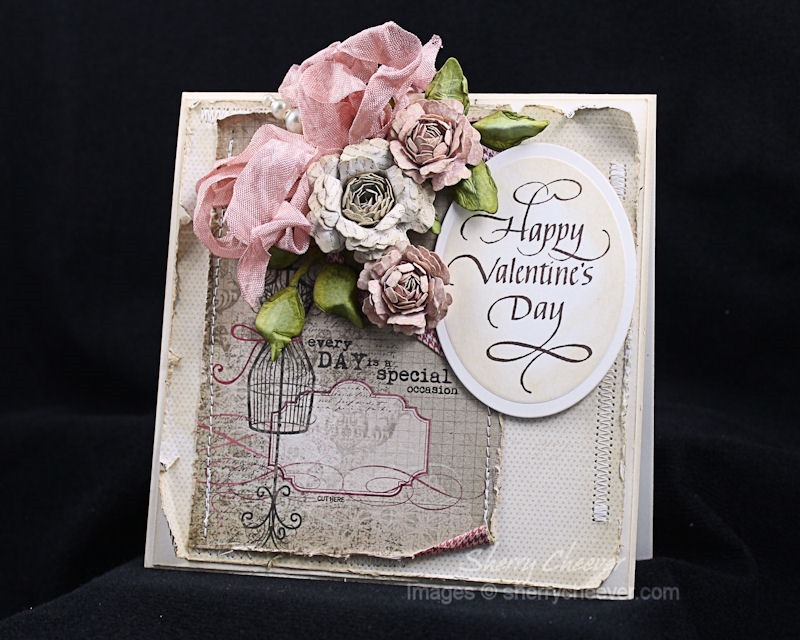
Digging deep into the paper stash I found an old pad of My Mind’s Eye Lost & Found Blush and the colors hit me right away!  So I figured why not a Valentine’s Day card.

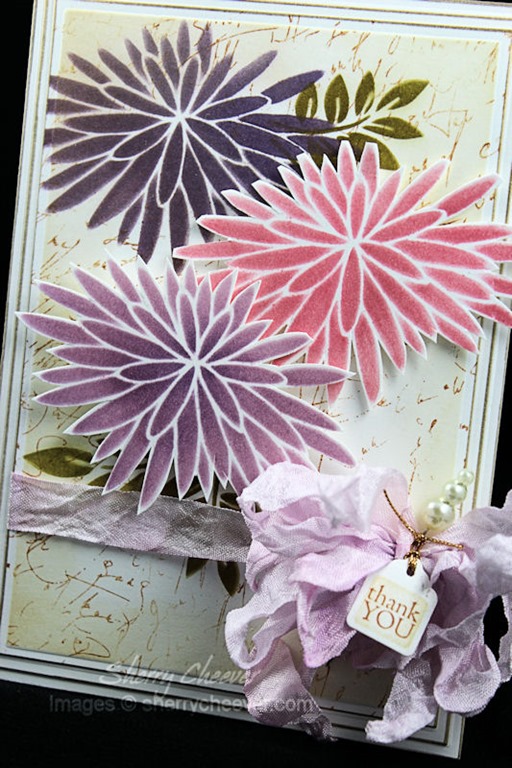
I picked out some coordinating sheets and started the distressing and sponging (Antique Linen).  I really liked the dress form on the one sheet and didn’t want to cover it up, so everything was placed at the top of the card.

QFD Valentine CloseUP

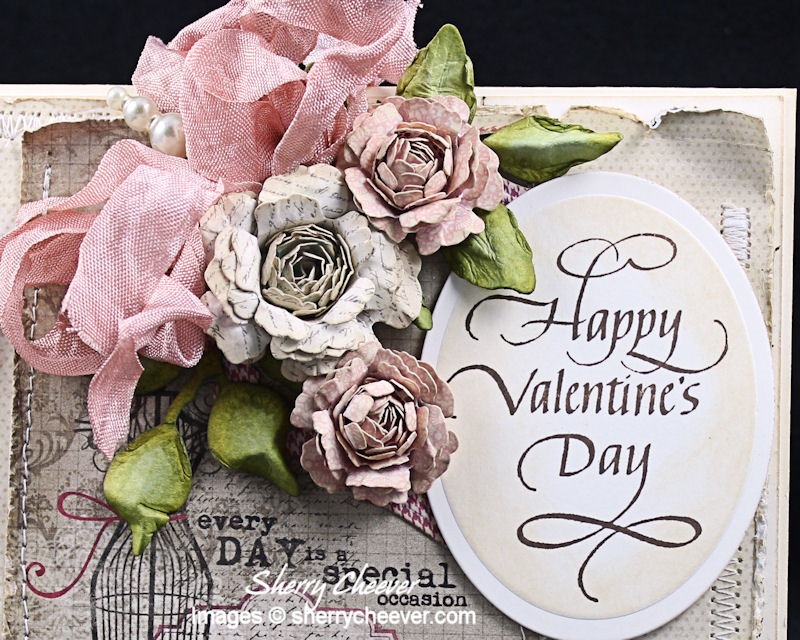
The flower were die cut/embossed from other sheets of the paper pad with Spellbinders® Bitty Blossoms.  The leaves were die cut from watercolor paper with Foliage and then inked with Peeled Paint.  Buried deep under it all is a frame made from chipboard that was die cut with Labels Four.  I didn’t realize that I ended up covering the whole damn thing up until I took the picture, but hopefully you can see a little bit poking out at the top and bottom.  The sentiment, Quietfire Design Valentine’s 2013, was stamped in Coffee and then die cut/embossed with Ovals LG.  While the paper was still in the die template it was sponged with Antique Linen.

QFD Valentine Left

I guess that’s all for me right now!  Hopefully I’ll be back in soon with another project . . . in the meantime, thanks for stopping by!

SHERRY SIGNATURE

Project Supplies:

Hey y’all!  I hope everyone has had a blessed holiday season and you’ve been able to enjoy some time with family and friends.

I don’t know about you (and even though winter has only begun), I’m so tired of wearing long underwear, fleece pants and fur-lined boots that I could just spit!  I’m ready for shorts and sandals . . .

so today’s card is inspired by my need to have a little sunshine and warmer weather.

FromTheGarden

The panels (including the base) for the card were all die cut/embossed with Spellbinders® 5×7 Matting Basics.   Once the top panels was die cut, the leaves and flower were stenciled in using Studio 490 From the Garden Art Stencil.  The background was then stamped in Sepia using Fun Stampers Journey Script background.  The panel was placed back in the die template and the edges were sponged with Antique Linen Distress Ink.

FromTheGardenCloseUP

The remaining two flowers were stenciled on a separate sheet of white cardstock and then trimmed out.  They are raised on the front of the card with foam mounting tape.

The sentiment “thank you” is from the Fun Stampers Journey set, Little Big Greetings.  It was stamped in Sepia and then die cut/embossed with Back to Basics Tags.

FromTheGardenLeftAngle

Before the card was assembled, all the edges were trimmed with a Krylon Gold Leafing Pen.  The tag was then tied to the ribbon with gold chord in my attempt to bring it together.

That’s it for me right now.  Thanks for stopping by today!

SHERRY SIGNATURE

Project Supplies:

I hope everyone is ready for the Holidays!  I have one final gift to pick up today and then tonight we will all be gathering at mom’s for our traditional Christmas Eve Blast!  I can’t wait to see what Hadlee does with some of the gifts that have been placed under the trees!  It looks like Christmas Day/Evening is going to be pretty quiet around here (with one kid working and another going their way).  I’m looking forward to some quality studio/play time!

My last holiday card for you is one that I posted last week on the Quietfire Creations Blog.  I had a conflict with the Spellbinders Blog Team hop and didn’t get to make a post here.  If you’ve already seen it on Facebook, Instagram or over on Quietfire, then I’m sorry I don’t have anything new for you today, but I do hope you’ll enjoy seeing it again.

Dec2013SCThoseWeLove

The sentiment from Quietfire was stamped, embossed and the die cut/embossed using Spellbinders Labels Four.  The background papers were die cut/embossed with 5×7 Elegant Labels Four.

Dec2013SCThoseWeLove Sentiment

The snowflake was die cut, covered with Glossy Accents and then sprinkled with Vintage Glass Glitter.

Dec2013SCThoseWeLove Snowflake

Each layer of the card was raised with foam tape to add more dimension and shadows.

Dec2013SCThoseWeLove LeftSideAngle

That’s it for my card today.  I’ve started working away on CHA Projects for Spellbinders in preparation for our big Sneak Peek and Giveaway January 6-10th!  More about that one later . . . it’s a biggie!

Thanks for stopping by and Merry Christmas and From Millan.Net

SHERRY SIGNATURE

Project Supplies:

Good morning!  Hope y’all are doing well and staying out of trouble.  Me . . . not so much . . . trouble I mean!

I’ve been hard at work in the studio with Christmas and CHA projects, but not too much to share yet.  However, I do have a few things today.

The above bezel and a gift box . .  .

PizzaGiftBoxLeft

are both being featured on the Quietfire Creations Blog today.  All the details for both, along with more pictures, are over there.  Please hop over and leave me a comment so I know that you were there!  It’s one of those things . . . I was here and you weren’t, now you’re here and I’m not!

I’m off for the weekly weigh in at WW and some quality time with my sister!  Oh wait, I don’t think I’ve mentioned this.  I started going to Weight Watchers with my sister back in October . . . as of last week, I had lost 20 pounds.  I’m tired of seeing pictures of myself plastered all over the internet looking like a short little stump . . .  hoping to remedy that.  I guess one remedy is to never ever have my picture taken again (which I don’t always have control over); the other remedy is to actually do something for myself . . . get healthy!

Okay that’s it for me today.  Thanks for stopping by!

SHERRY SIGNATURE

Project Supplies:

Hello and welcome to the second Design-abilities blog hop!  We are the Spellbinders® Blog Team and we wanted to do something fresh, fun and creative to bring our team together.  But before we get started we want to let you know this blog hop is just for fun and creative inspiration.  We are not sponsored by Spellbinders Paper Arts®.

This is also the first hop that our new Blog Team Members will be participating in.  If you missed the announcement on Friday that Darsie Bruno and Michelle Woerner have joined the Blog Team, you can find it here!

Sometimes we might not all be able to participate but we would still encourage you to visit all of the Blog Team Members and check out their blogs.  You will find all kinds of ideas for die cutting, paper crafting, mixed media, DIY projects, jewelry, home decor, lots of tutorials and techniques.  As designers we are always inspired by each other and we hope to inspire you too.

Including me, the Spellbinders Blog Team consists of:

My project today is something that I’ve had in mind for a month or more now . . . It was just finding the time to work on them!   I need a few special gifts for the holidays (hostess, open houses, friends, etc.) and I’m hoping these will be perfect.

MeltArtBezels

When I first thought about this projects, I first had in mind polymer clay.  I even purchased some while at Michaels one day.  Later it dawned on me that I since I had never worked with clay before, that I should stick with something that I had used often . . .  Ultra Thick Embossing Enamel (UTEE).

I began by adding clear UTEE in the melting pot.  Once it was melted I added a small amount of white UTEE and let it melt thoroughly.  Once all the UTEE was melted, I added drops of Turquoise, Jade and/or Coral Melt Art Heat It Inks.   White UTEE was added to make the colors opaque as opposed to translucent.   I think I ended up making 3 different pots of colors, pouring the mixes into various bezels/hat pins from the Spellbinders® Media Mixáge™ Line.

MeltArtDiamond

Beads were strung and added to the melt art pieces.  If I used a hat pin, the wire was snipped off and looped at the base of the hat pin.  Lobster claw clasps were used so these dangles could be hung from a key chain, a purse . . . or anywhere the recipient wished to hang them!

MeltArtRectangle

I loved the variations created by the colors added to the UTEE and hopefully you’ll be able to see them in the photos below.

Diamond CloseuP

If air bubbles rose on the surface, I heated the UTEE with the heat tool to melt the UTEE again and cover in the holes.

Oval Closeup

The best part of heating the UTEE again, was watching the different colors move about the bezel, creating more variation.

Rectangle CloseUP

The darker lines are made by some of the Heat It Inks not being mixed entirely in the pot and then coming to the surface during the second, or even third, melting.

Square CloseUP

I have one still on my desk that had a speck of red (that I truly thought was blood from a cut on my finger) and when it was re-melted, it ended up being the coral additive.  I’ll show that one to you later.

Needless to say, I had a great time making these and have plans for a few more . . . Melt Art is so darned addicting!

That’s all for me today!  Don’t forget to visit the other Blog Team Members and see what inspiration they have for us today.  I myself can’t wait to see what they’ve been up to!

Thanks for joining me!

SHERRY SIGNATURE

Project Supplies:

© 2015 Suffusion theme by Sayontan Sinha