Happy Monday!  I’ve done something for today that will Smiley from millan.net and amaze you . . . CLEAN AND SIMPLE!  No, I don’t have a fever just enjoying a challenge.  Last week at my Copic Certification we were having a discussion about CAS and how hard it was for me to do.  I can fly through a vintage/distressed/grungy type of card in no time flat.  My fingers fly and my mind runs wild!  However with CAS it literally takes me forever and then I hate it so much that it never gets used (and you probably never see it).  I was challenged, yes challenged by Jennifer Buck and Dawn Lusk to do simple . . . well at least I took it as a challenge.Smiley from millan.net

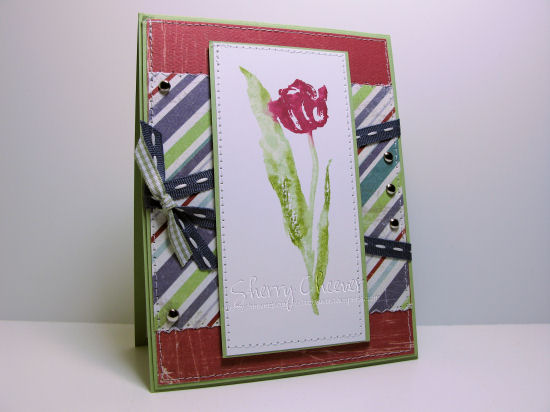
Now I have to tell you, this card took me all of about 10-15 minutes . . . I’m AMAZED!  Granted I’ve been thinking about for a day or so but for me to actually stop . . . and I mean stop.  No Ribbon!  No Embellishments of any kind!  No sponging!  Honestly I had to sit on my hands and say to myself . . . YOU HAVE DONE IT! Smiley from millan.net Not only did I have a CAS Card, but also one in a smaller size than I normally make . . . okay, okay . . . I might have a fever!

I also know that Monday is the CAS Challenge on Splitcoaststampers.  I decided to check it out before I headed to the studio and guess what . . . it was flowers!  My card fit this challenge perfectly so I ran with it!

SherryCheeverCASMothersDayMay3

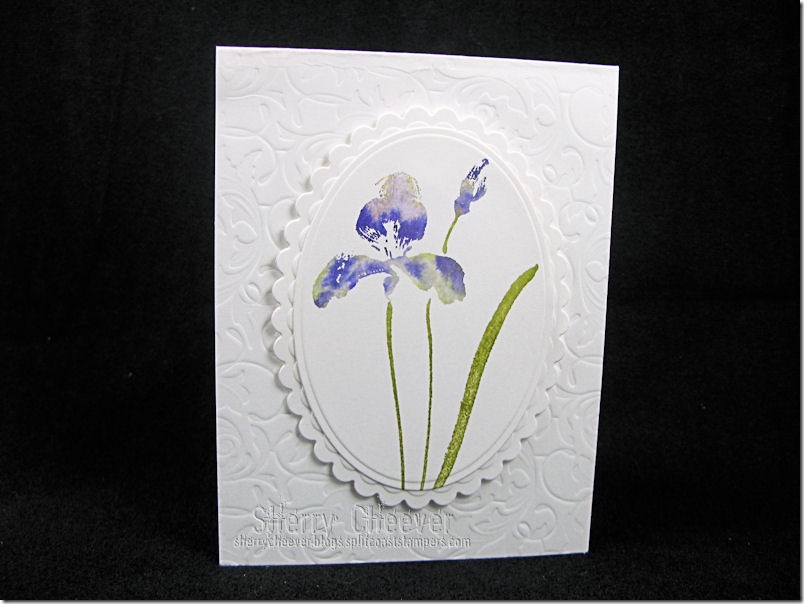
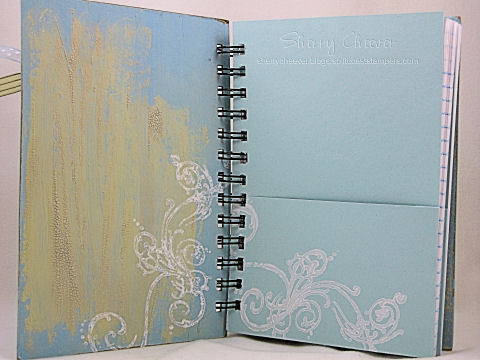
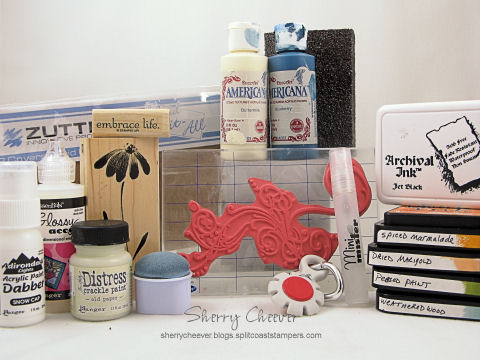
Using one of my favorite Penny Black stamps (and one that is screaming for attention) I colored the image with Tombow Markers, misted with water and then die/cut and embossed the image with Oval Nesties®.  I cut a piece of white cardstock to 8-1/2 x 4-1/4 and embossed one half of it with the Flourish Impressabilities™.  That’s it!  I placed the image on the card with foam mounting tape and then sat on my hands!

That’s all I have for now, but I’m sure I’ll be back.  At least I’m hoping so today!  In any event, I’m glad you stopped by and remember life is short . . . enjoy each adventure that comes you’re way!

Smiley from millan.net

SHERRY SIGNATURE

Happy Tuesday!  I meant to have this post ready for early this morning, BUT last night I wasn’t happy with the photo and decided to redo everything.  I had worked on this card all day yesterday (and the day before), and decided I needed to wait until this morning after my pot of coffee to finish it. 

I have so many snowman images and last year wasn’t able to find the time to work with them.  I’ve decided this year, that I will make the time and color each and every one.  It’s been a long time since I worked with some of these images and for the fun of it all, want to revisit them.

I just went rooting through my gallery on Splitcoaststampers and found the last card I made with today’s image and it was on November 21, 2006.  Wow that’s been a few years!

Snowman and Friends

I water colored the image with Ranger Distress Re-Inkers, and had paper all picked out for the image.  The only problem was I couldn’t find the right ribbon, etc., to go with it so I spent most of the day trying to come up with a layout and paper.  I finally decided to hang it up and try the Wrinkle Free Distress technique for the background.  Using the three dominate colors (blue, purple and green) and watercolor paper, I made my background.  To add some glitter to the background, I covered the entire piece of paper with Ranger Rock Candy Distress Stickles.  I’ve tried to get a close-up so that you can see how it looks  . . . and don’t you dare look at my out of the line coloring! 

Snowman and Friends closeup

I ended up adding the snowflake as an embellishment.  To color the watercolor paper, I misted some extra ink with more water and while the paper was still in the die, I ran it through the inky water.  It was a nice effect but it was just a little too light, so I added more ink to the edges and covered the snowflakes with Rock Candy Stickles.

All said and done, not bad for taking so much time.

  • Stamps:  Snowman and Friends from Penny Black; Believe from Papertrey 
  • Paper:  Arches Watercolor; Papertrey Plum Pudding and Ripe Avocado
  • Ink:  Ranger Mustard Seed, Broken China, Fired Brick, Shabby Shutters, Peeled Paint, Vintage Photo, Frayed Burlap, Tattered Rose, Black Soot and Dusty Concord Distress
  • Accessories:  Spellbinders™ S4-222 Create A Flake 1 and S3-030 Tag Shape 3; Papertrey Buttons and Ripe Avocado Ribbon; Watercolor Brushes; Gold Cord; Ranger Rock Candy Stickles, Non-Stick Craft Sheet and Mini Mister

I hope you have a fabulous day and thanks for stopping by!

Oh my BADness!  I have been so buried this week under paper, glitter and ink that I haven’t had time just to stamp.  I’ve been getting ready for my part of the Spellbinders CHA Blog Frenzy that . .  . well it’s like this . . . . Smiley from millan.net  I got last part of my projects done today, still have some more to do, but I just had to take a minute and clear my head.

I did something today that I haven’t done for a very long time.  I pulled out my absolute favorite floral image of all time!  For some of you, I don’t even have to show you the card and you’ll know the stamp.  For some others, it’s been so long since I’ve put ink to this image that you’ve probably never seen anything I’ve done with it.

Are you ready?  My Penny Black Blush stamp!!!!!!!!!!!!!!!!

PENNYBLACKBlush

If you haven’t been able to tell over the last bit, I love stamping on wet watercolor paper and today is no different.  I misted the watercolor paper and let it sit for a few minutes to soak up the water.  When the paper was just damp, I stamped Rubbernecker French Script in Old Paper Distress Ink.  I let the ink sit for awhile, and then when I had the look I wanted, I finished drying with my heat tool.  The flower was inked using Tombow Markers, misted with water and then stamped over the French Script.  I felt the look of one single flower was lonesome, so I added 2 more . . . just for the fun of it!  The image was then cut and embossed with Spellbinders S5-014 Small Deckled Mega Rectangles.

I chose BasicGrey Wisteria for the background papers and matched them up with Prism Iced Cobalt and Spring Willow Medium.  The edges of everything, including the scalloped border, were sponged with Old Paper Distress Ink.

I hope you enjoy the rest of your weekend and thanks for stopping by!

Good Sunday morning! It’s that time again, time for another Splitcoaststampers Dirty Dozen Challenge. This challenge is open to all current and alumni Dirty Dozen, and one that I enjoy participating in each month. This month the challenge was to make an Inspirational Journal using the following picture as inspiration.


Inspiration Photo


The inspirational photo is from BH&G 100 Decorating Ideas Under $100 magazine. We could choose to be inspired by the color pallette, the composition, or any other element of the photo that grabbed us. The restricted element for this challenge, was NO markers (including Copic, SU or any other brand) or watercolor crayons. I was immediately taken with the soft blue and white color scheme in the room. The next thing that jumped out at me were the flowers on the table and the oranges on the shelf. I decided to make my journal in blue and white, with just a small punch of orange.

DCI408

As you can see, I actually was inspired by one of my own creations as well. Yesterday I posted the journal that I made for the Lizzie Anne Designs April Project of the Month, which subsequently became my sister’s birthday present. This time, the journal is for me and the design on the POM Journal was one that I absolutely loved. Not only that, but since this journal is mine, I pulled out my favorite Penny Black floral stamp that I have not used in months and months and months. I won’t go into great detail in this post about making the journal (since I did that yesterday), but I will highlight some of the details.


I inked the flower image by tapping Distress Ink Pads directly onto the stamp. I then misted the image with water, and stamped it out three times on a piece of watercolor paper. Once the image was dry, I went back with a wet watercolor brush and pulled the ink into the open areas of the image. The edges of this panel were then sponged with Weathered Gray Distress Ink, completely into the image. Using a baby wipe, I then pulled some of the color off by wiping from the image out to the edges. I loved the effect I got, more of a watercolor look as opposed to sponging. The image was then layered onto solid colored designer paper and stitched together.


The covers for the journal were painted with acrylic paint, then highlighted with distress crackle paint. Once the crackle paint was dry, I went back and sanded all the edges to give the journal a worn look. As a last minute addition, I added the flourish to the all the covers and the inside pocket dividers. The flourish was stamped in white acrylic paint.

DCI408 INSIDE

I decided to separate the journal in two sections, divided by pocket dividers. The first section contains lined paper, and the second section is plain white cardstock.

DCI408 PRODUCT


Stamps: Penny Black Blush; Stampers Anonymous Tim Holtz Collection Anthology from Rubbernecker Stamp Company; and Stampin’ UP! Embrace Life

Paper: Canson Watercolor Paper; BasicGrey Periphery; Stampin’ UP Bashful Blue; Georgia Pacific White; Lined Memo Pad

Ink: Ranger Archival Jet Black, Tim Holtz Spiced Marmalade, Dried Marigold, Peeled Paint, Weathered Wood and Vintage Photo Distress Inks

Accessories: DecoArt Americana Blueberry and Buttermilk Acrylic Paints; Ranger Glossy Accents, Mini Mister, Snow Cap Acrylic Paint Dabber, Tim Holtz Old Paper Distress Crackle Paint; Sewing Machine; Zutter Bind-it-All, 7.5×5″ Craft Covers, 1″ Double O Wire; SU Hodgepodge Hardware; Tonic Tim Holtz Distress Tool; Sanding Block; Ribbon; Watercolor Brush

I hope you enjoy the rest of your weekend, and that perhaps you are inspired to make your own journal. If you would like to see all the journals made by the Dirty Dozen, all you need to do is click on this keyword, DCI408.

NEW SIG

It’s Derby Week here in the Kentuckiana Area. There are so many events taking place and so many celebrities visiting. Today is the Great Steamboat Race and tomorrow is the Pegasus Parade. Unfortunately, I will not be attending either one – too much other stuff going on. I’m sure you’re asking why am I mentioning the Kentucky Derby, well because it ties in with my Sketch Challenge Card today.

As I was preparing to make my card for today’s Sketch Challenge on Splitcoast, I pulled out some new papers that I got from Jacksonbelle Embellishments and was struck by the colors in one package. I knew I wanted to use my tulip stamp today because it used to be that tulips were planted in the middle area by the paddocks at Churchill Downs. I don’t know if they are still there, our weather gets warmer every year a little earlier and they bloom sometimes well before Derby. I tried to find a picture online, but much to my chagrin, all I could find were pictures of horses – go figure! Anyhoo, the paper fit what I wanted to do with my card today!

I pulled out my Penny Black Allure stamp, colored the image with markers (trying to match the red stripe in the paper) and misted it with water and then stamped the image. I started to cut the DP for the card front, and imagine my surprise when I flipped it over and there, right in front of my eyes, was the name of the paper – Tulip from the Crate Paper Samantha Collection. How cool was this and I immediately knew that things were right today! I mounted the image and the DP on a piece of Certainly Celery cardstock and flew to my sewing machine for a little stitching. I added the brads and ribbon and then stuck the background layers on the card (which is also Certainly Celery). The image is raised on mounting tape.

Derby Time

Stamps: Allure by Penny Black

Ink: Rose Red, Certainly Celery, Old Olive

Paper: Certainly Celery, Tulip from the Crate Paper Samantha Collection

Accessories: Brads, Ribbon, Mounting Tape, Sewing Machine, Markers, Water Mister

© 2015 Suffusion theme by Sayontan Sinha