
Good Monday morning! I hope y’all had a great weekend and stayed out of trouble. I know I did! On Saturday I drove with Mom and Aunt Linda, down to the country for my Great-Aunt’s 80th Birthday party. On Sunday Mallory and I hopped in the car, drove up to get Katie, and then we wandered around Art in Speed Park for a couple of hours. Good times!
I have a fairly simple card to show you today. Now before you even begin to say this can’t be simple . . . truly it was!
The image, from Wplus9 Design Studio, was embossed with clear embossing powder and then water colored with Distress Ink Refills . . . Faux Bleach/Batik Technique. The ink refills are still my favorite medium to watercolor with . . .
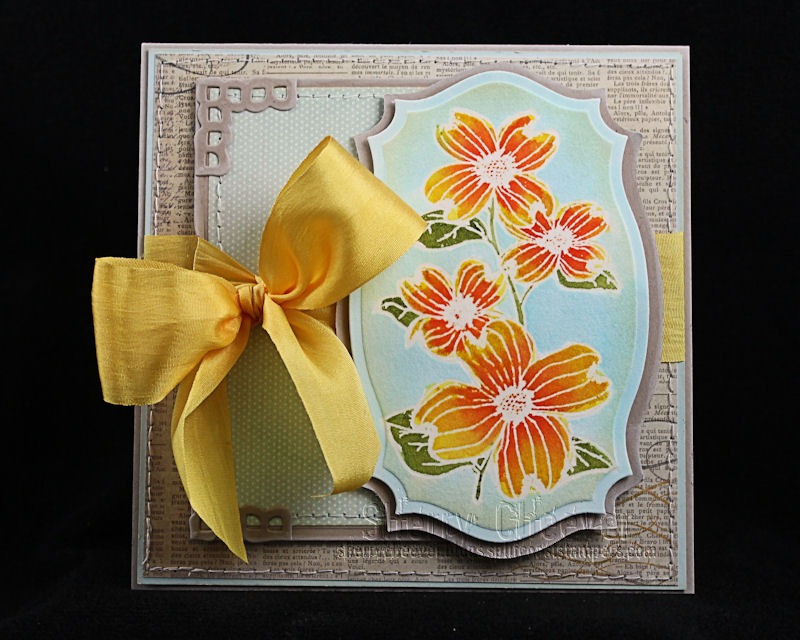
The image was then die cut/embossed with Spellbinders™ Labels Twenty-Five. For the kraft layer behind the image, and because I didn’t want an extra amount of paper edging, I traced the same die template onto the kraft cardstock and trimmed it out with scissors. The edges were sponged with Jasmine Mix’d Media Inx.
The layered panel behind the image was die cut/embossed with the new Card Marker A2 Matting Basics die templates. The corners were die cut/embossed with the corner die template from Lace Doily Accents.
See I told you, it really is a pretty simple card! The image took me longer to watercolor than it did to make the card.
That’s all I’ve got for you today. Hopefully I’ll have a tangle for you tomorrow . . . we’ll have to see how the rest of my day unfolds. In the meantime, thanks for stopping by and remember . . . life is short, make the most of the adventures that come your way today!

Project Supplies:
|
|
|
|
|
|
|
|
|
|
|
|
|
|
|
|
|
|
|
|
|
|
|
|
|
|
|
|
|
|
|
 Good morning! I probably wouldn’t have this post for you until later today or even tomorrow, but for some ungodly reason, I woke up . . . wide awake . . . at 4:30 this morning. I’m sure that sometime this afternoon this is where I’ll be . . .
  . . . but until then
I think I’ll show you an A2 card I made the other day with a new Penny Black stamp I picked up recently. I also used the new Spellbinders™ Nestabilities® Card Creator die templates . . . which seem to be the only way I can bring myself to make this size card anymore! I can’t believe that this is the only size card I used to make and now I automatically cut my cardstock at 5.5” square. Anyhoo, I needed a little thank you card and though this would fit the bill!
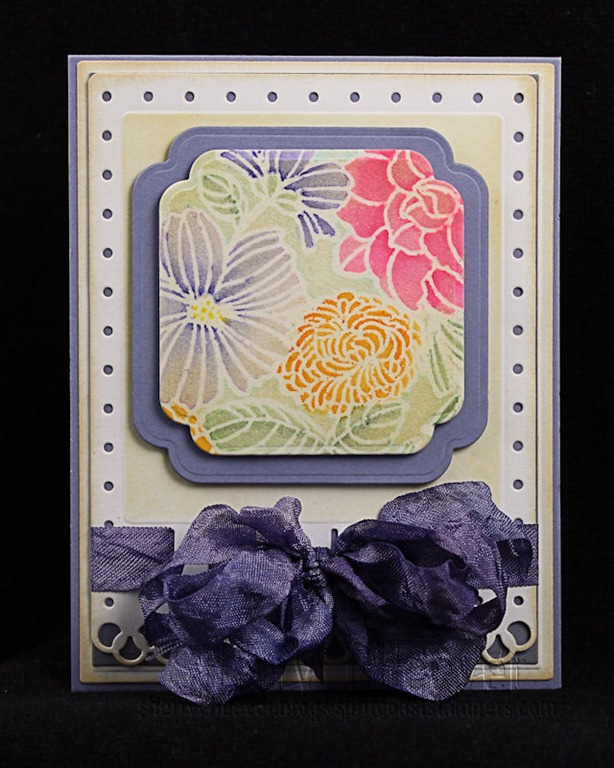
The base of the card was made with the Matting Basics A and B, but the top panel of the card was made with the new Fancy Ribbon Threader. The seam binding was dyed with Dusty Concord Distress Ink.
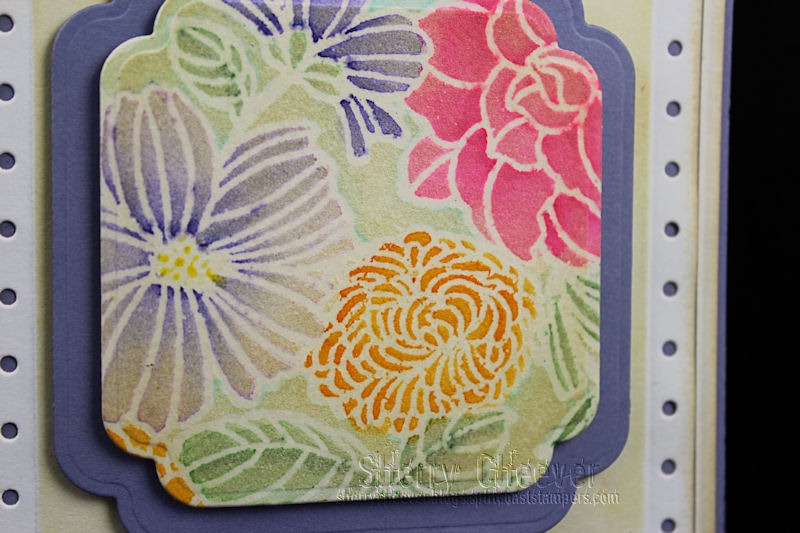
The image is only a portion of the stamp, which I die cut/embossed with Labels Twelve. First, the image was stamped in Distress Embossing Ink, embossed with clear embossing powder, then water colored with Tombow Markers. After the watercolor had dried, the embossing was ironed away leaving a Faux Bleach/Batik look.
I guess that’s all I have for now . . . unless you want to come help with laundry today . . .

Project Supplies:
|
|
|
|
|
|
|
|
|
|
|
|
|
|
|
|
|
|
|
|
|
|
|
|
|
|
|
|
|
|
Good Monday morning! I hope you weekend was good and you celebrated the dad’s in your life with good food, good drink and plenty of family. I know we did! Mallory organized a great meal for all of us (Kate, Will and my mom included) . . . I grilled kabobs while she made the sides and a GF mixed berry cobbler!
On the Mallory front, we are still waiting for test results from last Friday. Her cough isn’t any better after being on the meds the specialist prescribed, so we are prepared for what might be next if last weeks tests come back negative. After long talks yesterday, she has decided to defer TFA for one year and continue with her masters here at home. It’s more important that she feel well . . . we can’t send her off and not know what is going on.
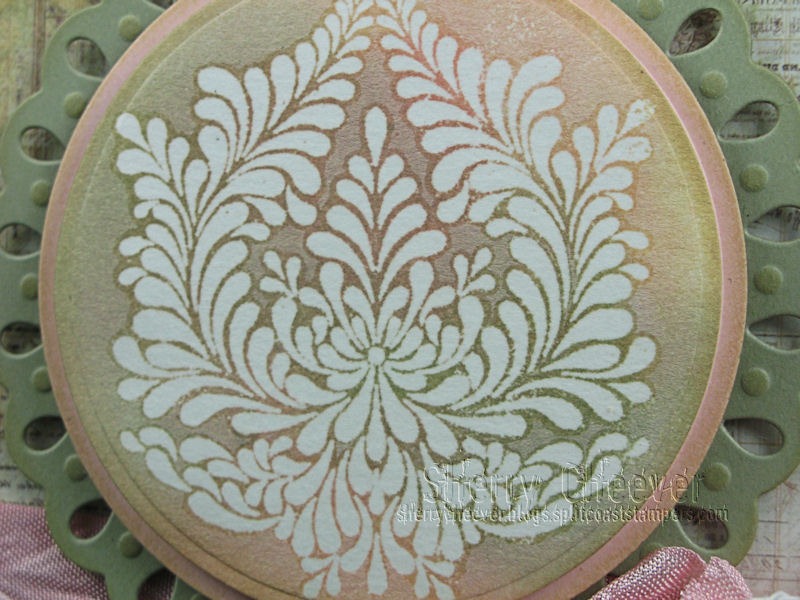
I kept myself busy with CHA projects over the weekend, but was able to sneak in one more Faux Batik project (Faux Bleach/Batik Technique). I know . . . I know! I’ve done a number of these recently, but they are just so damn much fun to make. Where else to you get the thrill of watching the embossing powder melt together and the joy of ironing it all off . . . there is something about seeing that image appear on the printer paper as the embossing melts. (It’s like watching the powder melt, only in reverse.)

This is another stamp that I picked up while browsing The Queen’s Ink, Damask by Judikins. The paper (which I got at the same time) is Natures Garden Collection from Prima. Sponging the inks over the image to match the paper was way too much fun!

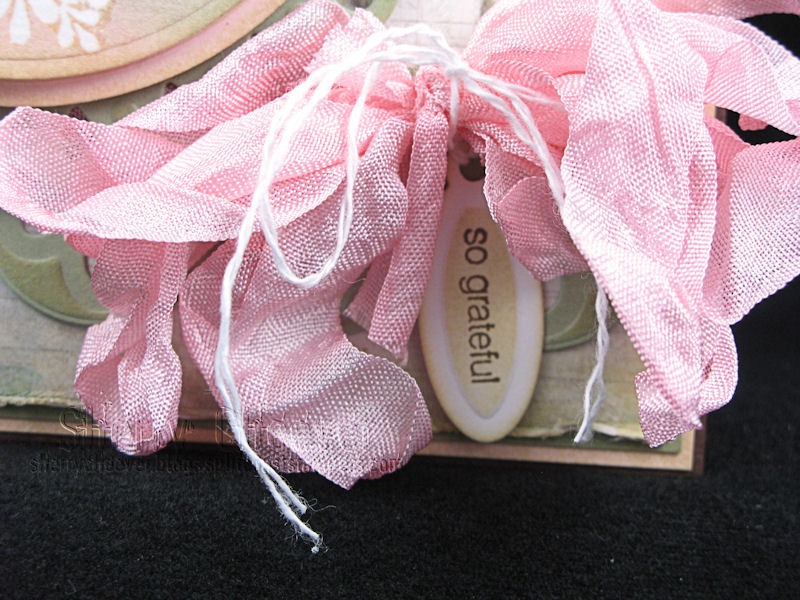
The sentiment, so grateful, is from a very old SU Hostess set that I dug out of my storage cabinet. I wanted a small sentiment for a small tag on the front of the card, leaving the inside blank for a handwritten note of thanks.

I’m off now to fight Mallory for my daily puzzles . . . she’s done them every day before I could get to the paper!
Thanks for stopping by and I hope you have a fabulous day!

Project Supplies:
|
|
|
|
|
|
|
|
|
|
|
|
|
|
|
|
|
|
|
|
|
|
|
|
|
|
|
|
|
|
|
|
|
|
Good Friday morning! When you are reading this, I’ll be at the doctor with Mallory hoping that we finally found out what is wrong with her. Bless her little heart . . . she just hasn’t felt well for so long and I hope we get some answers today.
In answer to a few questions yesterday, YES we were able to find out the grandbaby’s sex, but I am sworn to secrecy! There are a few men in the family who don’t want to know . . . . so we women have to remain silent and keep all our purchases hidden until the big day . . . which is, according to her due date, October 26. We get to add one more October baby to the family . . . that will make my aunt, me, Mallory and baby!
Did I tell you how much I LOVE The Queen’s Ink! The store is fabulous and so much fun to shop. Well YES I had to fill a basket! I found a few new stamps while I was browsing around, and I used one of them for today’s card.
Now this card is all about techniques. As you can tell, I’ve not grown tired of the Faux Batik yet . . . you might have, but I haven’t and I’m still playing. Actually when I saw this background stamp (Garden Background from Stampendous) that was the first thing that came to mind . . . Faux Batik.
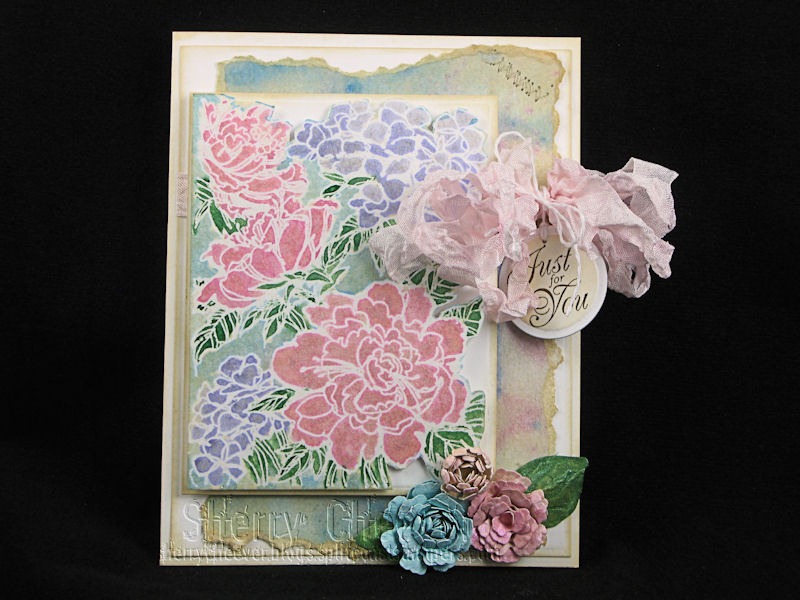
The image, the paper, the flowers and the ribbon were all colored with Twinkling H2Os. It’s been a very long time since I’ve pulled them off the shelf, so I thought – – why not? We are playing with techniques and all! Of course, the image was embossed in clear and then when dry the embossing was ironed away (Faux Bleach/Batik Technique). Colors of Twinks used were Apple Blossom, Fern, Sweet Lavender, and Caribbean Mist.
For the background (and because I couldn’t find just the right paper) I made my own by misting a piece of mixed media paper with water and then dumping some water from the Twinkling H2O cups. The paper was misted again and then dried with a heat tool.
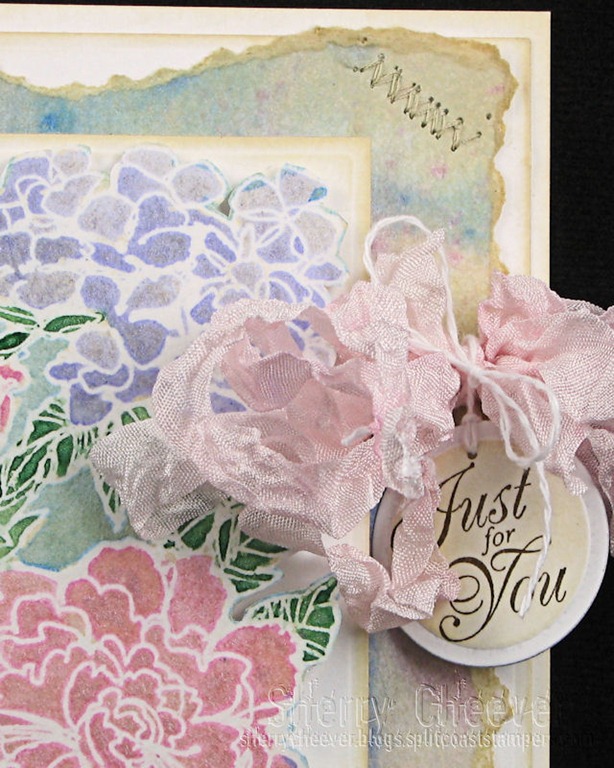
You can barely make out some of the shimmer of the Twinks on the papers. The seam binding was dyed by misting the pot with water then dumping it out on the craft sheet and misting the color with more water. They actually worked better than I thought.

Before the flowers were die cut, the paper was painted with the same Twinks. Can you see the shimmer on the leaves?
This is the image after it was initially water colored:
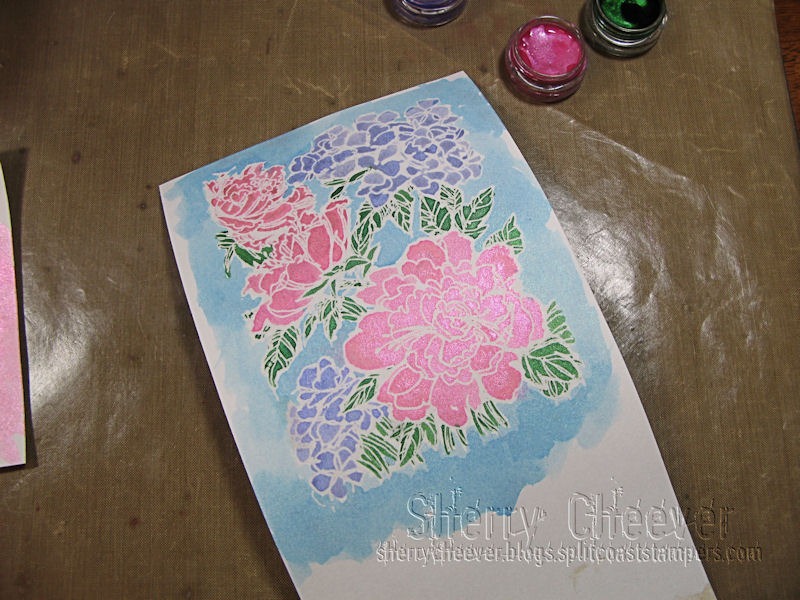
Pretty bright for me, so I added a light sponging of Antique Linen Distress Ink over the top to town it down a bit.
That’s all for now. Thanks for stopping by today and remember to enjoy the adventures that come your way!

Project Supplies:
|
|
|
|
|
|
|
|
|
|
|
|
|
|
|
|
|
|
|
|
|
|
|
|


