Happy Thursday!  I want to continue with the Alcohol Faux Bleach/Batik Tutorial today.  If you were at the Chicago or York Stamp Show, you saw me work with acrylic fragments and alcohol ink.  That is what I want to walk you through today.  I’ll also show you the finished project, which is a tag made with alcohol inks using the faux bleach technique.  I really think this one needs a different name, but I just haven’t settled on what.  I am leaning toward calling it – – – oh I don’t know!  It is a variation of the faux bleach technique that I have been playing with so it might as well be Alcohol Faux Bleach.

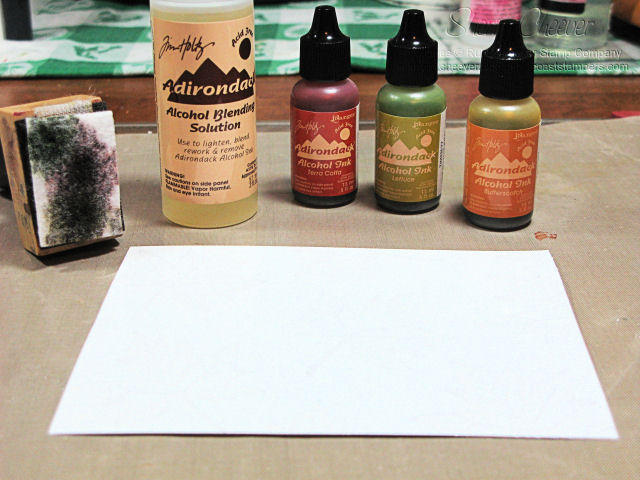
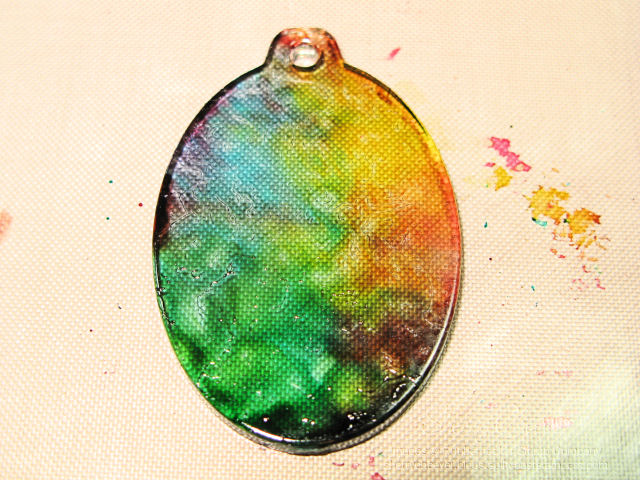
Let’s get started by inking up your felt applicator with the alcohol inks.  I have used cranberry, butterscotch and stream.

Fragment Ink Applicator

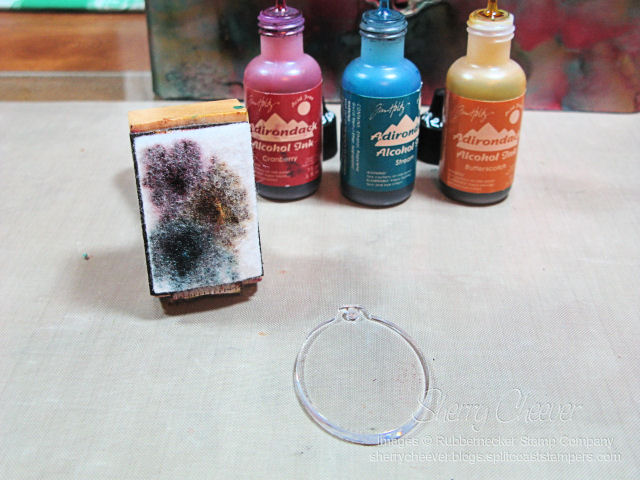
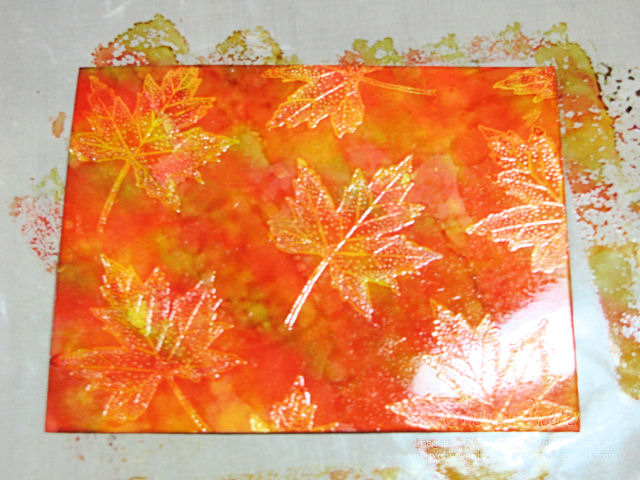
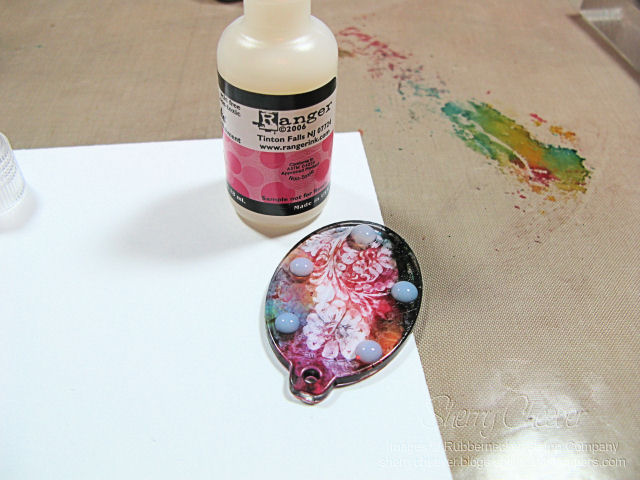
Apply the inks onto the fragment, letting the alcohol ink dry in between layers.  You will end up with a fragment that looks similar to this.  Let the ink dry thoroughly.

Fragment with Alcohol Ink

Choose an image (not words or sentiments) that you would like to stamp on your fragment.  Ink the image with a permanent black ink.  I have used Ranger Archival Jet Black.

Stamp Fragment with Black Ink

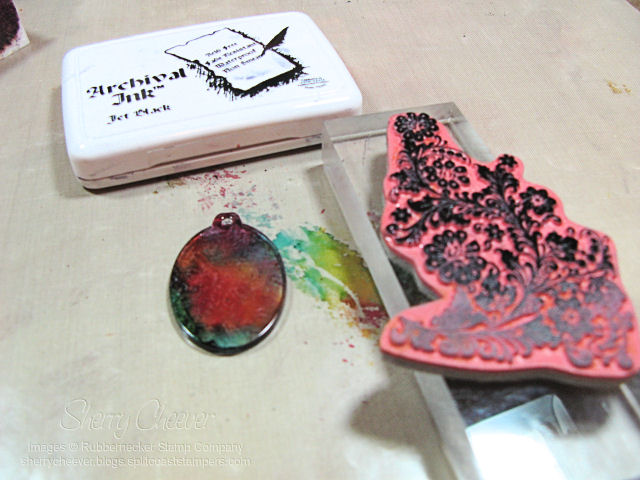
Stamp the image over the alcohol ink that you applied to the fragment.

Stamped fRAGMENT

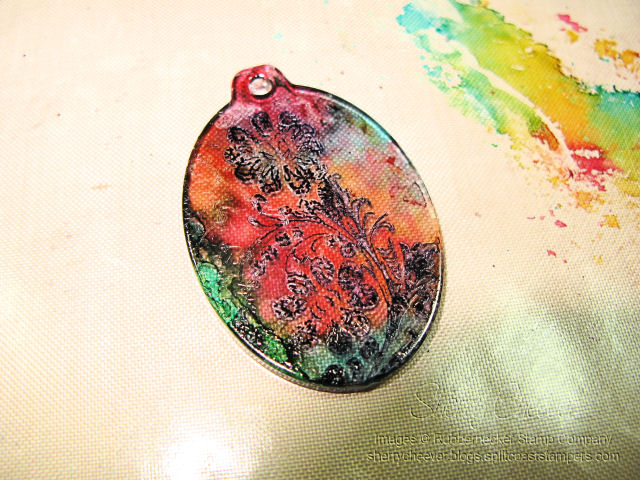
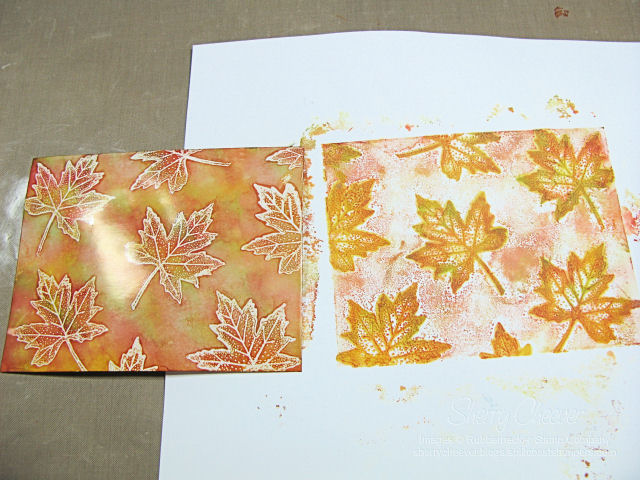
Using a gentle touch, immediately wipe the black ink off with a cloth.  You should now have a fragment that has a clear image of the one you stamped.

Wipe away Black Ink

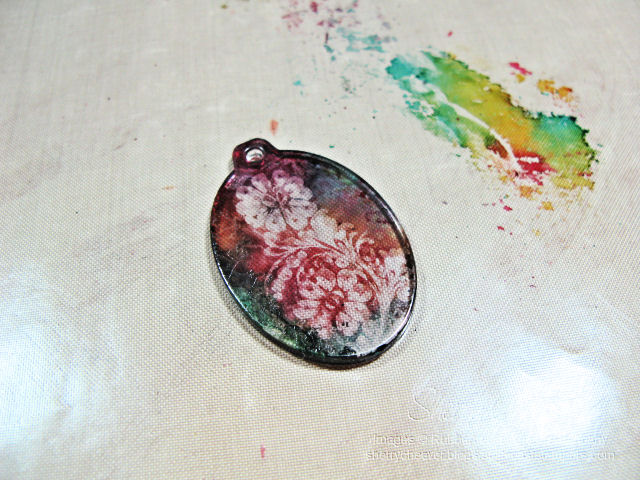
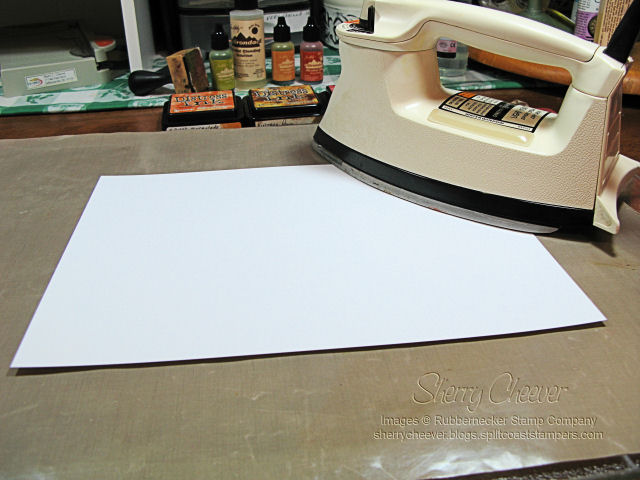
To highlight the stamped image, glue the fragment (alcohol ink side down) onto a white piece of cardstock.  I have used Ranger Glossy Accents as my glue.  It dries clear and very quickly.  (By the way, I applied more Glossy Accents than needed – it was way too much.)

Gluing Fragment

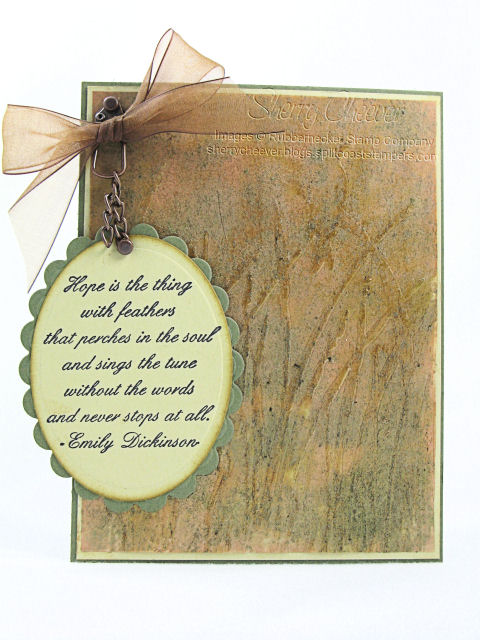
Trim the image and you will now have an embellishment ready to use on a card, or anything else you would like to use it for.

Completed Fragment

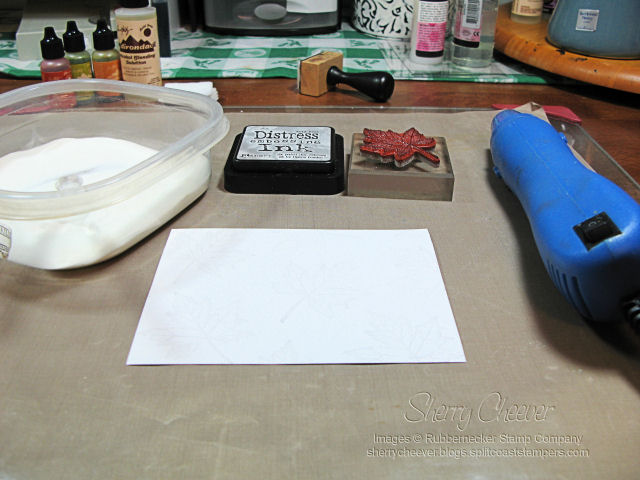
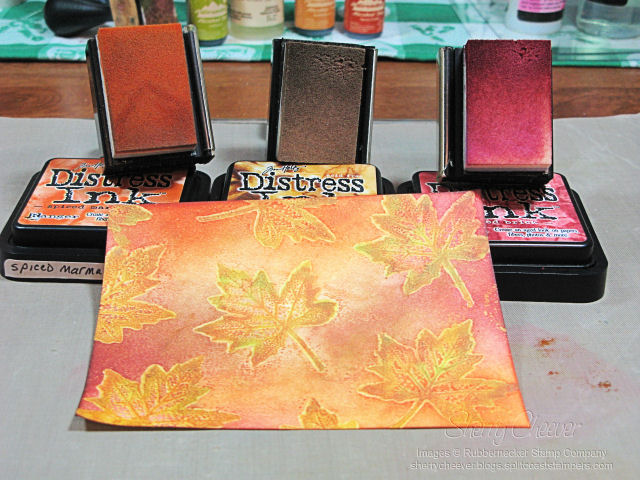
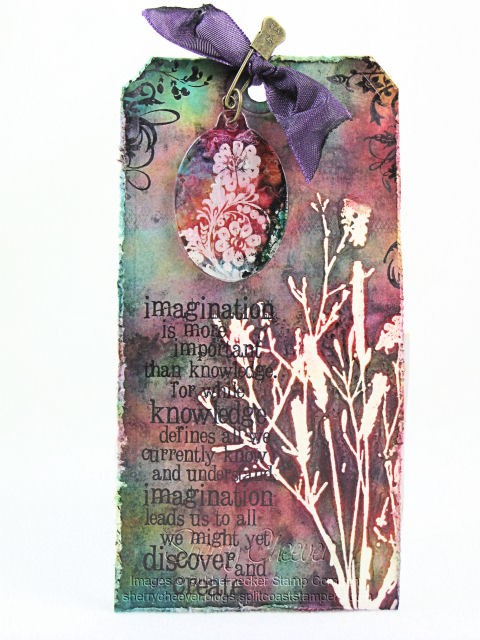
For mine, I used the fragment as an embellishment on a tag.  Using the faux bleach/batik technique described in the first installment of this tutorial, I created a tag using alcohol inks.  The tag, unlike glossy cardstock, absorbs the alcohol ink and gives an entirely different look than that of glossy cardstock.
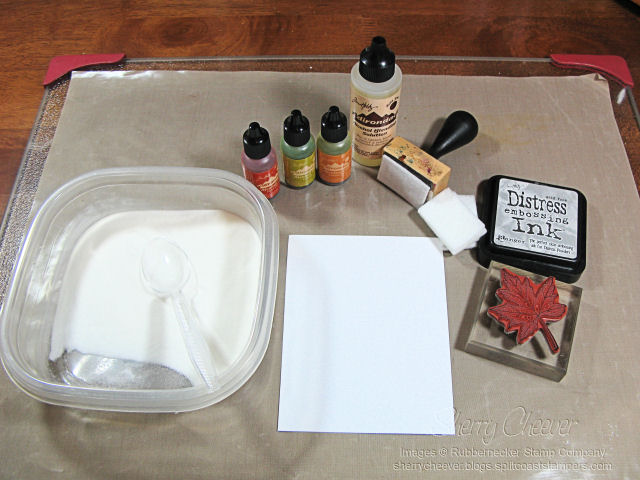
Complete Alcohol Faux Bleach Tag

Supplies used:

  • Stamps: Tim Holtz Nature’s Discovery by Stampers Anonymous from Rubbernecker Stamp Company
  • Paper: White Cardstock and White Shipping Tag
  • Ink: Ranger Archival Jet Black and Distress Embossing
  • Accessories: Ranger Cranberry, Butterscotch and Stream Alcohol Inks, Ink Blending Tool and Felt, Glossy Accents, Alcohol Blending Solution, Clear Embossing Powder; Tim Holtz Idea-ology Oval Fragment and Trinket Pin; Heat Gun; Iron; Ribbon; Tonic Tim Holtz Distress Tool

I can’t wait to see all of your alcohol ink projects!

Good Tuesday morning!  Wow what a whirlwind of a weekend I had.  I’m still dragging a bit, but there is so much to tell you today!  First, let me say how exciting and fun it was to work the Rubbernecker Booth at the York Stamp Show this past weekend.  I got to meet so many Splitcoaststampers, including fellow dirty girls Angie and Denise.  I was lucky enough to have lunch with Angie and have a change to sit and chat with her!  I have to say that it just makes my day when someone from SCS walks up to the booth and says hello!  Some of you I have chatted with online or seen your work and I truly feel like I already know you!  It just makes the entire weekend for me.  The next one I’ll be at is in San Antonio, Texas in a few weeks.

Now you know it’s Tuesday, and that means it’s Treasure Hunt Tuesday at RubberneckerSmiley from millan.net You can find sample cards of one of the prizes today on the Rubbernecker Stamps Blog.  You’ll also find a list of all the Design Team Members with their blog links so that you can hop around and visit them.  I have Blog Candy today, and will be giving away two $10 Gift Certificates from Rubbernecker.

Bucks

In order to win, all you have to do is leave a comment on this post.  No special questions today – I’m too tired to think of one!  I’ll pick two winners and post who they are tomorrow.

While working the show, I was demonstrating Ranger Alcohol Inks.  Part of the demo included an embossing technique.  While showing this technique to a group of women on Sunday, they were taking notes, trying to keep up with me.  I promised them that I would have a brief tutorial on my blog today, just for them!  So ladies, this one is for you.

The products you will need are: Ranger Alcohol Inks (I have used Butterscotch, Lettuce and Terra Cotta); Alcohol Blending Solution; Ink Applicator with felt; Embossing Ink; Clear Embossing Powder; Heat Tool; Iron; White Glossy Cardstock; Plain White Cardstock.  Stamps I used are from the Stamp Oasis Winter Holiday Collection Leaf Set SKU:868 869 870 SO.  All product and images from Rubbenecker Stamp Company.

Fresco Supplies

Stamp your image on the white glossy cardstock, cover with the clear embossing powder, and then heat set using your heat tool.

Fresco Clean Emboss

Apply the alcohol inks to your felt applicator by pressing in the point of bottle and give the bottle a good two second squeeze, allowing the ink to fill your felt.

Fresco #3

Begin pouncing the ink onto your embossed glossy cardstock, covering the entire surface.  To apply a second layer of color and blend the inks, apply a small drop of the blending solution to your felt, and go over your cardstock a second time.

Fresco #4

While the alcohol is still damp, lay your plain white cardstock over the top of the inked glossy cardstock, and then iron over your image.  Your iron should be set on high with no steam.

Fresco#5

Once you see the embossed image come through the top layer of cardstock, you are done.  Remove the white cardstock and you will have two backgrounds.  The background on the left is the original alcohol inked glossy cardstock (Faux Bleach and/or Batik with Alcohol Inks) and the background on the right is the Alcohol Fresco.

Fresco #6

Here is the fresco background trimmed and inked.  You can also leave the second background as it is for more of a fresco look.

Fresco #7

You can now make two cards with one technique.  My first with the Faux Bleach/Batik Background.

Fresco/Batik Background

The second with the Alcohol Fresco Background.

Fresco Card

I look forward to seeing your designs now!

Good morning!  I hope you all had an enjoyable weekend. I myself, did nothing – absolutely nothing.  I sat on the couch in my pajamas, took naps and watched movies . . .  Bliss I tell you, pure bliss!  Of course, I have to pay for those two days today.  I have errands to run, finish up some cards I should have done over the weekend – and post today, and begin preparations to go out of town.  This I what happens when you are lazy . . . too much crap to catch up on!

I did want to do a little fun stamping this morning, and checked in on the Try a New Technique Challenge on Splitcoast.  I have to say that since Lynn has taken over (no offense Beth), but the challenges really do test me!  Today’s challenge, Batik – The Colorwash Way, is actually the very same thing I’ve been doing, only calling it Faux Bleach.  The difference with today’s challenge is, however, that Lynn used watercolor paper.  Interesting!  I had to try it!  AND, it does give a different effect because the color wash soaks into the paper leaving a darker background.

Anyhoo, chores beckon, so here’s my card!

TLC188

I stamped the silhouette on watercolor paper and clear embossed.  Using Ranger Color Wash, I misted the image and then placed it between two pieces of printer paper.  With my iron set on cotton, no steam, I ironed the paper to remove the embossing.  To finish my card, I stamped Flannel Plaid (because it just goes with everything) on my background panels.

  • Stamps: SU Upsy Daisy and Flannel Plaid
  • Paper: Canson Watercolor Paper; SU Kiwi Kiss and Baja Breeze
  • Ink: Ranger Archival Jet Black and Tim Holtz Distress Embossing; SU Kiwi Kiss and Baja Breeze
  • Accessories: Ranger Clear EP; and Red Pepper, Stream and Butterscotch Color Wash; SU Scallop Punch and Ribbon; Spellbinders Petite Oval Nestabilities; Venture Foam Tape

Enjoy your day!

Happy Friday!  I have some exciting (well I think it is exciting) new today.  Yesterday Rubbernecker started a company blog!  Can you see me jumping up and down?  Smiley from millan.net I’ve heard from so many of you inquiring about the Rubbernecker Blog Challenges and if we were going to start them again.  Well, yes we are!  Only now they will be hosted on the RN Blog.  Not only will you be able to find the challenges there, but it will also be the place for tutorials, techniques, product info, our show schedule, and chats with the Design Team.  Please stop by Rubbernecker Stamps – Company Blog and say hi!

Because I worked all day yesterday on the blog and other matters, I didn’t have time to stamp.  I started down to the studio this morning when my phone rang.  Kate was having car problems – MOM to the RESCUE!  See, they still need us even when they think they don’t!

I was intrigued by the Limited Supply Challenge on Splitcoast today, and needed to play along.  The object of today’s challenge to create a card using a technique with only paper, ink and stamps.  I took that to mean no acrylic paint, embossing powders, fancy sprays, etc. – just ink!  To make things even more interesting, while having my daily blog fix this morning, I saw Beate’s weekend sketch challenge.  I’ve never played along in Beate’s challenges and today just decided I needed a little fun.

Anyhoo, here’s my card today.

LSC185

I decided to make the larger panel in Beate’s sketch the image panel, even though Beate used designer paper in this area and she also made the small panel her image.  Brilliant actually!  To make the background, I took out my Ranger craft sheet and down the center I swiped three ink colors directly from the pad, Mustard Seed, Broken China and Fired Brick.  I then misted the ink swipes with water until beads started to form on the craft sheet.   Taking my piece of white paper, I laid the paper down in the middle of the ink and picked it right back up.  I then dried the paper with a heat tool.  This step was repeated until I had picked up most of the ink from the craft sheet.  It is important however to the paper dry between adding layers.  This adds interest to the background.  By the way, the sentiment panel was created the same way.  After creating the background, the images were stamped and more color was added to the edges using a blending tool.  For more interest I distressed the edges, and then stitched the panel to the actual card base.

  • Stamps: Sentiment and Tim Holtz Nature’s Discovery by Stampers Anonymous from Rubbernecker Stamp Company
  • Paper: Neenah Classic Crest Solar White; Scrapperdashery Love is Patient; SU Barely Banana
  • Ink: Ranger Tim Holtz Mustard Seed, Broken China, Fired Brick and Dusty Concord Distress, Archival Jet Black and Coffee
  • Accessories: Ranger Craft Sheet, Mini Mister, Inkssentials Blending Tool; Venture Foam Tape; Sewing Machine; Tonic Tim Holtz Distress Tool; Ribbon

Have a great day!

I was going to say Happy Monday, until I sat down to write this post.  Then I changed my mind.  Okay it still is a happy day, just a little frustrating.  I use a 2.0 GB card in my camera, and for some reason the card won’t work correctly in my laptop.  It always wants to reformat.  So to solve that problem I use a cable attachment on my camera direct to my laptop.  Sometime between Friday and today, I have lost the darn cable.  Now it could be downstairs, since that’s where I was working Friday and did nothing else over the weekend.  I did move some things around for Stamp Club on Saturday . . .  But darn it all I wouldn’t have moved the cable!  I finally found an old memory card in one of the other cameras that I used to retake the pictures of today’s card.  Okay that issue was solved, but I get so upset with myself when I misplace something like that.  Oh it’s here in the house somewhere . . . and I suppose one day I’ll run across it.  Thank goodness that I took some time last week and moved some pictures off that 2.0 GB card to my flash drive.  At least I hope I did!

Let’s talk stamping.  I so wanted to do today’s Try a New Technique Challenge on Splitcoaststampers today, but didn’t have the Lumiere paint that was called for.  After I read Shelly’s post today, I decided to work with a substitute.

TLC185

What I had on hand were the Ranger Paint Dabbers, and luckily I had a copper one that would have the shimmery effect of Lumiere.  To the copper paint I added a drop of Peeled Paint Reinker and using a brush, stippled the paint mixture onto a piece of acetate.  While it was still wet, and wanting a bit more of a patina finish, I stippled on Green Patina Perfect Pearls.  Once the paint had dried, I ran the acetate through the Wizard using the Cuttlebug Bird Call Embossing Folder.  I attached acetate to the card front by placing a drop of Ranger Matte Accents in each corner.  The sentiment panel was hung from the corner of the card using Tim Holtz idea-ology embellishments.

  • Stamps: Rubbernecker Garden Collection With Out Words Text SKU:49-05 from Rubbernecker Stamp Company
  • Paper: Acetate; SU River Rock and Always Artichoke
  • Ink: Ranger Peeled Paint and Vintage Photo Distress, Copper Paint Dabber
  • Accessories: Tim Holtz idea-ology Swivel Clasp and Long Fasteners; Spellbinders Classic and Scalloped Oval Nestabilities; Cuttlebug Bird Call Embossing Folder; Ranger Green Patina Perfect Pearls; Tsukineko Sponge Dauber; Ranger Matte Accents; Stipple Brush; Ribbon

Hope you have a great afternoon!

© 2015 Suffusion theme by Sayontan Sinha