Good morning and welcome to Day 7 of the Spellbinders™ Sneak Peek and Giveaway!  I hope you’ve enjoyed the sneak peek so far and you’ve found some wonderful inspiration over the last 6 days.  I know I sure have!

I had such fun working on my projects for the Sneak Peek and thoroughly enjoyed stepping outside my box to work with mixed media on altered projects.  For both of my projects I used beeswax  . . . way too much fun.

Project Supply List:

  • S5-178 Arched Windows One
    EL-027 Numbers and Letters M-Bossabilities
    LF-132 Grand Rectangles
    Grand Calibur

    All new products shown in the Sneak Peek can be found in the “What’s New” section of the Spellbinders Online Store!

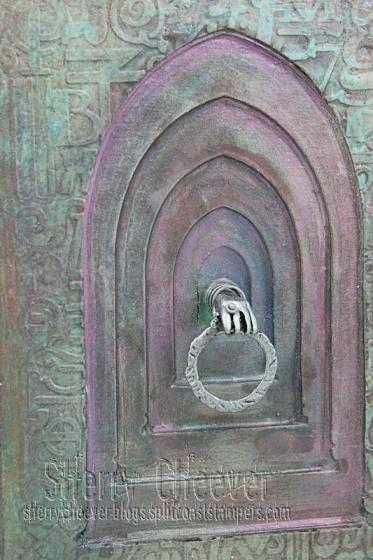
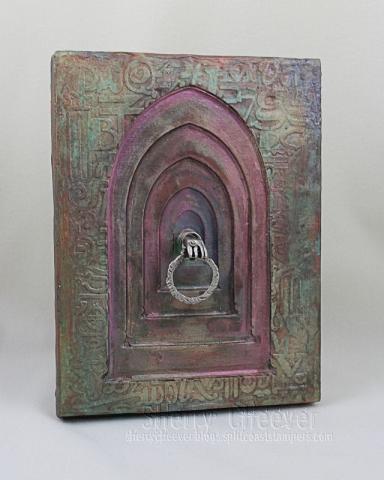
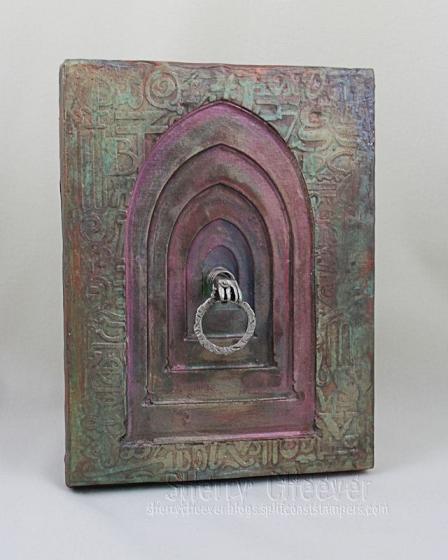
My first project is constructed completely from chipboard and covered in beeswax and Perfect Pearls.

SCheeverGothicAltar MYCOPY

During a shopping trip at Michael’s, I found that fabulous dangle hand charm from Industrial Chic by Susan Lenart Kazmar.

SCheeverGothicAltar CLOSEUP CENTER MYCOPY

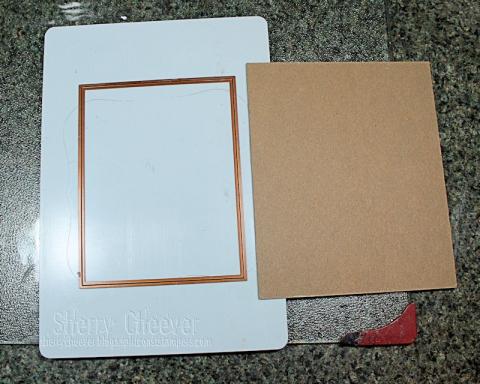
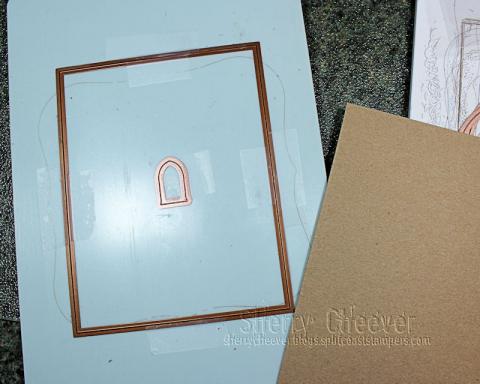
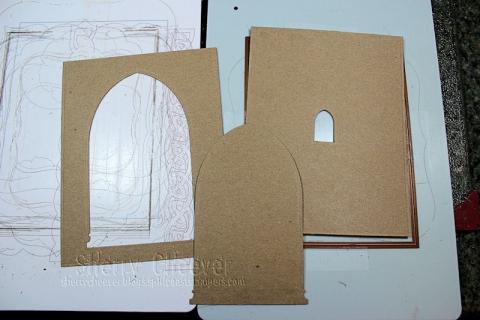
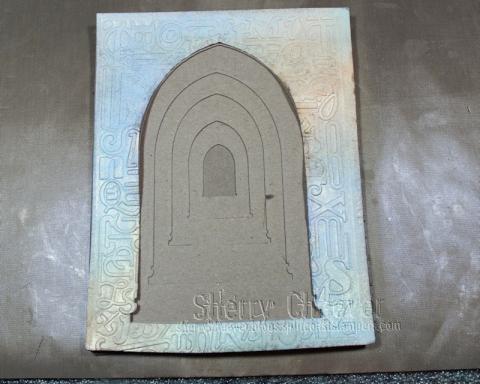
My project was created using .22 thin chipboard – three pieces die cut and glued together for each recessed layer.  For the purposes of the tutorial, I will only be using 1 piece.  If you wish to try your hand at this project, to get the depth I created, you will need to die cut 3 individual pieces and glue them together to make one layer.  Spellbinders die templates very easily cut .22 thin chipboard; however, medium weight and thicker requires a little more effort.  I say this because the backing to the piece is actually medium weight chipboard that I die cut with LF-132 Grand Rectangles Nestabilities®.

STEP1

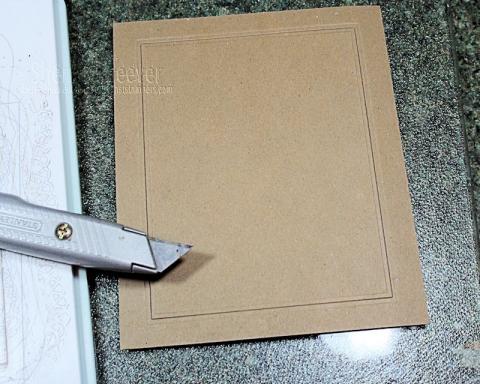
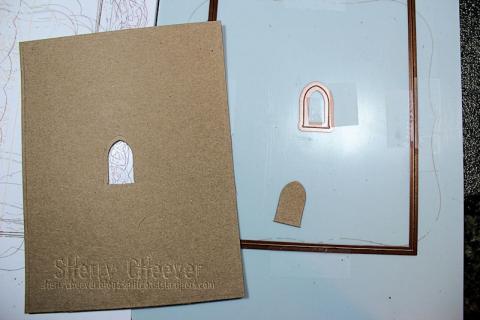
As you can see, the die does not cut all the way through the medium weight chipboard; however, you do get a very detailed cut that you can complete with a simple mat knife or cutting blade.

STEP2

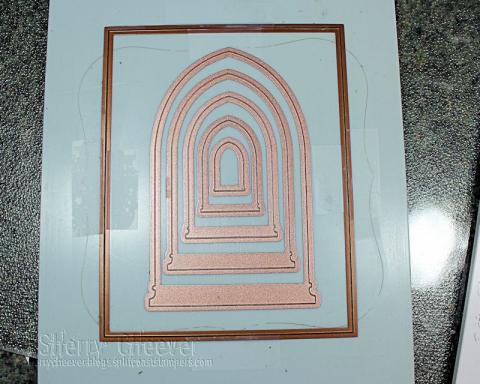
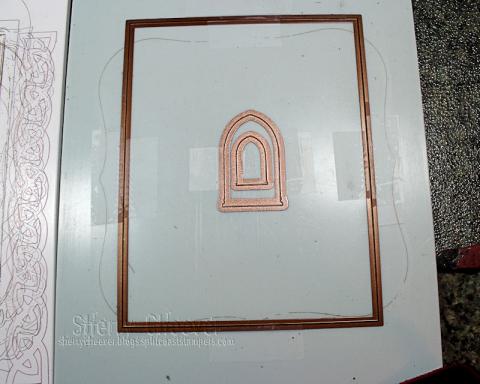
To align the dies for the different layers, the Grand Rectangle was taped in place.  I recommend taping all four sides, inside and outside, to keep the die from slipping with repetitive cuts.  All five dies from S5-178 Arched Windows One were placed inside the Grand Rectangle, centering them as you want.

STEP3

Once the placement of the smallest die has been determined, tape the die in place as you did the Grand Rectangle.

STEP4

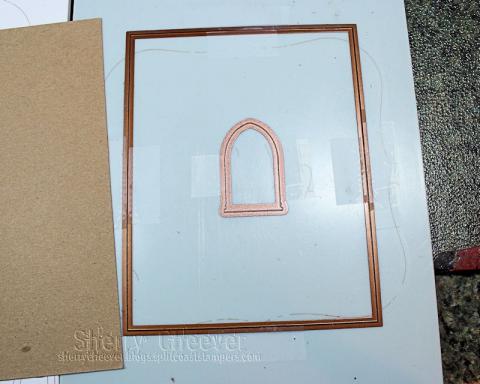
You can now die cut the thin chipboard.  Remember that I’m only showing your one piece of chipboard.  For my project, I die cut the same die arrangement three separate times.  All three pieces were then glued together to form one layer.

STEP5

The next larger die was placed around the smallest, for the next layer to be die cut.

STEP6

You will continue in the same manner as described above until you have cut all the different layers.

STEP7

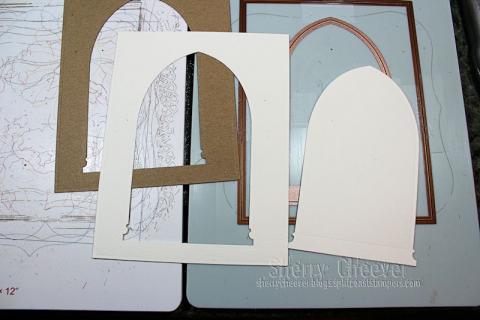
Here you can see the difference from the largest to the smallest die template.  I also saved all the Arched Window die cuts to use on another project.

STEP8

While the largest Arched Window die is still placed within the Grand Rectangle, I die cut a piece of watercolor paper to be used as the top layer of the project.

STEP9

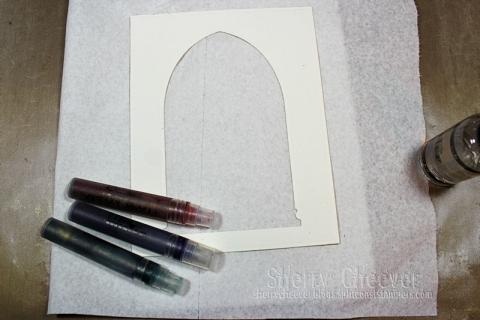
The die cut watercolor paper was then misted with water to open the fibers of the watercolor paper  . . .

STEP10

and then misted with a combination of Perfect Pearl sprays that I had previously mixed up.  You can use any type of ink that you want to color the paper with.

STEP11

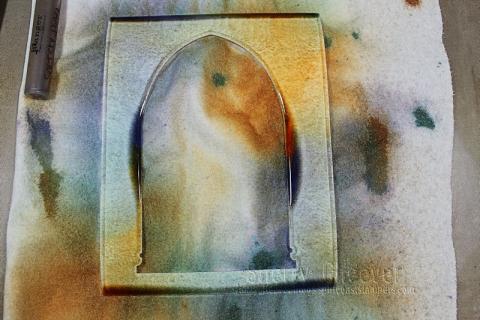
I like to use mists because while the watercolor paper is still damp, a deeper embossing is achieved.  Here I’ve placed the still damp watercolor paper in the EL-027 Numbers and Letters M-Bossabilities.

STEP12

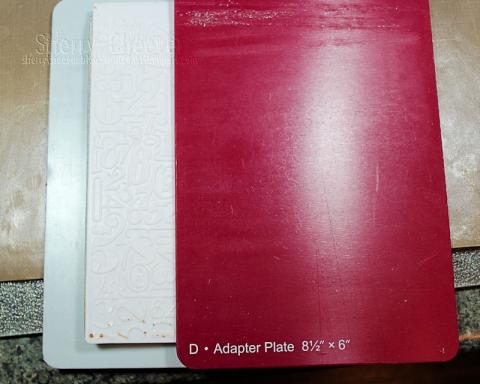
The sandwich for using M-Bossabilities is the Base Plate, M-Bossabilities with paper inserted, and then the Adapter Plate.

STEP13

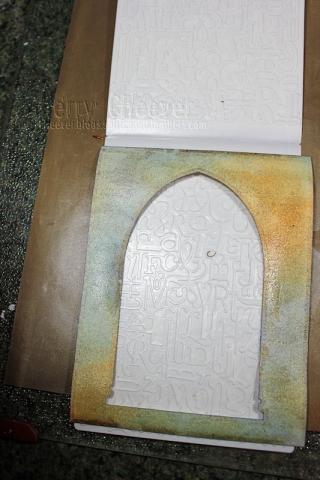
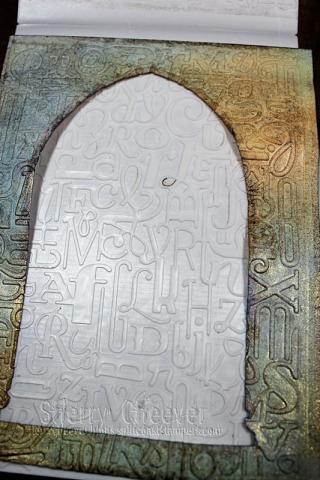
This is the watercolor paper once it has been embossed.

STEP14

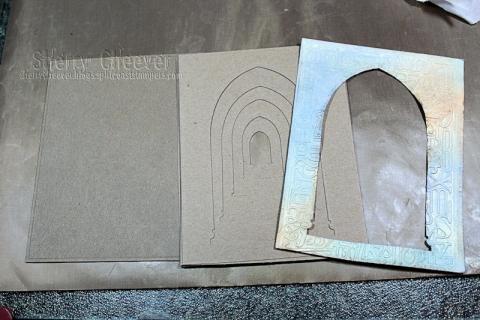
Here are all the different layers for the project.  Each layer, except the watercolor paper, can now be glued together

STEP15

To adhere the watercolor paper to the chipboard, I layered down three or 4 layers of beeswax before applying the watercolor paper.

STEP16

The remainder of the project was completed by adding layers of beeswax and different colors of Perfect Pearls.

SCheeverGothicAltar MYCOPY

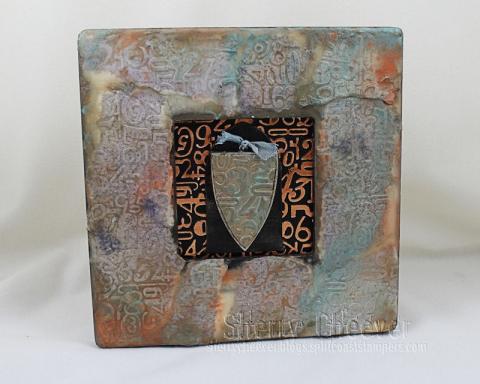
For my second project, I altered a $ frame from Michaels with beeswax.  I’ll give you more details on this project in a few days.

SCheeverBeeswaxFrame MYCOPY

Official Giveaway Rules can be found HERE.

Enter the Giveaway HERE!

Questions? [email protected]

No entries will be accepted at this email address.

Thanks for stopping by today and don’t forget to visit Candy Rosenberg’s blog today for another chance to win and more inspiration.

clip_image001

SHERRY SIGNATURE

I don’t know about you, but every time I type Little Darlings, I think of the song . . . Little Darlin by the Diamonds!  Just sayin!

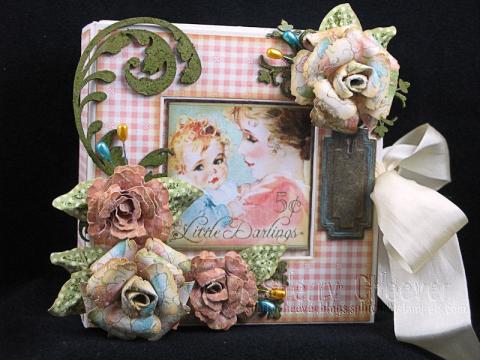
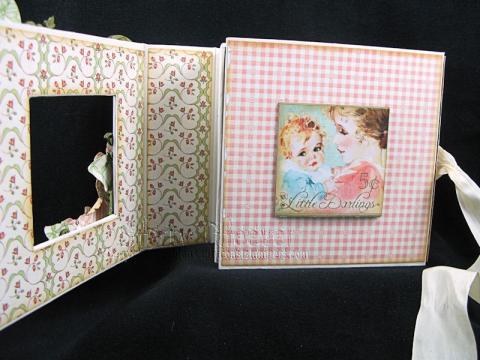
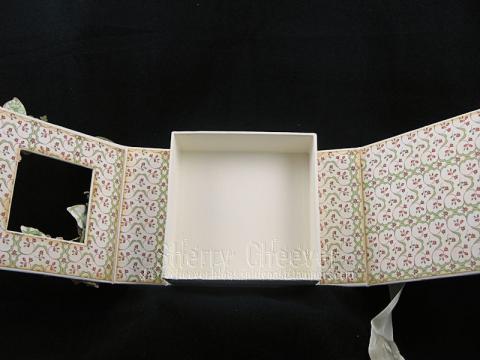
I have one final Graphic 45 CHA project to share with you today.  I’ve seen it all over the internet, so I might as well share it myself.  There were 2 items requested by Diane that we make . . . a tag and an altered container.   For my container, I chose to work with the 5×5 Kraft Board Box.

AlteredBoxCHA(4)

The front flap open

AlteredBoxCHA(4)HalfOPEN

I didn’t get the inside album finished for CHA, put I do have some ideas (and inspiration) now to finish that up.

AlteredBoxCHA(4)OPEN

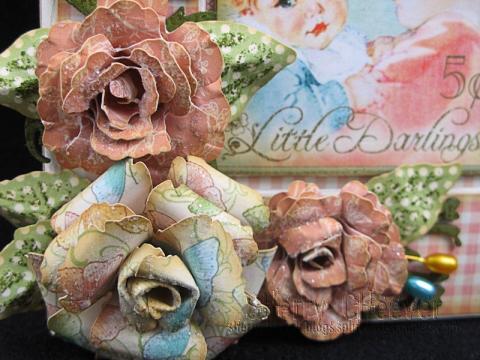
Of course, it wouldn’t be one of my projects with out flowers . . . oh how I LOVE flowers!

AlteredBoxCHA(4)CLOSEUPFLOWERS

To add balance, a flower on the upper right corner.

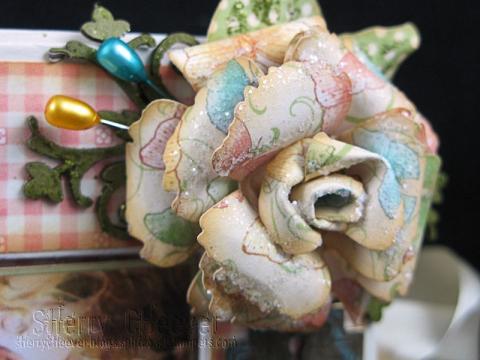
AlteredBoxCHA(4)CLOSEUPTOP

One thing I learned when working on this, don’t cover the entire box in paper . . . the magnets don’t work . . . thus, the reason for the ribbon tied off to the side.  I needed something to keep it all closed and the metals tags were used to hold the ends of the ribbon in place.

That’s all for today, except to say . . . thanks for stopping by and remember life is short, enjoy the adventures of your day!

SHERRY SIGNATURE

Project Supplies:

Good morning!  Well, I’m finally home after 3 weeks of traveling.  After I came home from the cruise, I had one more weekend of traveling to a sorority meeting.  If I can get my butt in gear now, I’ll be spending some time in the studio.  Of course, it’s still a mess from CHA projects and the Christmas decorations are still in the middle of the basement (and Mallory’s room and the studio) that need to be put away . . . the storage closet is in my studio, so I’ve been putting everything off.

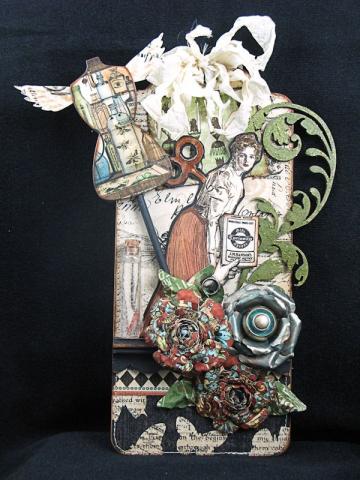
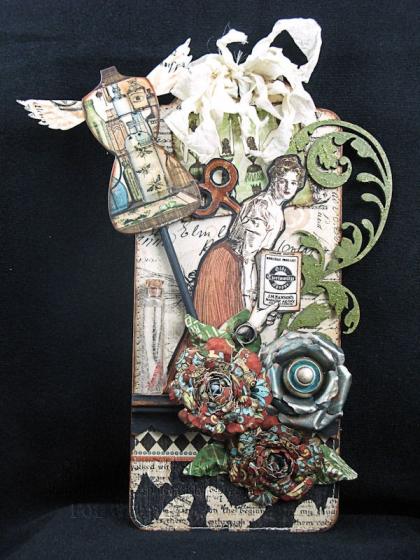
Anyhoo, today on Graphic 45 Blog they are showcasing some tags that were made by the Design Team for CHA.  Mine is there today along with Gloria Stengel’s, who has an excellent tutorial to go along with her.  Hop on over and check them out.

OldeCuriosityShoppeTAGSherryCheeverCHA(3)

You’ll find a complete supply list along with other pictures on the Graphic 45 Blog.

Well, that’s it for me today.  Thanks for stopping by and spending a little bit of time with me!

SHERRY SIGNATURE

Happy Wednesday!  I’m home from CHA and so tired, but I’m still chugging along.  Today I unpacked, started laundry, did some repacking and then did some last minute shopping for my Smiley from millan.net

I didn’t take many pictures at CHA, mainly because I was running around from meeting to meeting.  I never even pulled my camera out of my bag . . . I grabbed the cell phone each time and took just a few.  HOWEVER, I’ve borrowed a few photos from some friends.

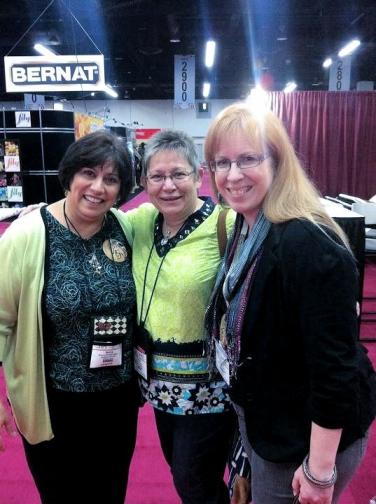
Here I am with Nancy Wethington and Laura Denison at the Graphic 45 booth.

I was so thrilled to finally meet these girls . . . I’ve admired their work for a long time!

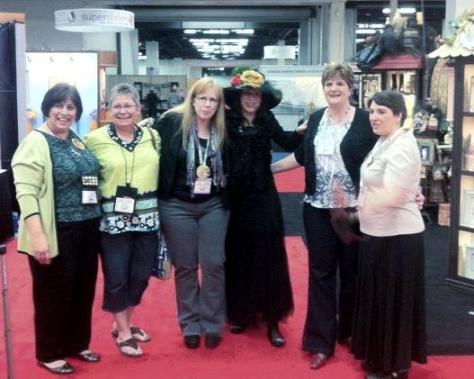
Here we all are with Diane!  That’s Gloria Stengel and Jane Tragenza on the right.

We had a G45 Dinner that night and we all gathered outside the restaurant for a group photo.  It’s a little blurry, but it’s the best I could find.  Jane’s son took a number of photos, so hopefully I’ll have another to upload.

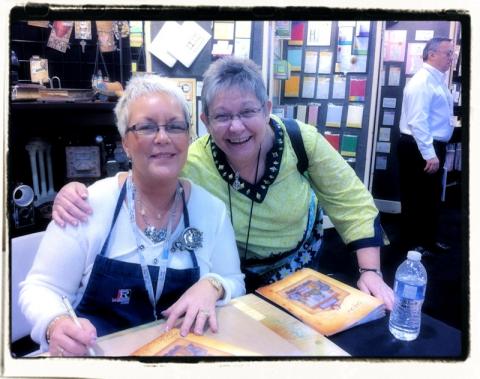
CHA is not CHA unless I can spend a few minutes catching up with Wendy Vecchi.  Here we are at her book signing.

I’ll be gone for the next week or so, but I’ll try and post a few updates  . . . if I can.  While I’m away, let me leave you with these thoughts . . . CHA was fabulous for new adventures and things to come . . . there will be some big changes and announcements coming to the BAD Side over the next few months.  I think I can probably share this one now, because I’m over the moon excited . . . I’ve scheduled a weekend of classes at The Queen’s Ink!  YES, I will be teaching some classes with the Queen!  There will be more info on this later . . .

Thanks for stopping by and remember . . . life is short, grab onto the adventures of the day!

SHERRY SIGNATURE

Good morning!  I just got in from my Graphic 45 dinner and while I’m packing up to leave in the morning I remembered that I have one final project to share.

This is one I did for Graphic 45 and also one of my favorites.  We were challenged to make a tag from the Staples packaging and this is what I came up with, using the packaging from the Metal Doorplate.

CHATag(3)

I need to cut this short, but I’ll be able to post a little more when I arrive home.

Thanks for stopping by!

SHERRY SIGNATURE


Project Supplies:

© 2015 Suffusion theme by Sayontan Sinha