Smiley from millan.net Good morning! I hope y’all had a great day yesterday and got to enjoy the great weather . . . if you HAD great weather where you are. I’m a warm weather girl (hence the dream of a private island and cabana boys Smiley from millan.net) and spring and summer are always my favorite time of the year.

I started working on today’s project late yesterday afternoon. Actually I got so involved in what I was doing, that when my cell phone rang at 6:30 is startled me. It was Mallory calling to let me know that dinner was ready! She was upstairs, I was downstairs and she has been cooking dinner since she’s been home . . . can’t ask for anything better . . . . Healthy gluten-free meals that actually taste good! My job is to clean the kitchen after and guess what? I can handle that!

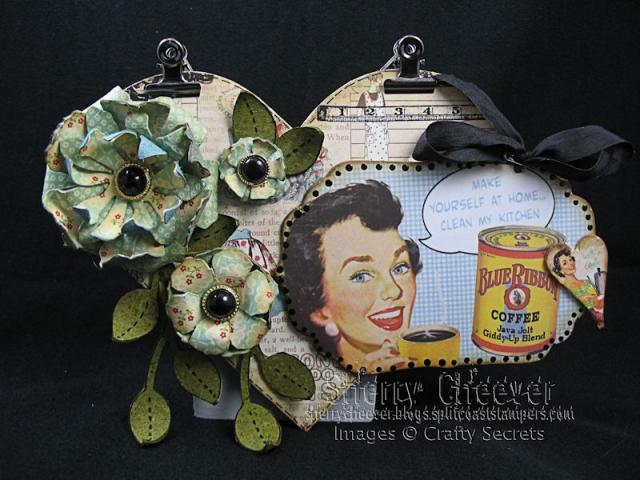
Okay, for today’s project. There was a little thought that went into this one. I knew that I was going to use the Kitchen Mail Postcard Kit, but wanted to mount the postcard on something else. Knowing that this would hang in my own kitchen because the image I picked to use said “Make yourself at home.” That is a standard phrase here in our house. I tell every guest to just make themselves at home and help themselves to whatever they need. I want friends and family to feel comfortable and welcome when visiting. In most homes, the kitchen is always the heart of the home . . . SO; I picked a heart chipboard piece to mount the postcard on.

SherryCheeverCleanMyKitchenMay24

This all makes sense to me but I’m afraid I might have gotten somewhat carried away. I was in such a zone that some of the things I added seemed right at the time and then when it was all said and done, maybe not so.

The flowers were made from The Thrift Shop papers and the heart is covered with the inside of the Domestic Goddess Creative Scraps. I worried so about where to place the heart on the Scrap so that certain images would show . . . DUH you can’t even see them now! To add a little interest to upper right side, I stamped the ruler from Crafty Secrets Hardware set. I punched my holes in the heart to close to the edge, so to solve my problem of torn chipboard; I added the clips to hold my chain.

That’s all for today folks! Thanks for stopping by and remember . . . life is short; take advantage of the adventures that come your way!

SHERRY SIGNATURE

Smiley from millan.net Good morning!  I hope everyone had a fabulous weekend.  After our storms on Friday evening, we had great weather  . . . sunny and warm.  Can’t ask for anything better than that.

I have to tell you after I came home from last weekend’s classes with Wendy Vecchi Smiley from millan.net, I feel so inspired and out of my rut.  It’s actually fun to go into the Studio and work  . . . it’s always fun, but now there’s a different element about it.   My project today is totally inspired by Wendy!Smiley from millan.net  It’s also for a fairly new Challenge Blog, The Shabby Tea Room.

Stamp Simply Ribbon Store is the sponsor for this week’s challenge and there are number of SSRS Designers participating today:

Sharon Johnson, Stamp Simply Ribbon Store
Michelle Woerner
Deb Saaranen
Sherry Cheever me
Barb Schram

Stop by their blogs and see what their take is on the Inspiration, which you can see at The Shabby Team Room blog.

Even though there’s tons of pink in the Inspiration piece, and I’m really not too much of a pink girl, I decided to go with the polka dots.  I didn’t make a card either but a chipboard wall hanging.

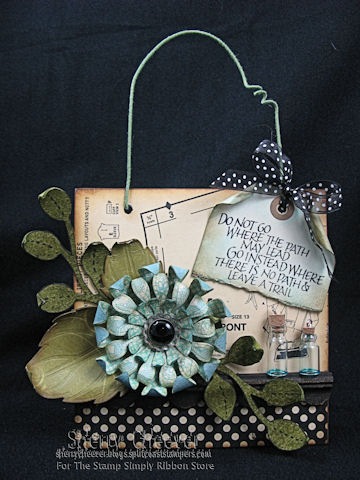
Here’s a small picture of the entire hanging.  One of the things I learned at Wendy’s Smiley from millan.net classes, was that florist wire makes perfect hangers for things like this and in this photo you can see how I used it.

 ShabbyChallengeMay24FULLShot


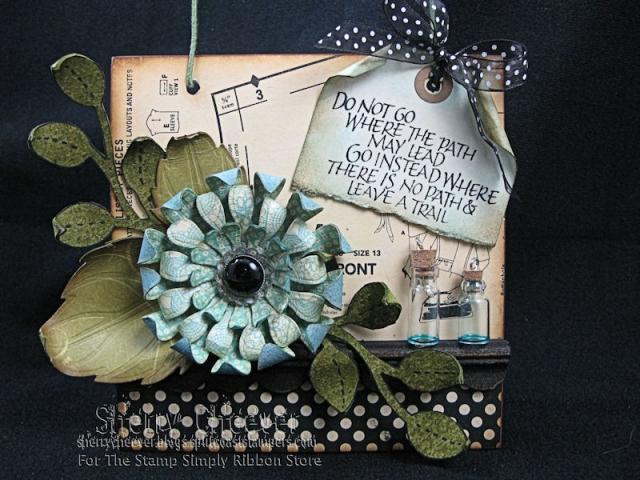
While browsing through Michaels last week, I was in the hobby wood section and saw these little shelves that could be painted and trimmed down.  Of course, this is another element inspired by Wendy Smiley from millan.net  and one I truly love!

ShabbyChallengeMay24


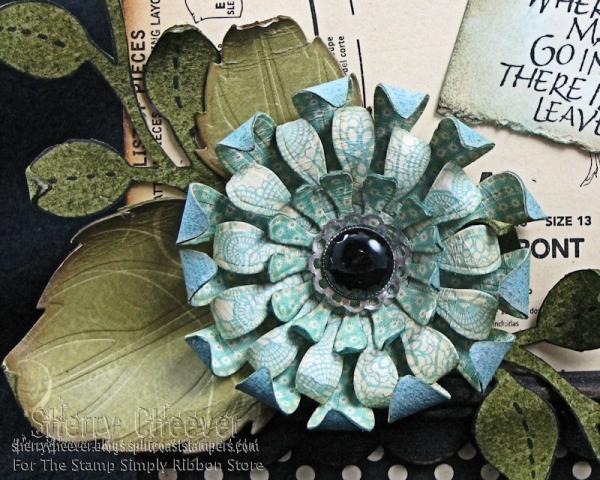
Instead of painting the wood trim, I used Distress Ink and painted on different colors.  It really is a great stain as well.  The flower is made with Grunge Paper which was covered with the Designer Paper first and then die cut with Spellbinders™ Sunflower Shapeabilities.  To me, this makes the Sunflowers look so different you don’t even know that it’s a sunflower.  LOVE IT!!!  The extra leaves are made from Grunge Board.


ShabbyChallengeMay24CLOSEUP

The center of the flower is an old clip earring that fell apart when I was trying to get the back off.  There were little black beads around the edge and the wires broke.  I started to look for another flower center and then decided that I liked the silver and black with the blue.

The sentiment is from a new line that Stamp Simply Ribbon Store is carrying, Rubber Sole/Wordsworth.  I can’t begin to tell you how excited I am that Sharon picked up this line of stamps . . . You’ll be seeing lots of new sentiments from me.

( * Product Available at Stamp Simply Ribbon Store) 

Thanks for stopping by today and sharing in my new found inspiration!  Wait . . . . it’s a new adventure  . . . yes, that’s it!

SHERRY SIGNATURE

ShabbyHopBanner

Good Tuesday morning!  I’m a tad excited about today’s Stamp Simply Ribbon Store Blog Hop . . . its shabby!  Oh yeah baby, shabby!!!!! 

Before I get into my project, there are a few things about the Blog Hop you need to know.  There’s Blog Candy . . . FABULOUS Blog Candy!

blue-awning-kit-440-370

AND

As a special addition to our Simply Shabby Blog Hop, The Stamp Simply Ribbon Store is pleased to feature ALL JUSTRITE PRODUCT on sale for 20% OFF, running for one week, until 8 a.m. EST, Tuesday, May 18. All prices shown in the store pages are FULL priced — your 20% discount will be reflected on your invoice. Email [email protected] to order. All JustRite products can be seen here.

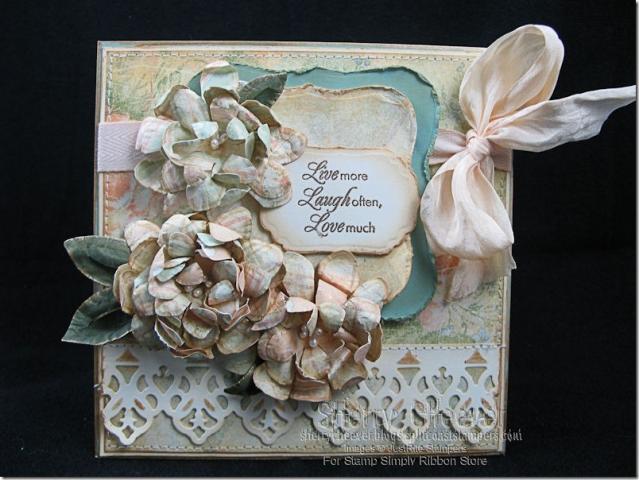
Okay here’s my project.  It’s not a card as the base of the project is illustration board.  You can have your pick on what you would want to do with it:  wall hanging, sitting in a decorative easel, frame it, etc., anything your little heart desires! More than likely I will end up sitting it a pretty gold easel!

May11ShabbyBlogHop

In essence, this is actually a card front that at the last minute I decided to make a panel.  To see how I made the flowers, you can see my video here.  Once the flowers were put together I misted them with water and Gold Perfect Pearls and then took the heat gun to them for some added dimension.  The edges of all the paper, except the flowers, are trimmed with gold paint.  Using Tea Dye Distress Ink and water, I dyed both the Twill and Silk May Arts Ribbon.  When I took the heat gun to the Silk ribbon, it scrunched all up and turned into this fabulous old looking ribbon!  Can I say that I absolutely LOVE it!

(*All Product from and available at Stamp Simply Ribbon Store)

Now that you’ve seen my Shabby Project, it’s time to visit all the other Stamp Simply Ribbon Store Designers.  Remember if you want a chance to win the Blog Candy, you should leave a comment here and all the other blogs.  We never know where the winner is going to come from . . . . Sharon has this system using Random.org and it could be any of our blogs!

Sharon Johnson – Stamp Simply Ribbon Store blog

Linda Duke

Sherry Cheever Me – You are Here

Deborah Saaranen

Michelle Woerner

Barb Schram

Holly McMillen

Thanks for stopping by and remember . . . life is short, take advantage of the adventures that come your way today!

SHERRY SIGNATURE


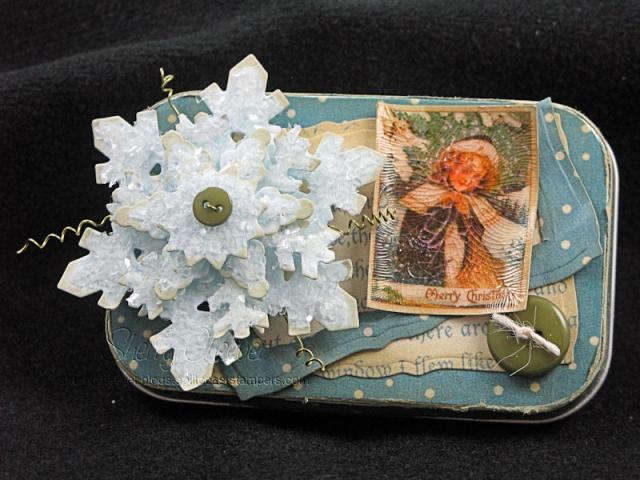
Here it is Saturday night, and I’m finally in the studio.  I had an idea for a gift tin, and wanted to see if I could make it work.  Some time ago I picked up a couple of the metal (altoid) tins at Archivers when they were on sale.  I thought I would use them business cards, but they are just the teeniest bit smaller than a business card.  However, they would be perfect for a gift card or money (everyone’s favorite gift)!

I was playing with snowflakes earlier in the week, and had an extra that I wanted to use an embellishment on the tin.  I found some Graphic 45 paper I thought matched and decided to cover one of the tins. 

Snowflake Gift Tin

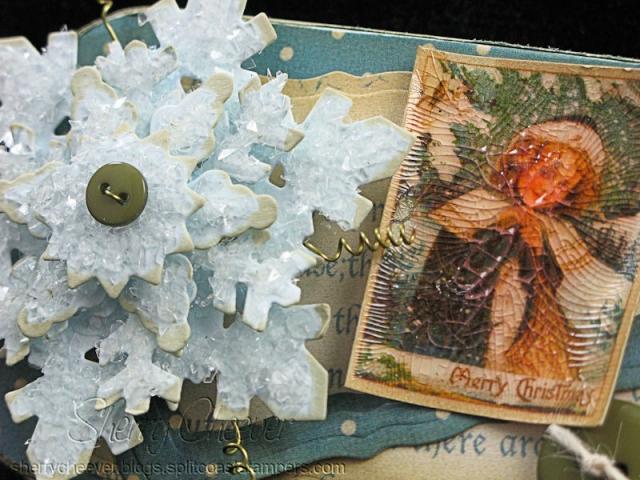
I found an image that looked snowy and covered it with Ranger Cracked Accents.  The flip side of the paper used to cover the tin was die cut/embossed with Spellbinders™ Curved Rectangles Mega Nesties.  For the fun of it and for some added dimension, I die cut/embossed a portion of a frame using the same Nesties™.

Here’s a close-up of the snowflakes and the image.  I love the effect of the Crackle Accent and of course you know I can never find enough uses for the Vintage Glass Glitter.

Snowflake Gift Tin CLOSEUP

You’ll be able to see more about these snowflakes on Wednesday.

  • Paper:  Prism Baby Blue Light; Graphic 45 Christmas Past Collection – The Night Before Christmas and Jolly Old St. Nicholas
  • Ink:  Ranger Old Paper Distress; Papertrey perfect match Fresh Snow
  • Accessories:  Spellbinders™ S5-006 Curved Mega Rectangles and S4-222 Create A Flake One; Tsukineko Sponge Daubers; Crafting Wire; Papertrey Vintage Buttons and Rustic Cream Button Twine; Ranger Glossy, Matte and Crackle Accents; Art Institute Krystallos Vintage Glass Glitter

I hope you enjoy the rest of your weekend, and thanks for stopping by.

WOW . . . it’s Smiley from millan.net!  Where is this week going?  Okay so maybe I don’t remember what I did during the first few days of the week . . .

Before I get started on my project for today, let me answer a few questions about the products I use.  I get my May Arts Ribbon from Sharon Johnson’s store, Stamp Simply Ribbon.  She told me last night if she doesn’t stock what you are looking for, she will special order!  All the Ranger product I use, including both T!m and Wendy’s stamps, can be found at eclectic Paperie.  Joy and Daisy are fabulous and so very helpful.  Everything is stocked and they have a quick turn around time.

Now I have a question for you!  Paper?  What do you use?  I have both SU and Prism and know that I won’t be purchasing any more SU.  That leaves the Prism which I find matches BasicGrey DP fabulously, but it is rather flimsy for a card base.  If you use Prism, where do you purchase it?  I’m seriously thinking of switching over to Papertrey.  If you use the paper from Papertrey what do you think about it?

Now that all that is over with, questions answered and if I forgot any that you’ve asked, please let me know.   I try to answer each individual email you send, but sometimes it’s not always possible to get to them as quickly as I would like and then I forget to answer.

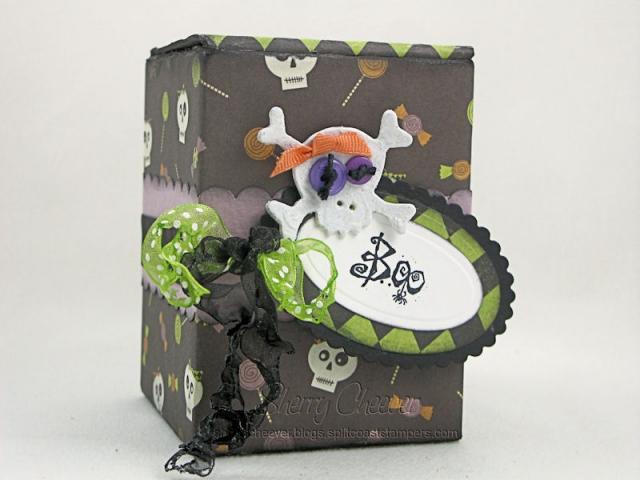
Now!  How many of you love the movie Hook?  It’s one of my favorites!  You know how there are certain scenes in movies that you always think of.  Like in the Color Purple, I will sit and watch the entire movie just to see Shug Avery walk her stuff down the road to the church, singing God’s Trying to Tell you Something.  I LOVE that scene!  In Hook, it’s the boo box!  When Glenn Close is placed in the boo box and the look on her face  . . . well it just slays me every time!  So, since it’s that time of the year for Halloween (which is one of my faves to decorate for), I’ve made a Boo Box!

I bought a candle not too long ago that was in this fabulously sturdy box and the lid slides down inside.  I kept the box thinking it would come in handy at some time or another.  While I was making Halloween cards, and thinking about the girls, I decided that treat boxes might be in order.  It will be so easy to slide some the girls fave chocolate in this box!

BooBox

I had one sheet of Lollipop Lizzy DP and used that covered the box.  All the edges were sponged with Black Soot Distress Ink.  I circled the box with a purple band and tied some ribbon.  I love watching ribbon melt, and used my candle lighter to melt the ribbon to give it a spookier look.  The boo label was die cut/embossed using Spellbinders oval nestabilities.  Since the paper had little skulls on it, I found a small grunge board skull, painted it white and then covered it with Rock Candy stickles.  Way too much fun!

  • Stamps:  Just Between Fiends
  • Paper:  Hallowhimsy – Lollipop Lizzy from imaginisce; White and Black
  • Ink:  Ranger Archival Jet Black and Black Soot Distress
  • Accessories:  Ranger White Paint Dabber; Spellbinders S4-141 Petite Scalloped Ovals – Small, and S4-138 Petite Ovals – Large; Tsukineko Sponge Daubers; Tim Holtz idea-ology Elements Grunge Board; May Arts Ribbon and twine; Scalloped Border Punch; Buttons; Candle Lighter; Foam Tape

Oh my gosh, I’m done and it’s time to start my day!  It’s not like I didn’t get up at 4:30 this morning.   I’ve already folded one load of laundry, put in another, written this post, and took the photos.  Anyhoo, have a fantastic day and thanks for stopping in!

© 2015 Suffusion theme by Sayontan Sinha