Good morning!    Well, I did get my stitches out yesterday morning and I have to say . . . I hope it looks better than it does in 6 weeks.  That’s when I have to go back for my next check-up.   I had an allergic reaction to the Polysporin I was using, and it’s still a little red.

The Making Art! Challenge on the Everything Wendy Vecchi Yahoo Group this week was to make an ATC.  I finally found some time yesterday afternoon to participate.

MakingArt#41ATC

Instead of using the typical paper ATC, I used one of the Studio 490 ATC Art Parts.  That background color is the new color Peacock Feathers from the Spring Seasonal release of Distress Inks.   The scallop trim was painted black and then the Maya Road Chandelier Trinket Pins were hung with black Artistic Wire.    The gloves (from Dress Forms and More) were colored with Barn Red and then over-stamped with Snow Cap Pigment.  That’s also Snow Cap Pigment on the background.

For some reason I thought it was “clever” to add hands and “eye”glasses along with the sentiment that talks about “body parts”.

Anyhoo, that’s all for me today.  Join me tomorrow for my day in the Quietfire Design Blog Buzz!

SHERRY SIGNATURE

Project Supplies:

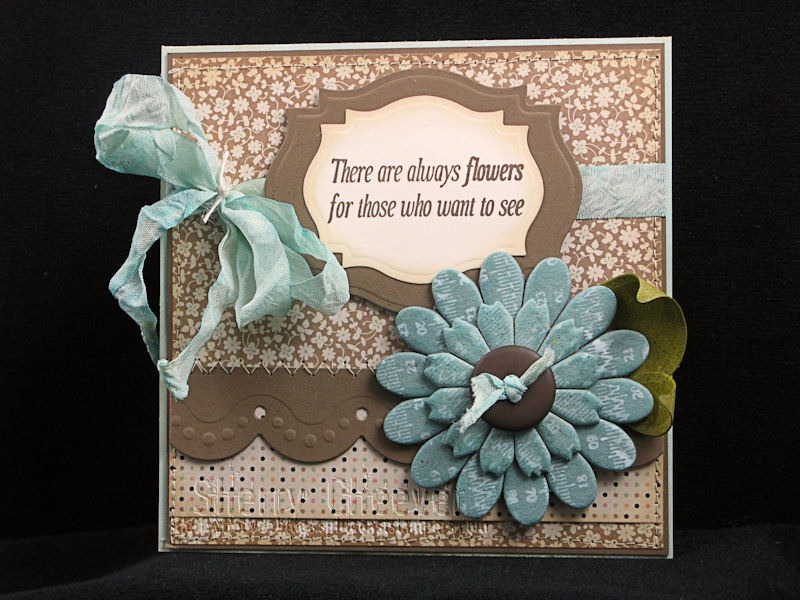
Happy Thursday!  I’ve been to the gym, got a haircut, had the car washed and then an oil change . . . AND . . .  finished my project for the challenge over at the Everything Wendy Vecchi Yahoo Group.

It’s been a long time since I’ve had the time to participate in a challenge over there, and they are already up to No. 40.  This challenge is to use the Cracked Glass technique and at lease one Studio 490 stamp.

Now this project has been a work in progress for some time.  It took the challenge to make me finish it up and get going.

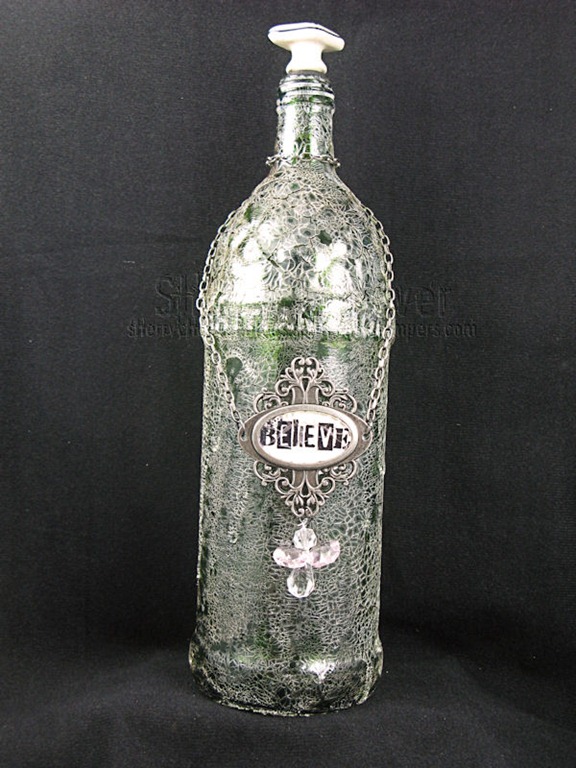
The entire project started with an old bottle of Noni Juice.  I still have a couple of them around (mainly to fill up my wine rack) and thought that one of them would make a great cracked bottle.  I dumped the contents down the drain . . . instead of drinking it . . . and rinsed the bottle well, removing all the labels, etc.

Crackle Bottle

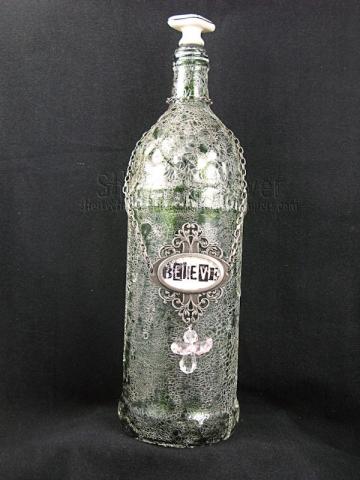
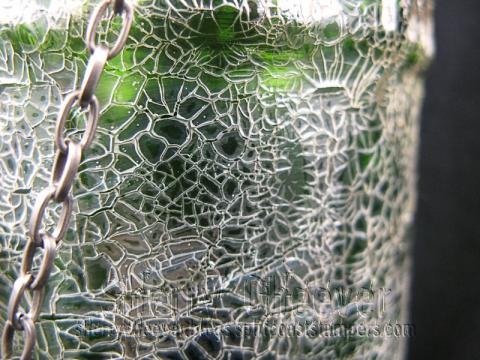
The bottle was first covered with Ranger Glue n’ Seal (matte finish) and left to dry for a day or so.  After that, I literally poured Rock Candy Distress Crackle Paint along the top of the bottle, letting it drip down the sides.  I did brush some of it around to make sure all parts of the bottle were covered.

Crackle Bottle CloseUpCracks

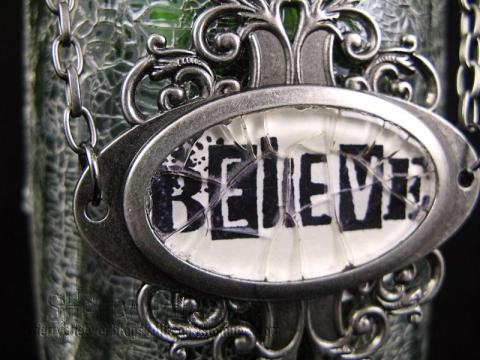
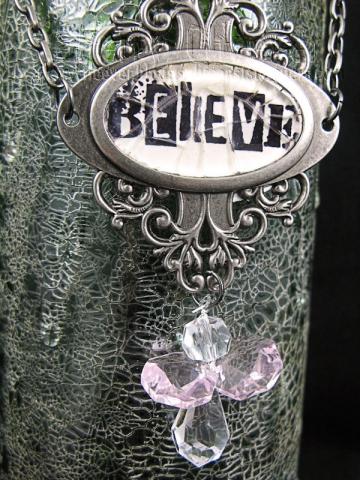
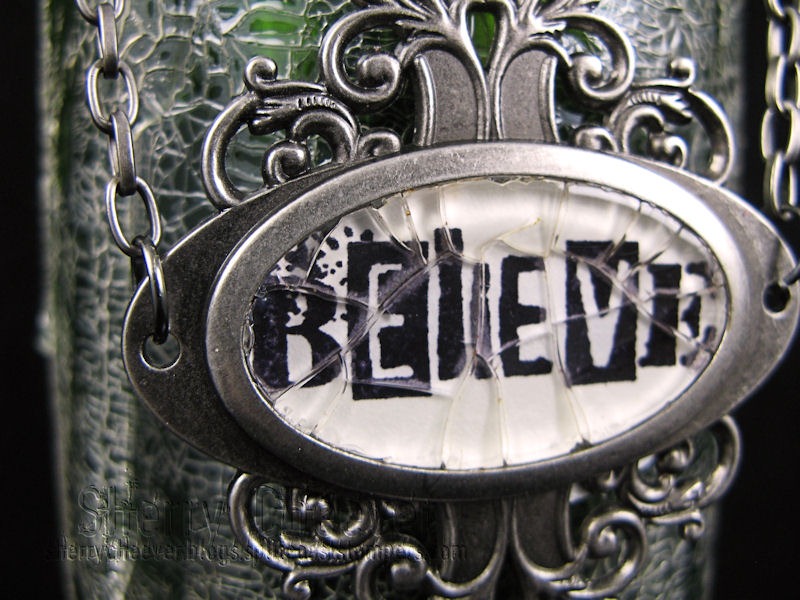
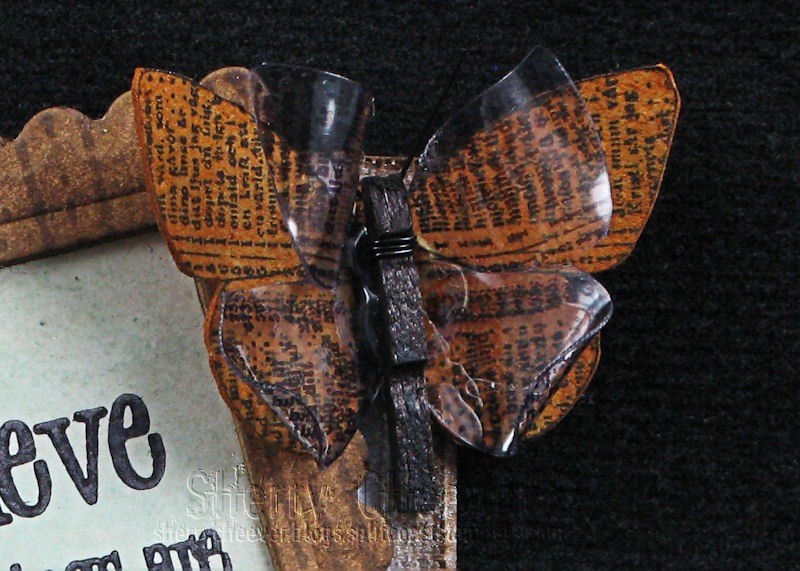
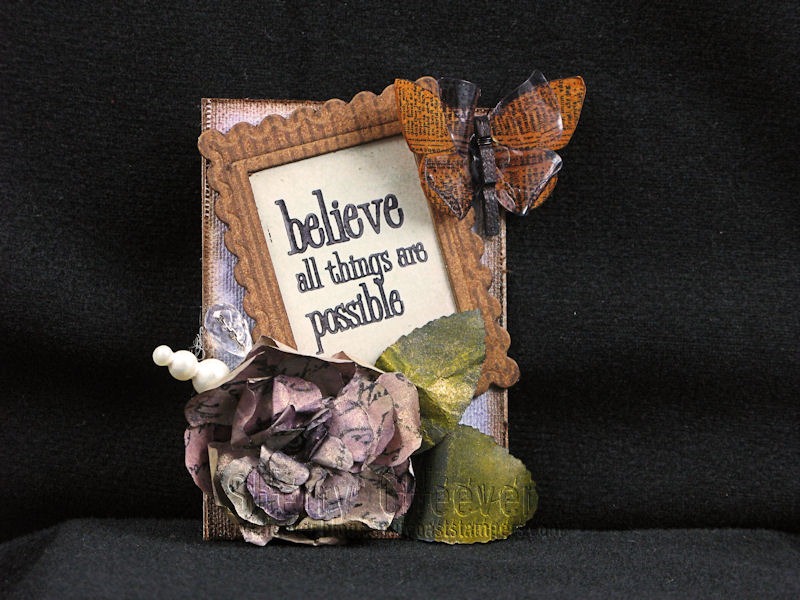
The one Studio 490 stamp I used is the word “Believe” from It’s Face Art.    It was stamped in Archival Jet Black Ink on Neenah paper.  I added some Glossy Accents to the back of the bookplate, and stuck it down to the paper around Believe.  The Neenah paper was trimmed and then the center of the bookplate was filled with Cracked Accents.  I love the larger cracks that were made!

Crackle Bottle CloseUPBelieve

When you walk around CHA, you are always picking up little things here and there.  I don’t remember which one, but at some booth I picked up a little lavender bag and inside the bag was a crystal angel on fishing line.  I added a jump ring at the bottom of the bookplate and tied the angel to the jump ring.

Crackle Bottle Angel

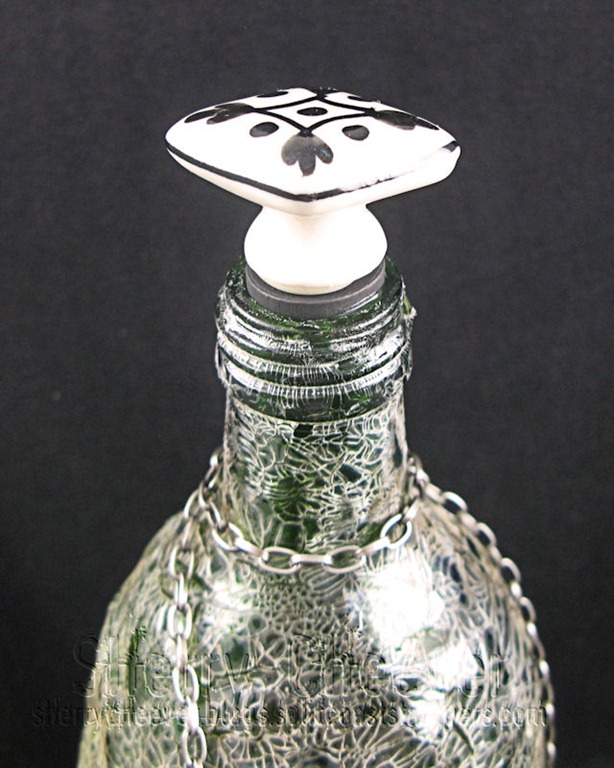
To finish the bottle off, I wanted to add something to the top.  My first plan a few weeks ago was to make some flowers and use the bottle as a vase.  However, I didn’t have the right stuff in my stash to do what I wanted . . . SO . . . to the rescue was a clearance drawer pull from Hobby Lobby.

Crackle Bottle Top

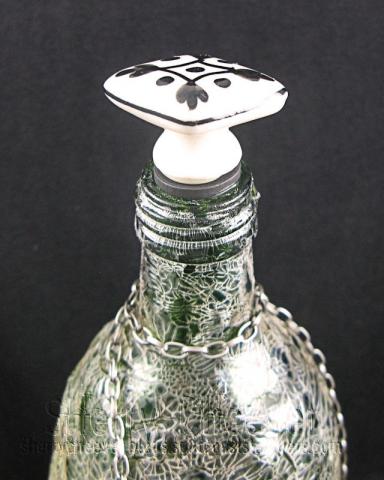
To make it work with the bottle, I sanded down one end of small wooden spool (so it would fit inside the neck of the bottle), painted it black and inserted the screw for the drawer pull into the center hole of the spool.  A little E-6000 adhesive was added to the spool to hold it in place long the top.

I know the minute my sister sees this . . . because I used the word Believe . . . she’s going to be yelling dibs!  We do that . . . yell dibs if there is something we want that someone else in the family (our mom mainly) has and we eventually want for ourselves.

I suppose that’s all I have for now.  It’s time to get my clothes ready for graduation and start packing!

Thanks for stopping by and remember  . . . life is short, enjoy the adventures that come your way today!

SHERRY SIGNATURE

Project Supplies:

Smiley from millan.net Oh my BADness, it’s Wednesday and that means it’s time for another What’s on Your Workdesk Wednesday!  I didn’t get to participate last week and I really did miss it.

So here’s my work table today . . . before the after stamping cleanup.

WOYWWFebruary16

Here’s the card I was working on . . . my entry for the Making Art Challenge on the Everything Wendy Vecchi Yahoo Group.

SherryCheeverMakingArt2

The challenge this week was to make a card with a chipboard flower and use pigment ink resist.

The chipboard flowers are some I’ve had for a few years now.  I stamped the background (from Studio 490 Art by the Number) in Snowcap pigment ink and then covered them in Tumbled Glass distress ink.  The leaves were die cut from Spellbinders™ S4-321 Nested Leaves in GrungePaper and then inked in Crushed Olive.  The sentiment (from Studio 490 Flower Art) was stamped on cream cardstock and then die cut with S4-310 Labels Eighteen.

The designer paper is some new that I picked up from CHA.  It’s from Fancy Pants and called It’s the Little Things.  This will be available from eclectic Paperie once the site is back up (it’s down for some upgrades and I couldn’t get a link for you).

I picked up some seam binding recently too.  I bought 100 yards of white so I could dye it to match what I was working on.  For today’s card, I dyed it with Tumbled Glass, misted it with water, scrunched it all up and then blew it dry.

Well, that’s all I have for today.  I’m heading back down to the studio to pick things up and start on my next project.

Thanks for stopping by and remember . . . life is short, embrace the adventures that come your way today!

SHERRY SIGNATURE

Product Used:

Happy weekend.  It doesn’t feel like the weekend  to me but hey . . . I’ll go with the flow.  Today I finally ventured into the studio to put all the crap (and some GOOD stuff too) away that I lugged home from CHA.   GOOD stuff = Graphic45 papers, Unity stamps, Maya Road embellishments, out right FUN play things!  Crap = lanyards, catalogs, buttons, blah blah blah!

While I was sorting and storing, I decided to get a little crafty. The Everything Wendy Vecchi Yahoo Group has started to have challenges and the first one is this week – – Making Art! Challenge #1 – – Make an ATC using scallops and a butterfly.  All of the challenges will be based off projects in Wendy’s books.

So here’s my submission.

SherryCheeverMakingArtATCFebruary5(4)

Since I used Studio 490 stamps on the flowers I posted before, I decided to add one to the ATC (hey a girl can take a shortcut every now and then).  The base of the ATC is illustration board that I covered with Ranger Inkssentials ATC Sticky-Back Canvas.  I colored the canvas with the Wrinkle Free Distress Technique using Dusty Concord and Tumbled Glass.  I added some extra Dusty Concord around the edges before I finished them off with Vintage Photo and then gave the entire canvas a spritz of Turquoise Perfect Pearls Mist.

While at CHA I watched Wendy work with her Clearly for Art line and knew that I had to have some.  The butterfly is composed of two pieces . . .  the bottom is GrungePaper and the top is Clearly for Art Modeling Film with the image stamped on it as well.  Too darn cool!

ATCcloseupButterfly

The frame is die cut from illustration board using Spellbinders™ Rectangles.  The stamping is the background from Studio 490 It’s More Flower Art and the sentiment is from Art-Fully Said.

I’ve my 7 Gypsies ATC Carousel sitting on my desk for months now waiting for me to be inspired with an ATC.  This is my first one for my carrousel.

That’s all for now I suppose.  I hope you have a great weekend and remember . . . life is short, embrace the adventures of the day!

SHERRY SIGNATURE

Product Used:

© 2015 Suffusion theme by Sayontan Sinha