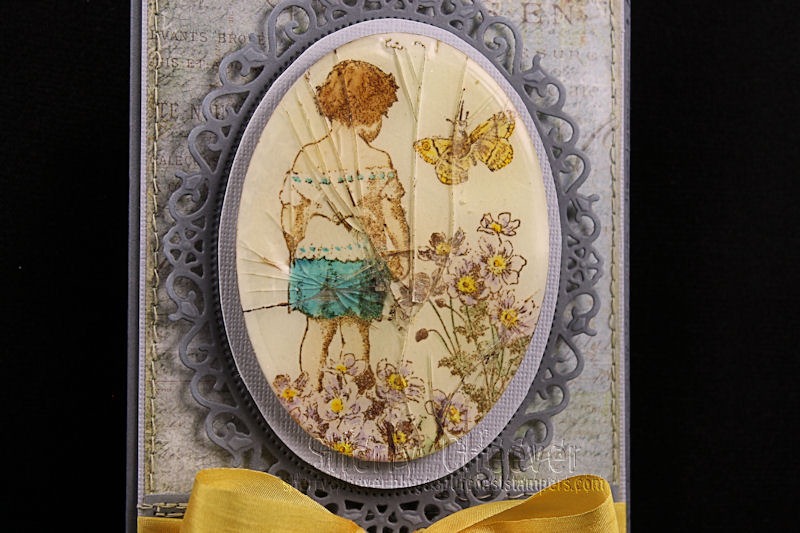
Good Tuesday morning!  I’ve got one more Wendy Vecchi inspired card today.  I can’t say that this is going to be my last one  . . . because I’m having way too much fun making these!  I’m absolutely relishing the fact that I finished 3 cards yesterday and typically it takes me close to 2 days to finish a project anymore.    I even like the idea that they are completely flat and easy to mail . . . AND THE BEST PART . . . they are still mixed media!

That’s it . . . mixed media on a mini canvas . . .  easy peasy lemony squeezy!

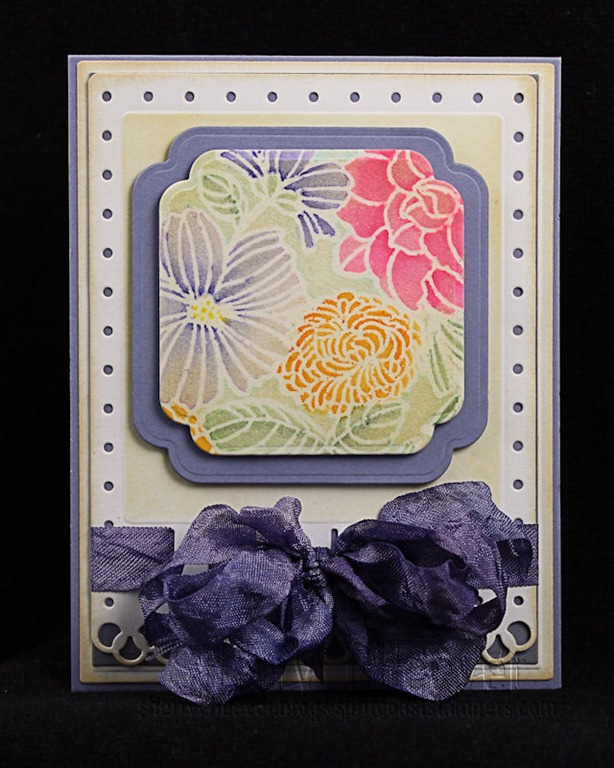
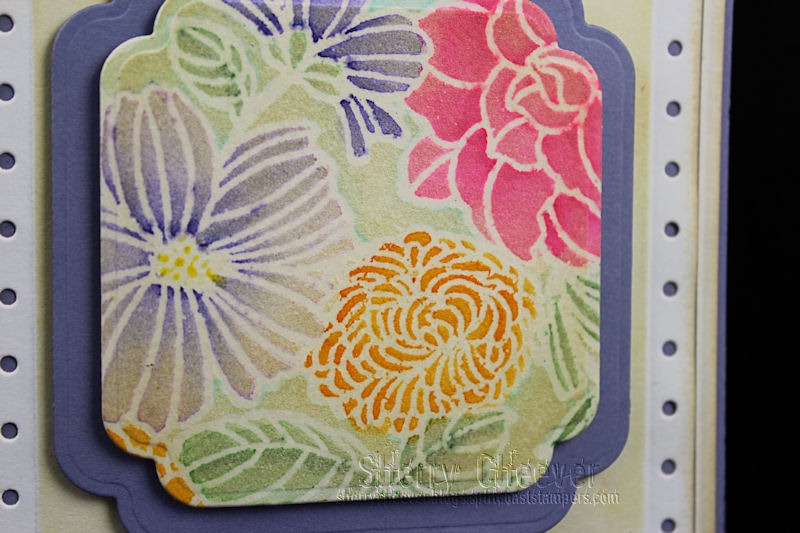
Plus because I’ve been using Spellbinders™ Matting Basics Die Templates for die cutting the paper I’m working on, then using another for the card base, all the guess work is taken away.  I’m telling you . . . . a quick (less than 10 minute die cutting) card!  For my stenciling I’m taping down the die template to the paper and using a stencil brush to add the ink . . . it can’t get any easier!

SCheeverHeartThanksCard

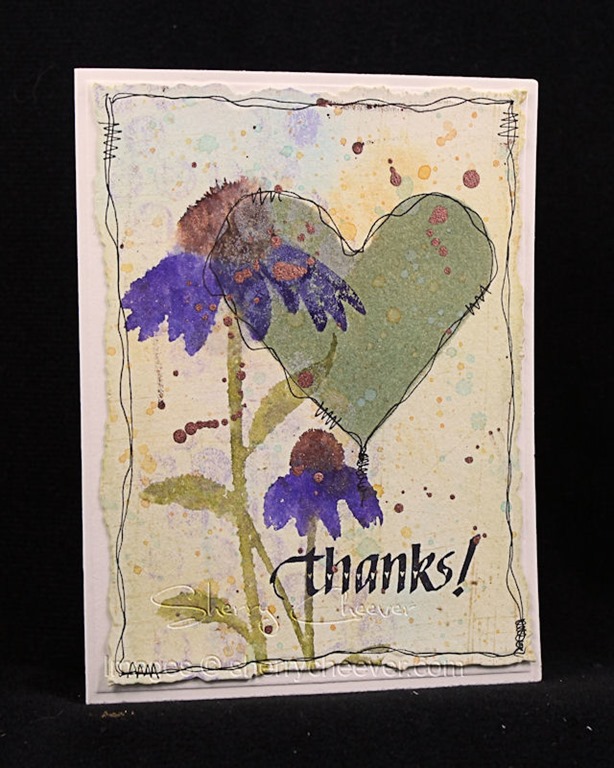
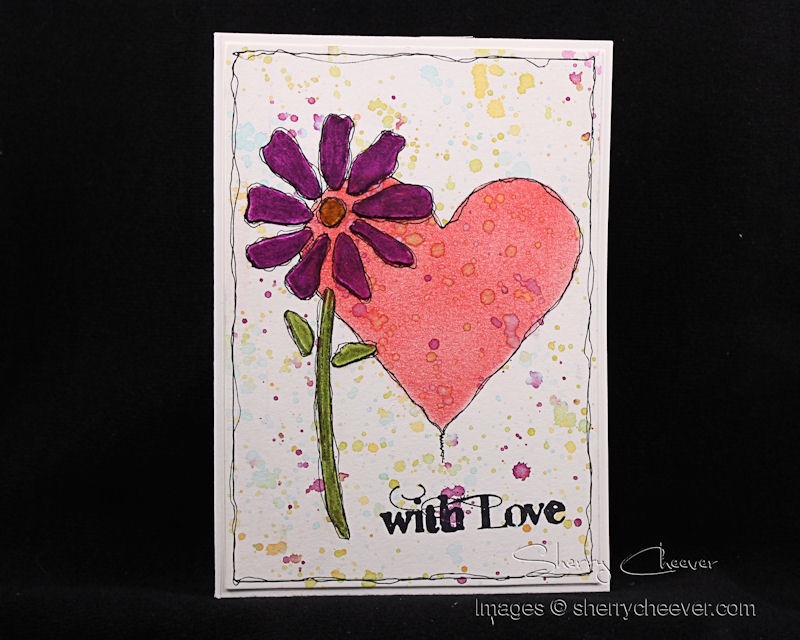
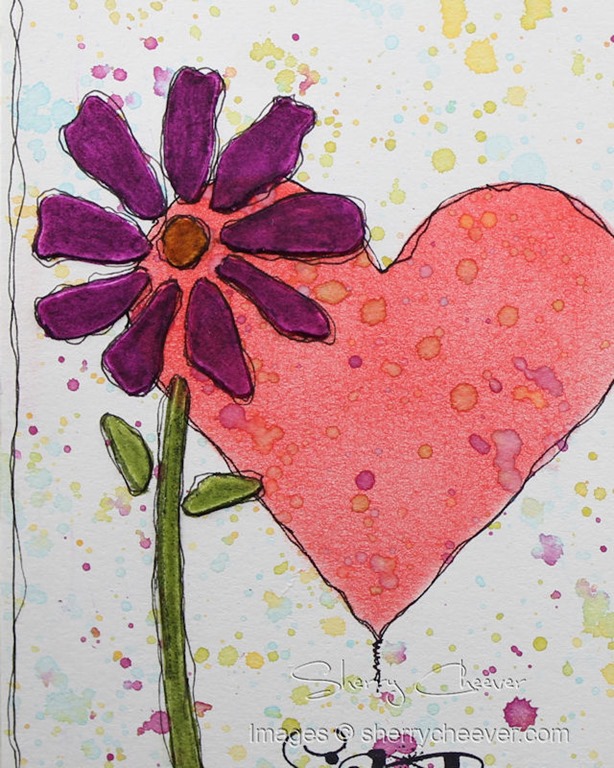
While waiting for Kate to pick up Hadlee today the idea for this one came to me.  Well actually, I was napping and Mallory was messing with Hadlee . . . the flowers (Inspired by Nature) and some of the background stamping (Sanded Background) are old SU favorites that I keep hanging onto.  The sentiment “Thanks” is from Quietfire Design – Thank You (set of 4), and was stamped in Archival Jet Black.

SCheeverHeartThanksCard CloseUP

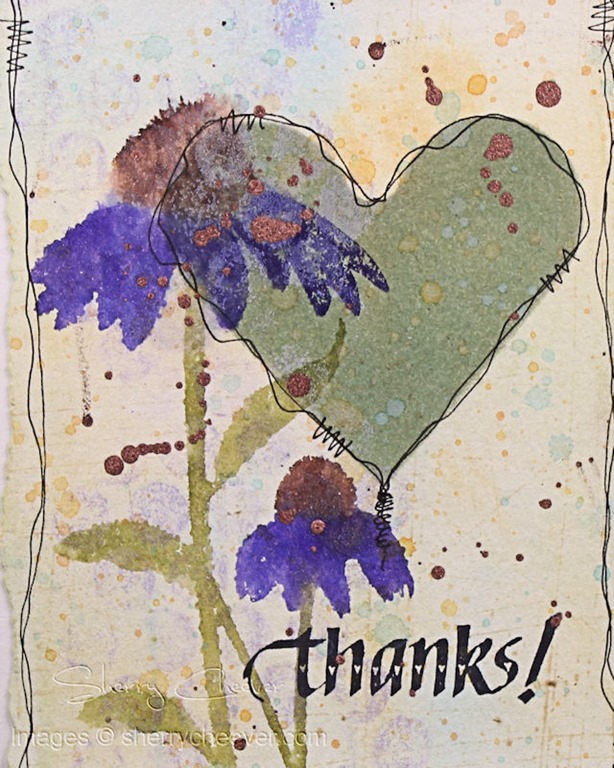
Once again I used Broken China, Bundled Sage and Wild Honey Distress Paint for the background.  The flower stamp was colored with Tombow Markers and when I misted the stamp, I accidentally picked up my Mini Mister filled with Copper Perfect Pearls  . . .  so, I had to add some copper splatters from my Krylon pen.  The heart was stenciled with both Bundled Sage and Tumbled Glass.

That’s all for me today.  Thanks for stopping by!

SHERRY SIGNATURE

Project Supplies:

Sometime during the last few weeks, Wendy Vecchi started posting some cards . . . I know Wendy making cards!  The first one caught my eye because of all the white space.  Then she followed up with these journal pages and another card!    I was hooked and INSPIRED!  I haven’t been inspired for a very long time . . .

SCheeverWithLoveCard

Using watercolor paper, I die cut/embossed my front panel with Spellbinders™ 5×7 Matting Basics A and the base of the card was 5×7 Matting Basics B.  The base is also watercolor paper, that was folded and then die cut as a whole by lining up the fold with the inner edge of the die.

I cut myself a stencil with the Classic Hearts and brushed in some Barn Red Distress Ink.    Splatters were made with watered down Peeled Paint, Wild Honey, Broken China and Seedless Preserves Distress Paint.

SCheeverWithLoveCard CloseUP

To define the heart and the edge of the card, some outlining was done with a Sakura Pigma Micron 03 Pen.

White Embossing Paste was applied with the Studio 490 3 Fresh Flowers Stencil and then colored with Peeled Paint Distress Marker and Tombow Marker #676.

The sentiment, from Studio 490 Just Work Art, was stamped in Archival Jet Black.

This card was a blast to make!  It’s light enough to mail in a regular 5×7 envelope without extra postage and something a little different from me.  I LOVE it!  Don’t be surprised if you don’t see a few more of these.

SHERRY SIGNATURE

Project Supplies:

Smiley from millan.net Good morning!  I probably wouldn’t have this post for you until later today or even tomorrow, but for some ungodly reason, I woke up . . . wide awake . . . at 4:30 this morning.  I’m sure that sometime this afternoon this is where I’ll be . . . Smiley from millan.net . . . but until then

I think I’ll show you an A2 card I made the other day with a new Penny Black stamp I picked up recently.  I also used the new Spellbinders™ Nestabilities® Card Creator die templates . . . which seem to be the only way I can bring myself to make this size card anymore!  I can’t believe that this is the only size card I used to make and now I automatically cut my cardstock at 5.5” square.  Anyhoo, I needed a little thank you card and though this would fit the bill!

PennyBlackCard

The base of the card was made with the Matting Basics A and B, but the top panel of the card was made with the new Fancy Ribbon Threader.  The seam binding was dyed with Dusty Concord Distress Ink.

PennyBlackCardCLOSEUP

The image is only a portion of the stamp, which I die cut/embossed with Labels Twelve.  First, the image was stamped in Distress Embossing Ink, embossed with clear embossing powder, then water colored with Tombow Markers.  After the watercolor had dried, the embossing was ironed away leaving a Faux Bleach/Batik look.

I guess that’s all I have for now . . . unless you want to come help with laundry today . . .

SHERRY SIGNATURE

Project Supplies:

Good Monday morning!  Thanks goodness that we’ve finally had a little rain and the temperatures have cooled.  Hopefully I’ll be able to get out and walk the dogs this week and get some much needed exercise.  It’s also going to be a very busy week with doctor appointments for most everyone in the family.  Mallory’s is coming up Tuesday and maybe, just maybe, they’ll be able to tell us why she still has this cough . . . I’m not holding my breath on this one though . . .

Anyhoo, moving on from family medical issues . . .

I’ve had a couple of LaBlanche stamps for some time now and not once have I ever done anything with them.  I’ve had an idea running through my head for a couple of weeks and decided it was time to do it . . .

One of my favorite techniques from a few years ago was Cracked Glass.  I loved making card with this technique and over time, I’ve just gotten out of the habit of doing some of my well loved techniques.  I decided that yesterday was the day and I paired the technique with this image from LaBlanche Stamps.

LeBlancheCloseUpCrackedGlass

Let’s start with the image.  It was stamped on Arches Hot Press Watercolor Paper in Archival Coffee and then water colored with Tombow Markers.  Even though it is very difficult to see, once the image was die cut/embossed with Spellbinders Classic Ovals it was very lightly stenciled with Antique Linen Distress Ink.    The panel was then inked with Distress Embossing Ink and probably covered in oh . . .  5 or 6 layers of Ultra-Thick Embossing Enamel (UTEE).    To make the cracking easier, I placed the embossed panel in the freezer until it started to curl.  Once the panel was straightened, it formed cracks.  Don’t you just love how the image cracked right in the butt   . . . trust me, not intentional!  Sadly, all the layers of UTEE make the image pale compared to how it looked before . . . there is actually blue water colored in the background . . . it disappeared to somewhere.  The cracks were enhanced by rubbing Gathered Twigs Distress Ink over them, with the excess being wiped away.

If you are unfamiliar with this technique, you can find a tutorial here under the Resources on Splitcoaststampers.   Maybe someday I’ll quit being lazy and break out the video camera and remake some tutorials of my favorite techniques for you.

LeBlancheCard

Because the flowers in the image were water colored with a pale lavender, I picked Prima Garden Collection paper to use at the background.   I tried a couple different colors of ribbon too, but finally decided that this Buttery Gold May Arts Silk was perfect and brought out the butterfly and the flower centers.

Oh and the card is also a different height for me . . . 4.5 x 7”.  Haven’t made one of these for a very long time!

Well, that’s all for me right now.  Thanks for stopping by and remember . . . life is short, embrace the adventures that come your way today!

SHERRY SIGNATURE

Project Supplies:

© 2015 Suffusion theme by Sayontan Sinha