
WOW I’ve finally done it! I’ve finished the big project . . . the one I’ve had in mind for over a year now . . . the one I knew would take more than a few hours in one day . . . the one that would take a couple of days if not 3 or 4 . . .
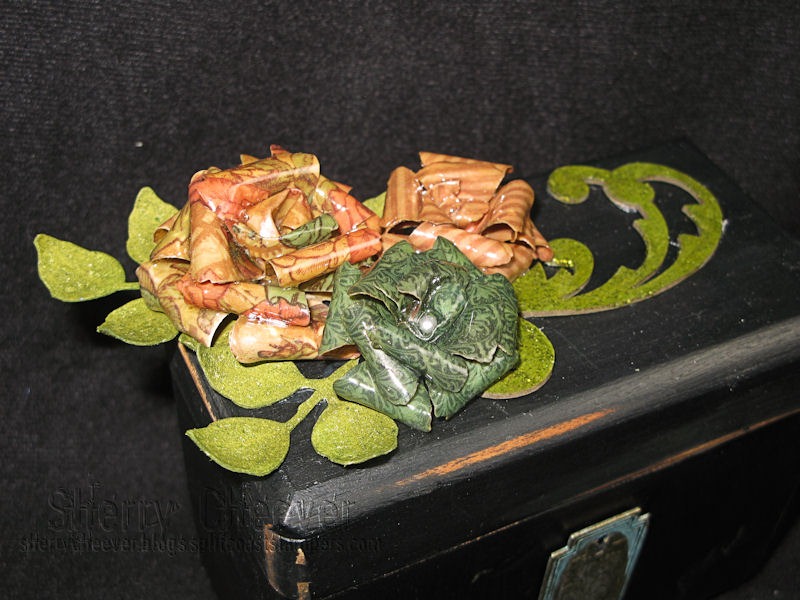
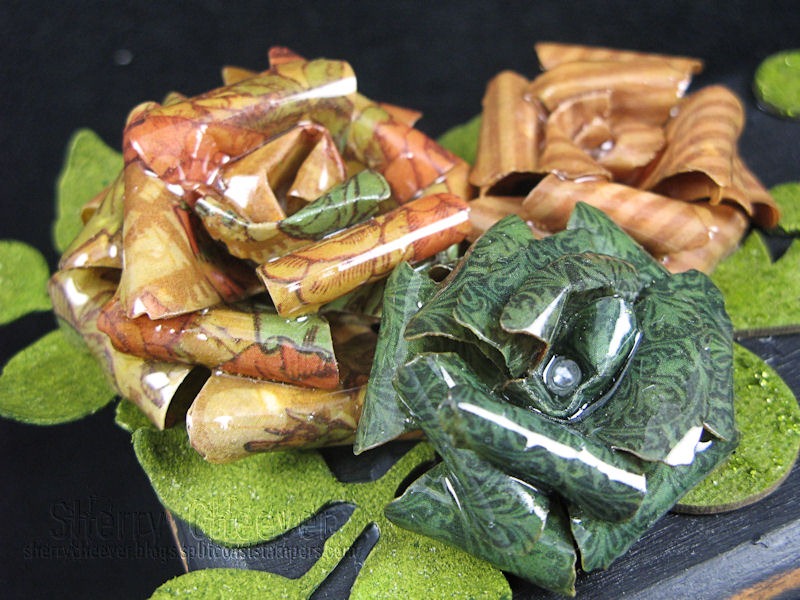
Faux Porcelain Flowers (updated tutorial here) made with ICE Resin instead of UTEE! I don’t have a tutorial for the ICE Resin yet, but trust me . . . it will be forthcoming! Why the switch you might ask? Well I didn’t like that the UTEE turned yellow (no matter what was done) . . . Granted the ICE Resin does take longer to cure but I do believe that you’ll see that the results are well worth the wait!

The base for this project was made from printers chipboard (see post from July 22) that was die cut using Spellbinders™ Labels One in varying sizes. There are three pieces on the bottom and then the frame itself is made with six. The base was covered with an old piece of designer paper from TPC Studio that I probably picked up at Archiver’s a few years back and the rest of the project is made with My Mind’s Eye Lost & Found – Madison Avenue. The flourishes were also die cut from printers chipboard using the new Venetian Motifs Die Template, painted Antique White, then covered with Rock Candy Stickles.
The sentiment is from Studio 490 – Evidence of Art, which was stamped and embossed with Queen’s Gold Embossing Powder, then die cut/embossed with the newly released Fancy Framed Labels One . . . using only the inner die from one of the labels. The sentiment was stenciled in Tumbled Glass and Antique Linen Distress Inks.
Lets talk about the flowers for a bit.

The flowers were made with both the new Blossoms Five and the smaller with Rose Creations. Once all the layers were shaped, they were assembled around a corsage pin (so that I would have the end of the pin to hold onto while applying the ICE Resin). Once the ICE Resin had been allowed to dry and set-up, the corsage pins were clipped off at the base on the back.

I tried drizzling the ICE Resin over the flower with a craft stick, but in order to get in all the crevices I and underneath each petal, I ended up using an old paint brush. It worked like a dream! (I’ve already cleaned and set aside a syringe that my compound hormones come it to use try the next time.)
A Krylon 18kt Gold Leafing Pen was used for the outlining of the edges of the chipboard layers and for the birdcage.
Needless to say, I’m darn happy with the outcome!
Before I leave, I’ll share: I’ve searched all over at my favorite shopping places for an ICE Resin link to give you . . . it’s 50% off over at eclectic Paperie. The only ones left are the syringes, which I only used 1/2 for this project. You can find the full bottles at Simon Says Stamp. AND/OR if you are like me, you’ve had it in your stash for over a year and NOW you finally have something to try it on!
Okay that’s all for me . . . Thanks for stopping by and remember . . . life is short, make the most of the adventures that come your way today!

Project Supplies:
|
|
|
|
|
|
|
|
|
|
|
|
|
|
|
|
|
|
|
|
|
|
|
|
|
|
|
|
|
|
|
|
|
|
|
|
|
|
|
|
|
|
|
|
|
|


