Good morning!  Hope y’all are doing well and staying out of trouble.  Me . . . not so much . . . trouble I mean!

I’ve been hard at work in the studio with Christmas and CHA projects, but not too much to share yet.  However, I do have a few things today.

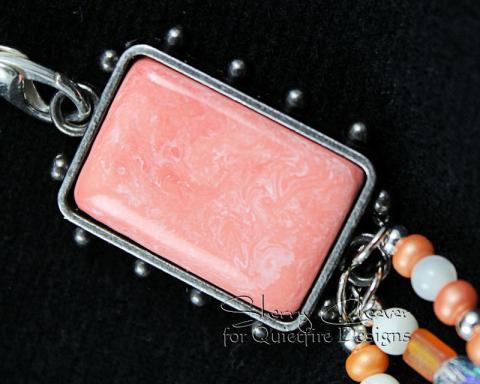
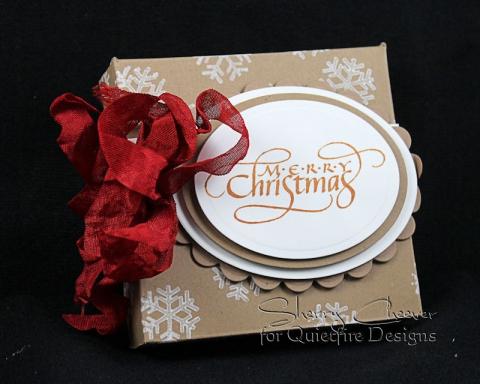
The above bezel and a gift box . .  .

PizzaGiftBoxLeft

are both being featured on the Quietfire Creations Blog today.  All the details for both, along with more pictures, are over there.  Please hop over and leave me a comment so I know that you were there!  It’s one of those things . . . I was here and you weren’t, now you’re here and I’m not!

I’m off for the weekly weigh in at WW and some quality time with my sister!  Oh wait, I don’t think I’ve mentioned this.  I started going to Weight Watchers with my sister back in October . . . as of last week, I had lost 20 pounds.  I’m tired of seeing pictures of myself plastered all over the internet looking like a short little stump . . .  hoping to remedy that.  I guess one remedy is to never ever have my picture taken again (which I don’t always have control over); the other remedy is to actually do something for myself . . . get healthy!

Okay that’s it for me today.  Thanks for stopping by!

SHERRY SIGNATURE

Project Supplies:

Hello and welcome to the second Design-abilities blog hop!  We are the Spellbinders® Blog Team and we wanted to do something fresh, fun and creative to bring our team together.  But before we get started we want to let you know this blog hop is just for fun and creative inspiration.  We are not sponsored by Spellbinders Paper Arts®.

This is also the first hop that our new Blog Team Members will be participating in.  If you missed the announcement on Friday that Darsie Bruno and Michelle Woerner have joined the Blog Team, you can find it here!

Sometimes we might not all be able to participate but we would still encourage you to visit all of the Blog Team Members and check out their blogs.  You will find all kinds of ideas for die cutting, paper crafting, mixed media, DIY projects, jewelry, home decor, lots of tutorials and techniques.  As designers we are always inspired by each other and we hope to inspire you too.

Including me, the Spellbinders Blog Team consists of:

My project today is something that I’ve had in mind for a month or more now . . . It was just finding the time to work on them!   I need a few special gifts for the holidays (hostess, open houses, friends, etc.) and I’m hoping these will be perfect.
MeltArtBezels

When I first thought about this projects, I first had in mind polymer clay.  I even purchased some while at Michaels one day.  Later it dawned on me that I since I had never worked with clay before, that I should stick with something that I had used often . . .  Ultra Thick Embossing Enamel (UTEE).

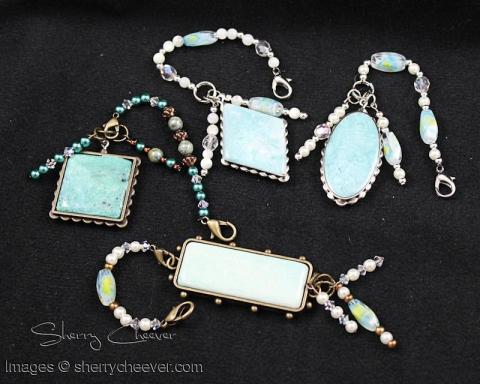
I began by adding clear UTEE in the melting pot.  Once it was melted I added a small amount of white UTEE and let it melt thoroughly.  Once all the UTEE was melted, I added drops of Turquoise, Jade and/or Coral Melt Art Heat It Inks.   White UTEE was added to make the colors opaque as opposed to translucent.   I think I ended up making 3 different pots of colors, pouring the mixes into various bezels/hat pins from the Spellbinders® Media Mixáge™ Line.
MeltArtDiamond

Beads were strung and added to the melt art pieces.  If I used a hat pin, the wire was snipped off and looped at the base of the hat pin.  Lobster claw clasps were used so these dangles could be hung from a key chain, a purse . . . or anywhere the recipient wished to hang them!
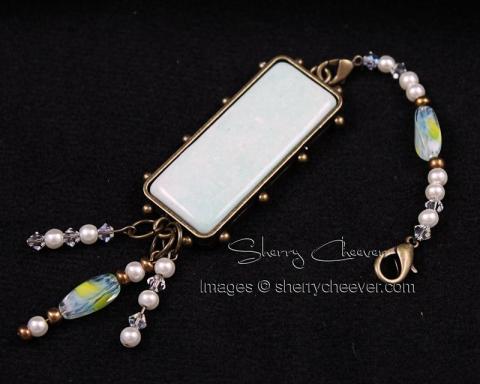
MeltArtRectangle

I loved the variations created by the colors added to the UTEE and hopefully you’ll be able to see them in the photos below.
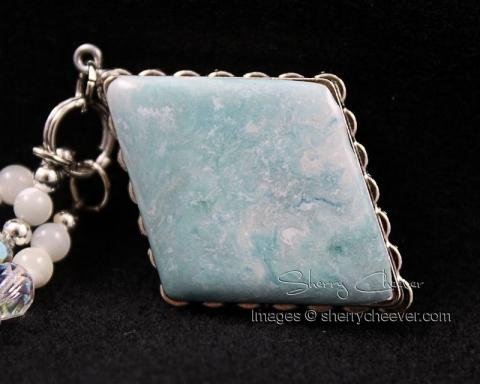
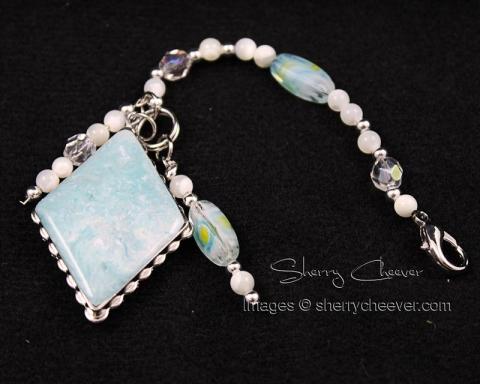
Diamond CloseuP

If air bubbles rose on the surface, I heated the UTEE with the heat tool to melt the UTEE again and cover in the holes.
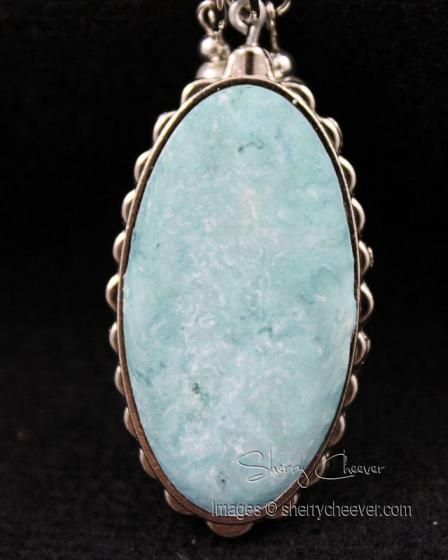
Oval Closeup

The best part of heating the UTEE again, was watching the different colors move about the bezel, creating more variation.
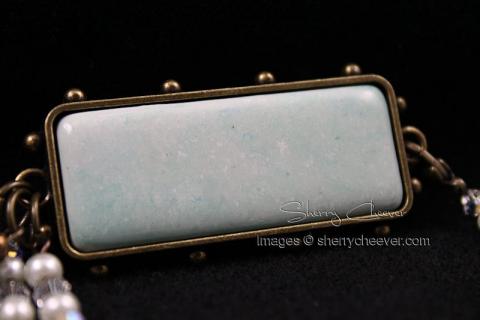
Rectangle CloseUP

The darker lines are made by some of the Heat It Inks not being mixed entirely in the pot and then coming to the surface during the second, or even third, melting.
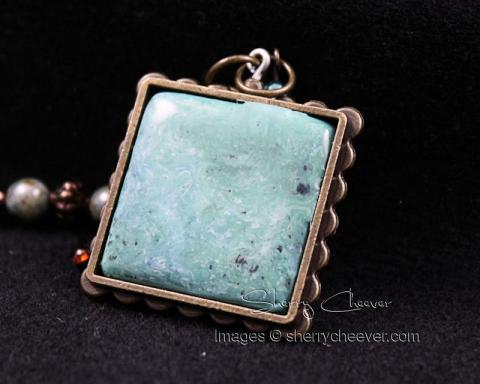
Square CloseUP

I have one still on my desk that had a speck of red (that I truly thought was blood from a cut on my finger) and when it was re-melted, it ended up being the coral additive.  I’ll show that one to you later.

Needless to say, I had a great time making these and have plans for a few more . . . Melt Art is so darned addicting!

That’s all for me today!  Don’t forget to visit the other Blog Team Members and see what inspiration they have for us today.  I myself can’t wait to see what they’ve been up to!

Thanks for joining me!

SHERRY SIGNATURE

Project Supplies:
Good Monday morning!  The first time I saw the Graphic 45 Typography Collection, I knew that it was a must have.  Every time I look at the collection I envision something else that can be done.  My project today is one that I have been wanting to do since the collection came out  . .  for the gypsy in all of us!

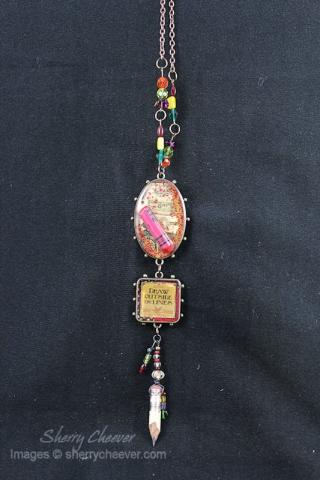
DrawOutsideTheLines

My first instinct was to find some old crayons  . . . but then a pencil stub hit me . .  . so I had to go with both.

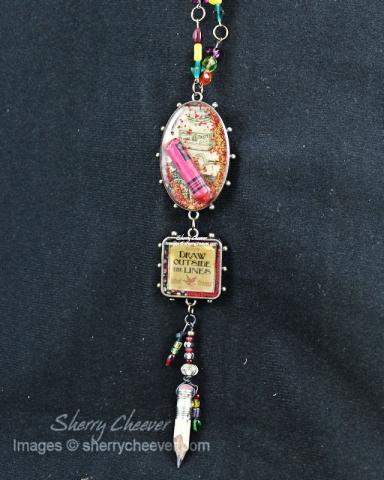
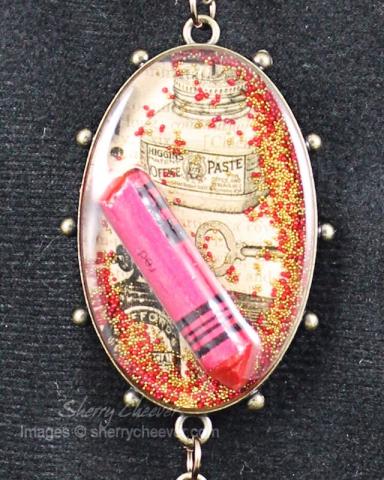
DrawOutsideTheLinesOval

Please pardon the glare on this one, the ICE Resin® over the crayon was a little difficult to photograph.

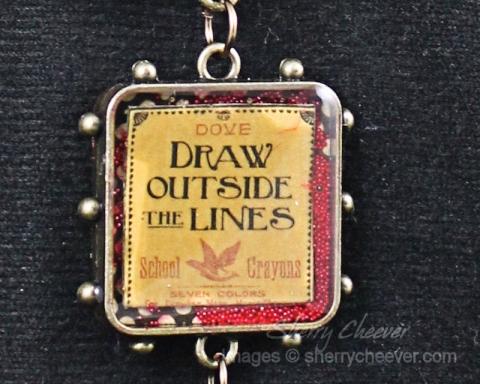
DrawOutsideTheLinesSquare

Who can’t resist drawing outside the lines . . .

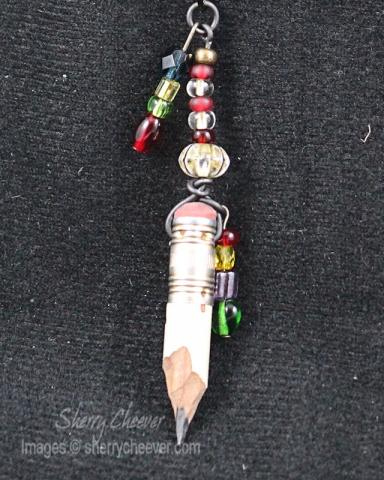
DrawOutsideTheLinesPencil

Some colorful beads to mimic Crayola colors and one of my crossword pencils.

DrawOutsideTheLines2

I LOVE it and now that I see it on the screen . . . I’ve just thought of another way to create it!

Thanks for stopping by today!

SHERRY SIGNATURE

Project Supplies:
Hello!!!!

I finally got up the nerve over the last few days to try something I’ve been wanting to do for some time now . . . make a necklace using the Spellbinders® Media Mixáge™ Bezels and Susan Lenart Kazmer ICE Resin®.    I’ve had ICE Resin for a couple of years now . . . ever since I saw it the first time at CHA.  I’ll never forget walking in the booth with Daisy Sparks and Wendy Vecchi . . . AWEstruck!  We all purchased her books with (I know) the good intentions of giving it a try.  So I guess it’s better late than never on my end!

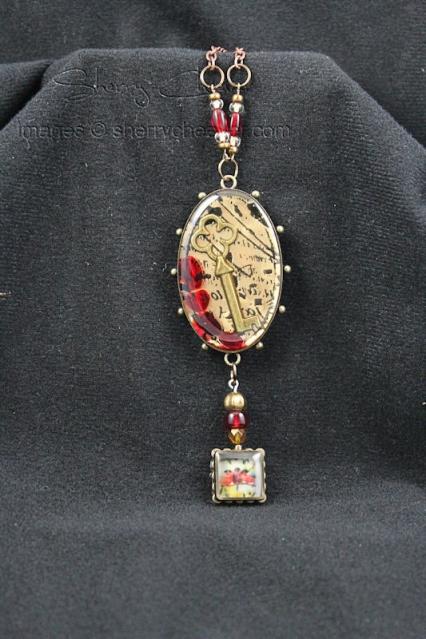
KeyNecklace

Lookie . . . I added a chain with a magnetic closure too!  I’m really planning on wearing this and get this . . . Mallory said she likes it well enough to actually wear it . . . I guess I did good!

So let’s talk about the many details . . . starting first with the larger pendant.

KeyNecklace LargePendant

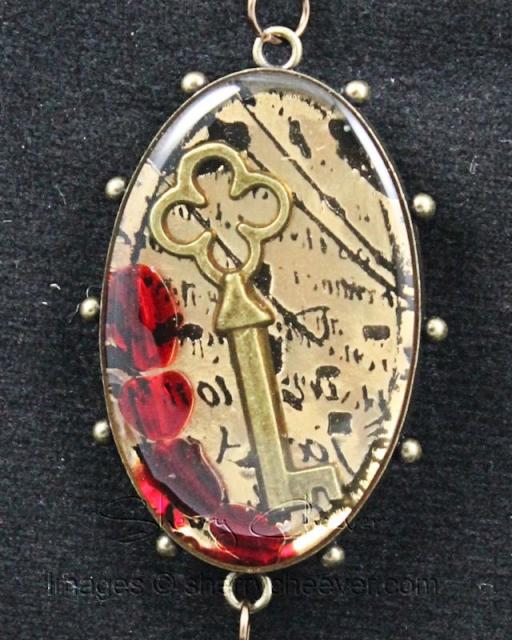
That’s the larger of the 3 oval Bronze Bezels from the Spellbinders Media Mixáge line.  The background is a piece of gold foil engraving board that was die cut with MD1-001 Ovals One and then embossed with the new Poetry Engraving Plate.  Using a sanding block I sanded away the areas that weren’t embossed.  Now whether I did the embossing correctly or not, and I’m not entirely sure, because when I sanded it all away, the embossed areas were much smaller and embedded into the board.  I didn’t try flipping another piece because I kinda liked the look of this one (I’ll try the other way at another time).

The die cut oval was glued to the bottom of the bezel and then the key was added over the top.  I started filling the bezel with ICE Resin and decided at some point that it really needed some color.  Before I had finished pouring the dome, I started dropping in some red beads that I had in my stash.

KeyNecklace Hatpin Charm

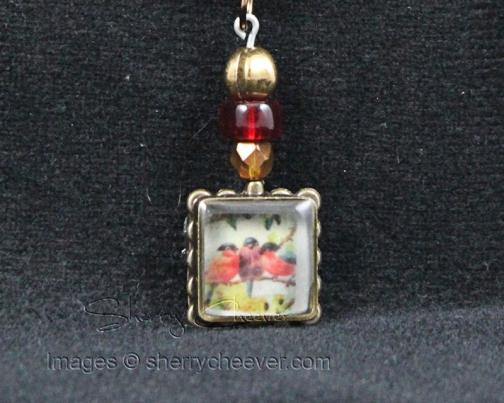
The smaller pendant is Spellbinders new Square Hatpin Bezel.  An image was die cut using MD1-002 Squares One (the #1 die template) and glued to the bottom of the bezel.  I turned the hatpin upside down to use it as a charm, adding beads on the pin and hooking it to attach to a jump ring.  The bezel was then filled with ICE Resin.  (Important info:  let the ICE Resin sit overnight before moving the bezel  . . . VERY important info!  I think I might have poured this smaller one first and while I was dropping beads in the larger bezel I kept reaching for a pin to help push down the bead.  Can you guess what happened?  Well of course I did!  I kept picking up the hatpin  . . . spilling resin all over my work space as I went.)

Once both pieces had dried overnight, I started adding the jump rings, chain, etc., to finish off the necklace.  The ICE Resin wasn’t nearly as complicated as I thought it would be and the process really didn’t take that much time.  I’ve been a little hesitant on trying the ICE Resin in this way . . . but don’t be!  It truly is a wonderful product and not nearly as difficult as I first though!

(and actually, while working on the necklace this afternoon, I mixed up some more ICE Resin for a project I’m hoping to have together tomorrow)

Whew!  I guess that’s all I have for right now.  Thanks for stopping by today and remember . . .  life is short, enjoy the adventure!

SHERRY SIGNATURE

Project Supplies:
Happy Tuesday!  I have a personal project to share with you today.  I didn’t really plan on making this, but  . . . well, I just couldn’t resist.

Tonight is social night at Sorority and since I am hosting in October, my sorority sister and I decided to go with a Witch Hat theme.  Of course, we all all sorts of devilish delights . . . potato soup, chili, pumpkin cake, wine . . . . and it is mandatory that all our sisters wear witch hats.

Saturday night is the annual Witches and Bitches Burn hosted by my friend Bad Bev and her sister, Terri.  It’s been a few years since I’ve been able to attend for one reason or another  . . . for the last couple of years I have been out of town working stamp shows . . . but I’m definitely planning on taking my BAD self, along with some Shark Fin, to the burn.  Once again, a witch hat is mandatory!

Now I’m not real fond of spending an entire evening sitting around in a witch hat.  First off, the brim gets in my way and I inevitably catch myself on something.  I did find my hats yesterday and quite frankly, I hate them both . . .  SO, I decided to make myself a new one that better expressed who I am!

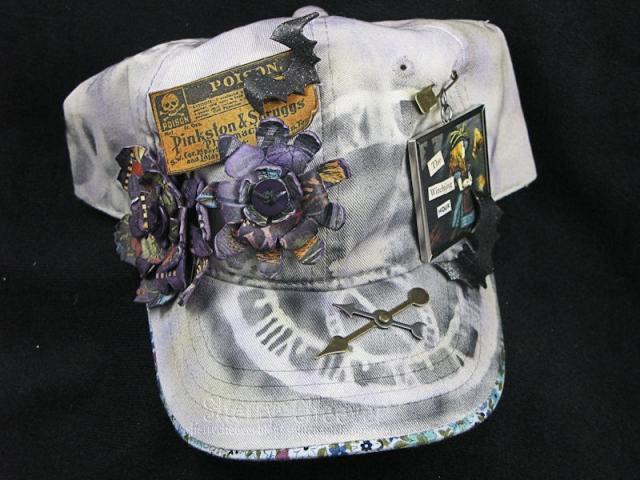
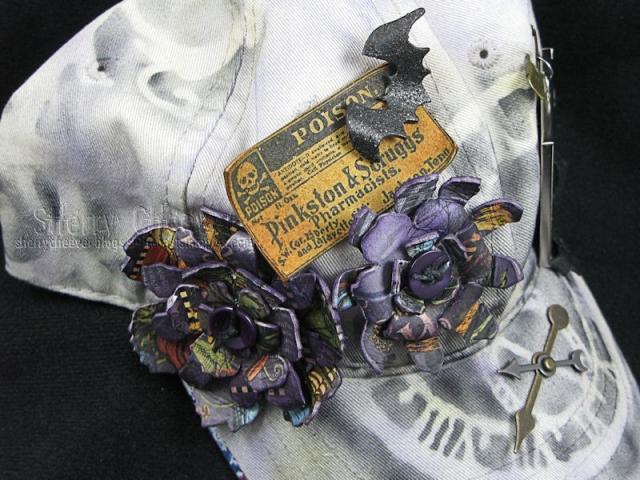
Yesterday on my way back from physical therapy (wrist), I stopped at the store to pick up the drinks and deserts for tonight’s gathering, and I found a tan ball cap on clearance for $2.00.  Okay for $2.00, I could afford to buy it and alter it without really caring if I messed up the hat.  Honestly . . . . . I LOVE MY WITCHING HOUR HAT!

HAT

I airbrushed some different masks using Black Copic with the airbrush, then added some additional purple and green color just by spraying around for the fun of it.  I particularly wanted the clock in the front . . . thus, the Witching Hour.  I added some game spinners as clock hands and pushed them through the bill with a long fastener.  The flowers are made from GrungeBoard covered in Graphic45 Halloween in Wonderland.  I die cut the GrungeBoard using the Tattered Florals die.

HAT Flowers

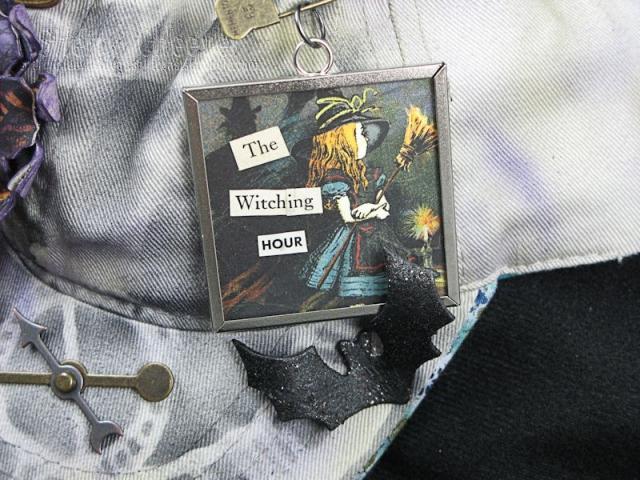
I decided the other side of the hat needed a little something, so I found my Memory Glass and Frames and cut out one of the Alice images from the paper.  The sentiment inside the frame came from going through various old books.

HAT Witch

I plan on wearing this hat tonight, as well as to the Witches and Bitches Burn.  I’ll be the bitch who refuses to wear a proper witch hat!

Thanks for stopping by and remember . . .  life is short, take advantage of the adventures that come your way!  Even if it is does mean being a bitch once in a while.

SHERRY SIGNATURE

© 2015 Suffusion theme by Sayontan Sinha