Good morning and welcome to Day 7 of the Spellbinders™ Sneak Peek and Giveaway!  I hope you’ve enjoyed the sneak peek so far and you’ve found some wonderful inspiration over the last 6 days.  I know I sure have!

I had such fun working on my projects for the Sneak Peek and thoroughly enjoyed stepping outside my box to work with mixed media on altered projects.  For both of my projects I used beeswax  . . . way too much fun.

Project Supply List:

  • S5-178 Arched Windows One
    EL-027 Numbers and Letters M-Bossabilities
    LF-132 Grand Rectangles
    Grand Calibur

    All new products shown in the Sneak Peek can be found in the “What’s New” section of the Spellbinders Online Store!

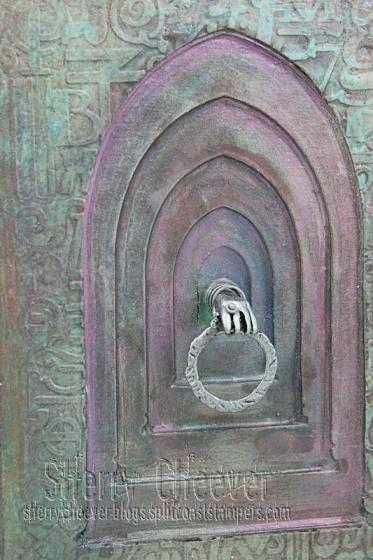
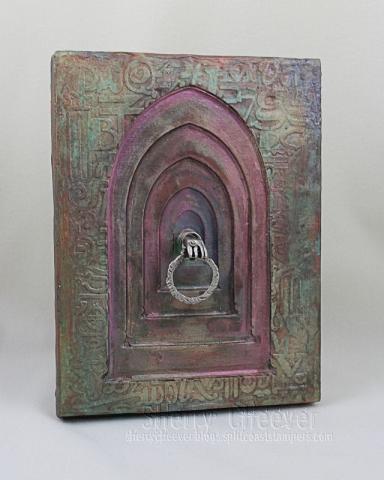
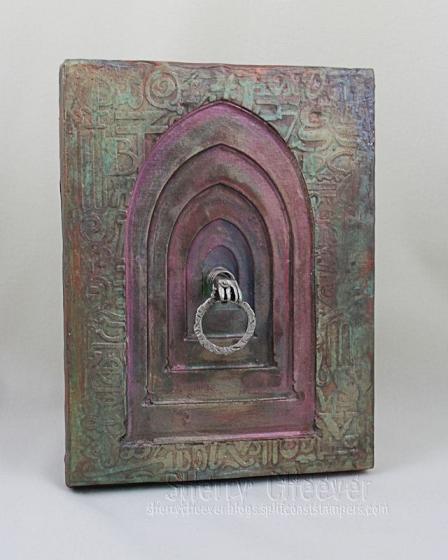
My first project is constructed completely from chipboard and covered in beeswax and Perfect Pearls.

SCheeverGothicAltar MYCOPY

During a shopping trip at Michael’s, I found that fabulous dangle hand charm from Industrial Chic by Susan Lenart Kazmar.

SCheeverGothicAltar CLOSEUP CENTER MYCOPY

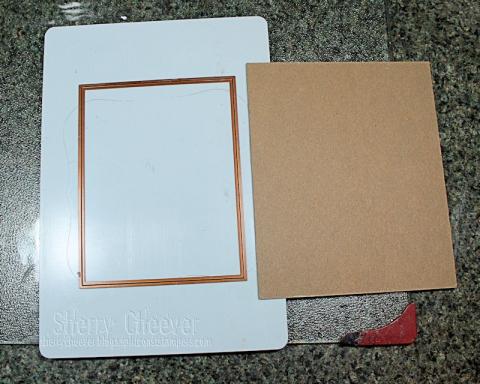
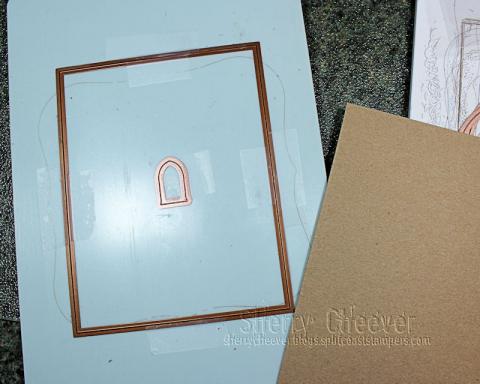
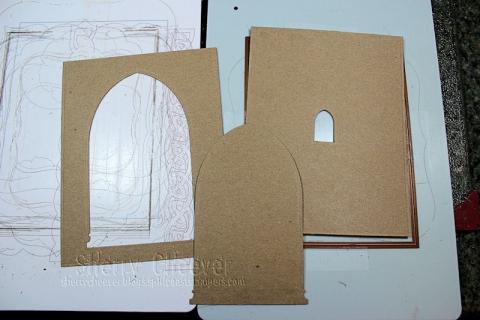
My project was created using .22 thin chipboard – three pieces die cut and glued together for each recessed layer.  For the purposes of the tutorial, I will only be using 1 piece.  If you wish to try your hand at this project, to get the depth I created, you will need to die cut 3 individual pieces and glue them together to make one layer.  Spellbinders die templates very easily cut .22 thin chipboard; however, medium weight and thicker requires a little more effort.  I say this because the backing to the piece is actually medium weight chipboard that I die cut with LF-132 Grand Rectangles Nestabilities®.

STEP1

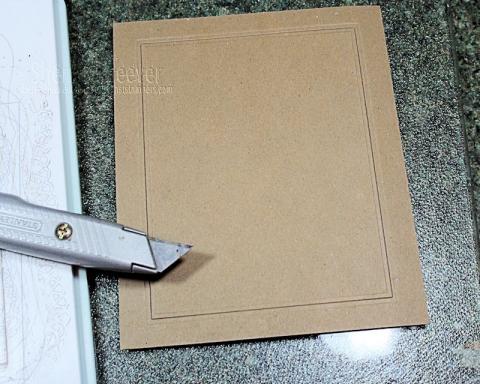
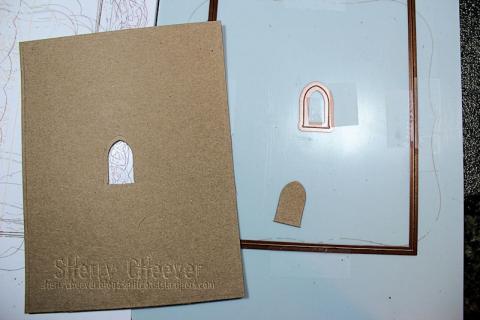
As you can see, the die does not cut all the way through the medium weight chipboard; however, you do get a very detailed cut that you can complete with a simple mat knife or cutting blade.

STEP2

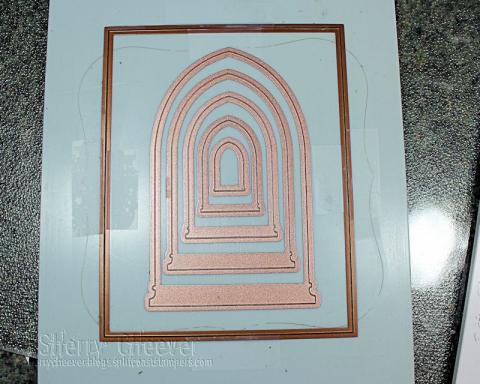
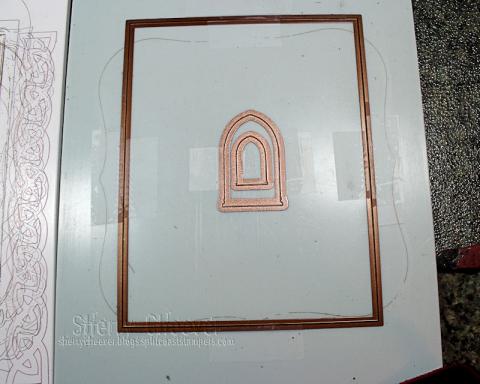
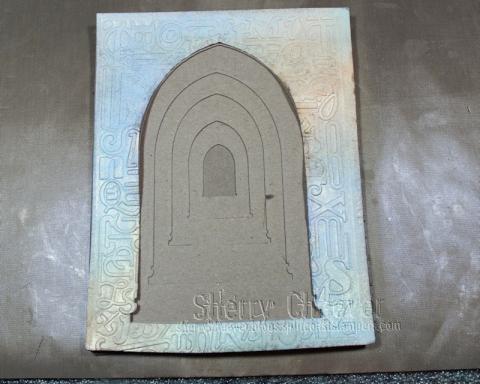
To align the dies for the different layers, the Grand Rectangle was taped in place.  I recommend taping all four sides, inside and outside, to keep the die from slipping with repetitive cuts.  All five dies from S5-178 Arched Windows One were placed inside the Grand Rectangle, centering them as you want.

STEP3

Once the placement of the smallest die has been determined, tape the die in place as you did the Grand Rectangle.

STEP4

You can now die cut the thin chipboard.  Remember that I’m only showing your one piece of chipboard.  For my project, I die cut the same die arrangement three separate times.  All three pieces were then glued together to form one layer.

STEP5

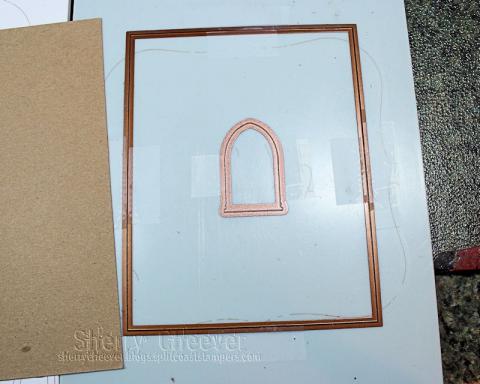
The next larger die was placed around the smallest, for the next layer to be die cut.

STEP6

You will continue in the same manner as described above until you have cut all the different layers.

STEP7

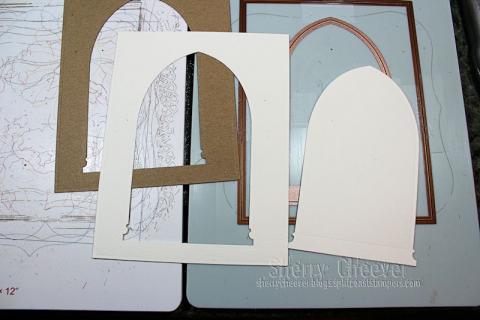
Here you can see the difference from the largest to the smallest die template.  I also saved all the Arched Window die cuts to use on another project.

STEP8

While the largest Arched Window die is still placed within the Grand Rectangle, I die cut a piece of watercolor paper to be used as the top layer of the project.

STEP9

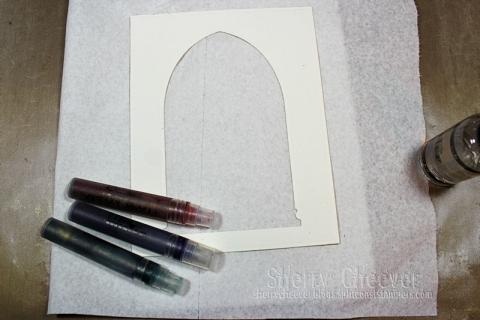
The die cut watercolor paper was then misted with water to open the fibers of the watercolor paper  . . .

STEP10

and then misted with a combination of Perfect Pearl sprays that I had previously mixed up.  You can use any type of ink that you want to color the paper with.

STEP11

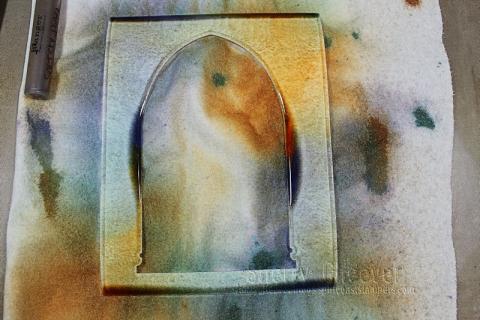
I like to use mists because while the watercolor paper is still damp, a deeper embossing is achieved.  Here I’ve placed the still damp watercolor paper in the EL-027 Numbers and Letters M-Bossabilities.

STEP12

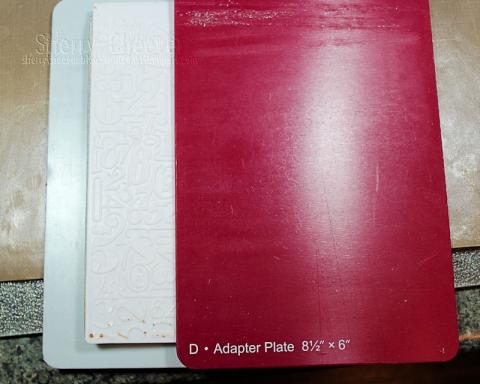
The sandwich for using M-Bossabilities is the Base Plate, M-Bossabilities with paper inserted, and then the Adapter Plate.

STEP13

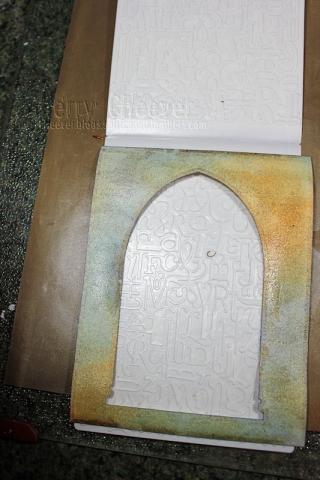
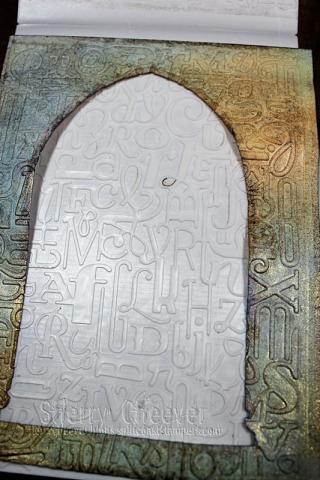
This is the watercolor paper once it has been embossed.

STEP14

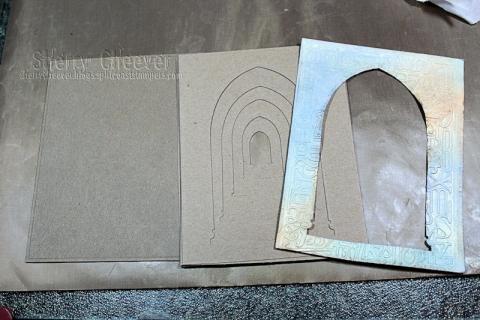
Here are all the different layers for the project.  Each layer, except the watercolor paper, can now be glued together

STEP15

To adhere the watercolor paper to the chipboard, I layered down three or 4 layers of beeswax before applying the watercolor paper.

STEP16

The remainder of the project was completed by adding layers of beeswax and different colors of Perfect Pearls.

SCheeverGothicAltar MYCOPY

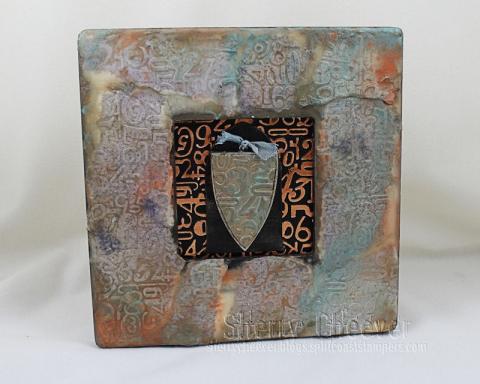
For my second project, I altered a $ frame from Michaels with beeswax.  I’ll give you more details on this project in a few days.

SCheeverBeeswaxFrame MYCOPY

Official Giveaway Rules can be found HERE.

Enter the Giveaway HERE!

Questions? [email protected]

No entries will be accepted at this email address.

Thanks for stopping by today and don’t forget to visit Candy Rosenberg’s blog today for another chance to win and more inspiration.

clip_image001

SHERRY SIGNATURE

Smiley from millan.net Good evening!  How the heck are ya?  I don’t know what’s come over me, but I sleep for a few hours, then I’m up and wide awake raring to go, then I sleep for a few more hours.  hmmm I guess it’s just nature taking it’s course . . .  .

This morning which could have been anywhere from 2 am to 5 am or 8:30 am to 2:00 pm.  See I told ya  . . . weird hours.  Anyhoo, I got this idea to finish up a pyramid image that I had done some time back.  It’s the companion to this piece Into the Looking Glass.  That one was the negative pyramid.  While I was working on the negative, I also finished up the positive.  It has been sitting on a shelf gathering dust, and I decided to use it for this project.

I also threw in the requirements for Week 11 of the Compendium of Curiosities Challenge over at Linda Ledbetter’s blog, Studio 3L.  I wish I had had the book when she first started these challenges, but alas I didn’t.  I’ve really enjoyed taking part that last couple of weeks . . .  it’s been good for the mojo.Smiley from millan.net

SherryCheeverAliceAugust23(4)

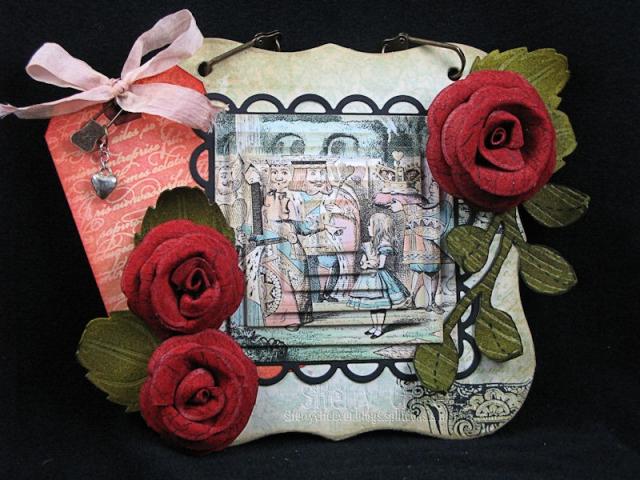
I was really trying to make that pink on the tag match the pink in the image, but damn it all . . . it looks like it’s a far cry from matching.  Oh well . . . things happen sometime.  I had to make make the roses red, there just wasn’t any other choice!  Oh and I also HAD to hang a little heart somewhere!

Well that’s it for today!  Thanks for stopping by and remember . . . life is short, take advantage of the adventures that come your way!

SHERRY SIGNATURE

Wow it’s Hump Day already!  Hard to believe that the first part of this week has gone to quickly.  Of course I’ve been running for two days non-stop it feels, so what should I expect.  I need to spend some serious time working in the studio today as I have a tutorial and video to write for Splitcoaststampers next week.  YES, you are going to LOVE it! 

I’ve got a project to show you today that was totally turned down.  I submitted it for a publication and as always . . . rejected! 

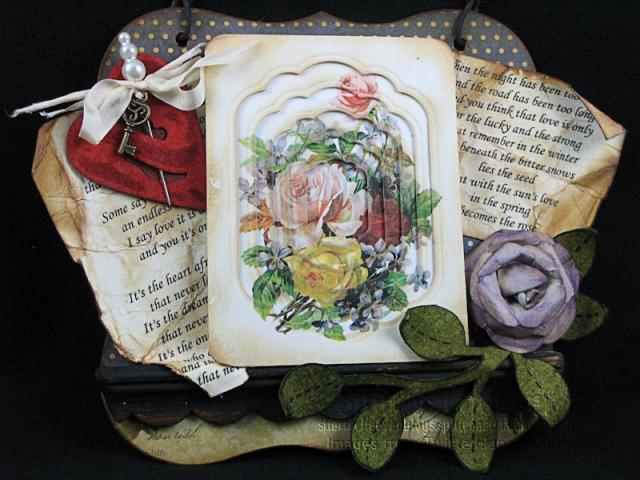
This is very cool because I used an image from TwistedPapers.com and did an inverted pyramid.  I started to type card, but it’s not a card but a wall hanging using a page from the Grungeboard Bracket Book.

sherrycheevertherosewallhangingaug43.jpg

I covered it with papers from Webster’s Pages and added some fun elements.  The tattered pages behind the image and heart are the words to Bette Midler’s The Rose.  The rose is made from Webster’s Pages, the heart is Grungepaper and the leaves are Gungeboard.

That’s all I have for now.  Thanks for stopping by and remember . . .  life is short, take advantage of the adventures that come your way today!

SHERRY SIGNATURE

Good morning!  Well, I really wanted to get this project posted yesterday, but in the middle of it all I decided to do a video tutorial.  Yes, you asked for it and here it is . . . a video tutorial on how to make those paper flowers using  Spellbinders™ Nestabilities!

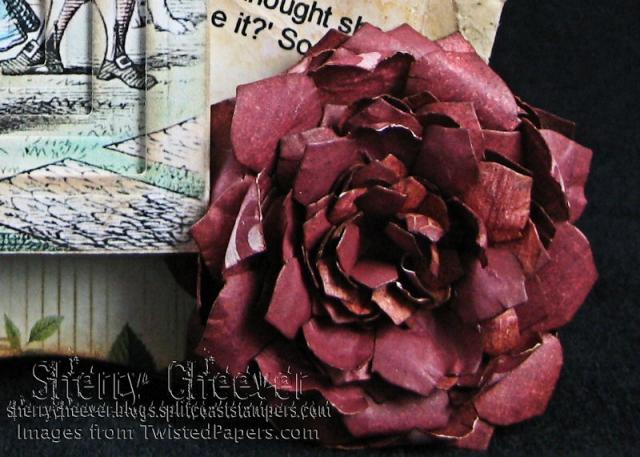
Here’s the flower that I was working on yesterday when I decided to stop and make the video.

AliceNegativePyramidRose

Here’s the video on how to make that flower.

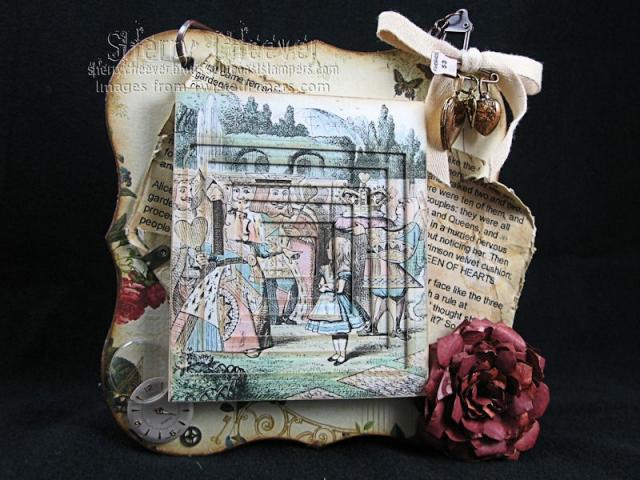
and here’s my project using the flower. 

AliceNegativePyramid

For some background on this project, the guys at TwistedPapers.com contacted me right before they were going to upload the colored images of Alice.  They thought it would be really cool if I made a project using one of the images with the negative Pyramid (get it . . . . down into the rabbit hole).  I’ve been singing

One pill makes you larger
And one pill makes you small
And the ones that mother gives you
Don’t do anything at all
Go ask Alice
When she’s ten feet tall

. . . . for weeks now!   I might have to dig out of the old Jefferson Airplane album (yes, I said album . . . and yes I still have a turntable in the basement just to play them on).

I made the positive and negative Pyramid images using Spellbinders™ Square Nestabilities.  After I had the layers made into the pyramid, I decided that the negative image needed more than a card.  I went digging through some supplies and found a Grunge Book from my last Tim Holtz class at CHA and used two of the pages from the book.  I glued them together and then glued a sheet of Webster’s Pages Postcards from Paris on both front and back.  For an additional layer, I printed out a section of Alice in Wonderland from the net about the croquet game (because it matched this image), did a little Wrinkle Free Distress using Old Paper and Vintage photo, then distressed the hell of all the edges.

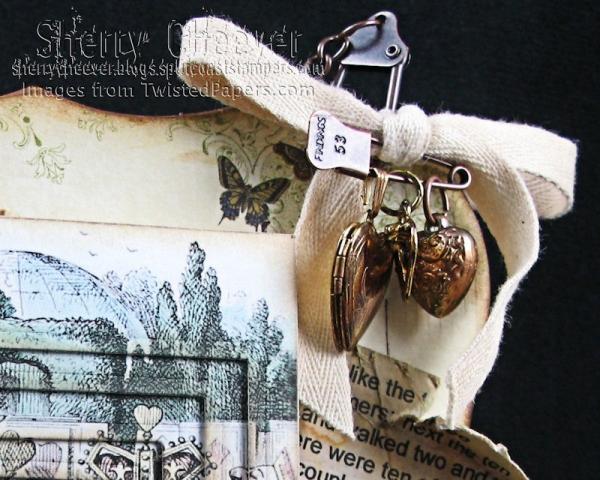
For some added fun I tore up a few old watches to get some parts that I added to the bottom left.  While doing that, I came up with another wonderful idea and have made note to get it done in the next few days.  In the image we have the Queen of Hearts so it wouldn’t do  . . . I had to add some hearts to the project.

AliceNegativePyramidHearts

To hang the project, I added some Tim Holtz idea-ology Swivel Clasps and link chain.  Thought that was pretty darn clever myself!

  • Images:  Alice in Wonderland from TwistedPapers.com
  • Paper:  Neenah Classic Crest Solar White; Webster’s Pages Postcards from Paris; BasicGrey Wassail
  • Ink:  Ranger Vintage Photo and Old Paper Distress
  • Accessories:  Spellbinders™ S4-232 Blossom Two and S4-126 Classic Squares – Large; Tim Holtz idea-ology Grunge Book pages, Swivel Clasps, Jump Rings, Trinket Pin and Link Chain; Ivory Twill; Ranger Matte Accents; Sponge Dauber

Well that’s all for today folks!  As if it wasn’t enough.  I’m off junking it with my sister today.  Hopefully I’ll find some great alterable junk!

Thanks for stopping by and remember . . . life is short, make the most of the day’s adventures!

SHERRY SIGNATURE


I know it’s a little late in the day for coffee, but I’m still enjoying the second pot of the day trying to fight a headache and lack of sleep.  So either grab a cup of coffee or whatever you drink (baileys?) and join me  . . . Smiley from millan.net

The other day I showed you another example of using Spellbinders™ Labels Eleven and a floral image from TwistedPapers.com.  I mentioned then that the image would probably become a card and I finished it this morning.

When I was searching for a name to call this technique nothing came to mind right away, so I settled on 3D Images.  Since I made the first post with this technique, I’ve heard from some of you and also read, that this is also called a pyramid card . . . well hell that certainly makes sense . . .  Smiley from millan.net  I will blame my lack of imagination on drugs.  If you watch the video tutorial closely, you might find glazed over eyes!  Yes, I’m sure you will.

Well anyway, here’s my finished project.

SherryCheeverLabels11Floral3DJan26
I also thought it would be fun to post a close-up of all the layers.  I’ve seen some of you making the pyramid without foam tape between the layers and I like the look of them too.  I just can’t resist using the foam tape to add more dimension.

FloralIllustration3DJan26
The outside edge of all the Spellbinders™ Labels Eleven and the embossed areas of the Classic Lace Border are sponged with Antique Linen.  The paper (Graphic 45) was sewn to a cardstock layer, then those edges plus the stitching were sponged in the same in.   A big silk bow ties it all together . . . gotta love this silk ribbon Smiley from millan.net

Thanks everyone for sending me links to your pyramid/3D cards which you upload them.  I love seeing what you’ve done . . . keep the links coming.

AND

Thanks for stopping by today  . . . . remember – life is short, enjoy the adventures the day brings you!

© 2015 Suffusion theme by Sayontan Sinha