Good morning!  I meant to get this post worked up last night and ready for you first things this morning, but . . . there were too many finals on last night for me to watch.  How could they put American Idol, Glee and Dancing with the Stars on all at the same time?  I mean really . . .  but by putting Dancing off until the last hour, I was able to see all three.

Yesterday I said that I would finally show one of my Graphic 45 projects.  If you checked out the G45 Blog yesterday you’ve already seen it.  For those of you who missed it, here it is!

For this one, a spiral-bound notebook made from Curtain Call.

The front cover:

SherryCheeverCurtainCallNotebookFRONT

The inside of the front cover:

SherryCheeverCurtainCallNotebookInsideFrontCover

The inside divider:

SherryCheeverCurtainCallNotebookDIVIDER

The inside of the back cover:

SherryCheeverCurtainCallNotebookBACKCOVER

The video tutorial details the sizes and putting it all together:

Well, I think that’s all for now.  One more Graphic 45 project will be on the G45 Blog on May 30th.

Thanks for stopping by and remember . . . life is short, embrace the adventures of the day!

SHERRY SIGNATURE

Supplies/Product Used:


Well, well, well . . . . Smiley from millan.net

Tonight I am entertaining some girls that I graduated high school with.  Now lets see . . . . 1976 graduating year . . . . is that 34 years ago?  Oh my . . . . Smiley from millan.net This group of girls have been getting together for dinner once a month for some time now and asked if I could do a craft night one month.  We had this planned for last month but someone fell and broke her wrist so it had to be rescheduled.

None of them are big crafters or stampers, so I wanted to keep things simple for them.  I thought of a couple of things I could make with them, and finally settled on making little notebooks that they could keep in their purses or by their phones.  Just something handy to jot notes in and since I am in the holiday mood . . . well, of course it has to be a holiday notebook!

This is just my sample for them to look at, theirs will be different as we are using scraps of old BasicGrey holiday designer paper.

Holiday Notebook

I covered two rectangle coasters with designer paper by adhering the paper to the coaster with Claudine Hellmuth multi-medium matte and then sanding off the excess.  I decided NOT to add any ink to the edges and simply keep the white edges.  The flourish was die cut from GrungeBoard with the Tim  Holtz Elegant Flourishes die and then painted gold.  The snowflake is part of the Tim Holtz Seasonal GrungeBoard set which was painted white and then covered with Rock Candy Distress Stickles.

Holiday Notebook Inside

I debated on what word to spell out on the front of the notebook, and finally decided just to use “notes” on mine.  They can make whatever word they want to make it their own.  To make “notes”, I used the Jonathan mini alphabet from Maya Road, inked it in Fired Brick Distress Ink and then applied Fired Brick Distress Stickles.

I suppose that’s all I’ve got for right now.  Prepping needs to be done now for craft night and then I’m hoping to get started on some new altered projects!  My mother and uncle went shopping at Hobby Lobby the other day and bought me two wood boxes to alter . . . they are both so excited to see what I do with them.  I have to say my uncle has become one of my biggest supporters.  One day I mentioned that I would like to have a couple of bottles and he kept me a whole bag of medicine bottles that he had emptied.  Those Hospice bottles are nice and I got a huge brainstorm (yes, it did hurt) the other day about keeping supplies in them.  I even ordered myself the new Pampered Chef spice rack to keep them in.  I sure hope they fit!  Anyhoo, I told him I needed some more so I’m sure he’s already started me a collection.  Gotta love him!

Thanks for stopping by today and remember to enjoy the adventures that come your way!!!!

SHERRY SIGNATURE

Product for Holiday Notebook:

Smiley from millan.net

I finally finished a project I’ve been working on for a few days now.  I have a trip coming up and decided that I would like to have a small notebook to keep with me to jot down any notes or things I wanted to remember.  I need all the help I can get when it comes to remembering things . . .  actually, I should have one of these in my car, by each computer, one in my purse and probably one in my pocket at all times.  Wonder if that is why I made 5 of these?  OR, could it be that I have 4 that are gifts?  Maybe!  Whatever the case, I love making these notebooks!

LifeArtNotebook

The outside of the notebooks are some rectangle coasters that I picked up from eclectic Paperie some time ago.  For the inside, I cut down college ruled filler paper to the size I needed, 3-1/4” x 5”, and punched the pages with my Bind-it-All.  The paper on the outside covers I found at Archiver’s a few weeks ago and I definitely need to pick up more. I used Ranger Matte Accents to adhere all the paper to the coasters and then for the embellishment on the front and inside.  Matte Accents is an excellent glue when working with items like coasters, chipboard and Grunge Board.  Once Matte Accents is down, nothing moves!

The sentiment panels were die cut and embossed with Spellbinders S4-138 Petite Oval and S4-190 Labels Four Nestabilities.  The flourish was stamped on the main panel in Old Paper Distress Ink and the sentiment in Vintage Photo.  Vintage Photo is also the ink that everything is sponged in.  The button is from the vintage button collection that my Aunt Linda gave me, and is tied on with embroidery floss.  Thank goodness I saved all the floss from m cross-stitch days . . . it sure comes in handy now!

After binding the notebook and finishing the front, I felt something was missing.  Since this is something that will be kept in a purse or bag, I didn’t want ribbon that could possible catch on something.  After playing around with initials and other stuff, I decided to die cut and emboss a border with Spellbinders Grand 12” Classic Lace Borderabilities.  On the inside of the back cover, I placed a 7 Gypsies pocket that could hold a few business cards.

  • Stamps:  463 Flourish Set and 461 Scraps and Scuffs from Rubbernecker Stamps
  • Paper:  K&Company Ancestry.com Tea Floral and Newsprint and Life’s Journey Layered Script; Prism Sage Dark; Bazzill
  • Ink:  Ranger Coffee and Jet Black Archival, Old Paper and Vintage Photo Distress
  • Accessories:  Spellbinders S4-138 Petite Oval and S4-190 Labels Four Nestabilities, and Grand 12” Classic Lace Borderabilities; Tsukineko Sponge Dauber; Ranger Matte Accents; College Rules Loose Leaf Paper; Vintage Button; DMC Embroidery Floss; 7 Gypsies Tag Pockets; Bind-it-All and 3/4” O Binding Wire; Rectangle Chipboard Coasters

I hope you enjoy the rest of the holiday weekend and have a great 4th!  Thanks for stopping by today!

Happy Friday!  Smiley from millan.net I hope everyone is staying warm and cozy with all this cold weather across the nation.  We’ve had no accumulating snow here, but the highs are in the teens . . . .  Good days to stay inside and stamp!

Yesterday I mentioned that I had a second project in mind and believe it or not . . .  I got it finished!

When I was making the monogrammed notebooks at Christmas, I used lined filler paper for the inside pages.  When I trimmed the paper down, I kept the sides that I cut away (3-1/4″ x 9-1/2″).  As I stood there looking at this pile of paper I was making, it occurred to me that I could make my book with it instead of tossing it in the garbage.  While I had the Bind-it-All out, I went ahead and punched the pages and put them to the side.

When Mallory took the 2008 calendar down from the fridge (one of those medium size desk calendars), I had her put it on my desk.  While cleaning off my desk last week, I realized that the cardboard on the back would be the perfect outer covers for my own book.   WOO HOO!  Take a look at what I did with some of my favorite papers, stamps and embellishments!

SLC Tall Journal

I cut the cardboard to size, then covered both pieces with some of my fave 7 Gypsies paper.  I have learned that the best way to glue anything down to cardboard or chipboard is Ranger Matte or Glossy Accents.  I used the matte for this project – it dries clear, quickly and the matte doesn’t have that sheen.  I sanded away the excess paper from the sides (so I would have a worn look) and then sponged everything down with Vintage Photo Distress Ink.  Once I had the sentiment panel the way I wanted, I die cut the panel out using the soon to be released Spellbinders Large Deckled Rectangles.  To finish off the book, and since I was using some of my favorite things, I decided to layer a number of Tim Holtz idea-ology embellishments.  Way too much fun!

To give you an idea of the size and the filler paper, here are a few pics of the inside:

Inside Cover Tall Journal          Tall Journal Inside

That’s all I have today, but while working on this project and idea came to mind for another.  I know.  It’s scary!  I hope you have great adventures today . . . whatever they may be!

Happy Friday!  I hope you all had a wonderful Christmas.  We had Christmas Eve here with my family and lots of food.  Once again we over did it with the food . . . but oh my was it good!

As I’ve mentioned in prior posts, I had made some gifts for my sister, aunt and mother that I couldn’t show until after they had received them.  Today, I get to show you!  You have to bear with me though, there’s a lot of info to share.

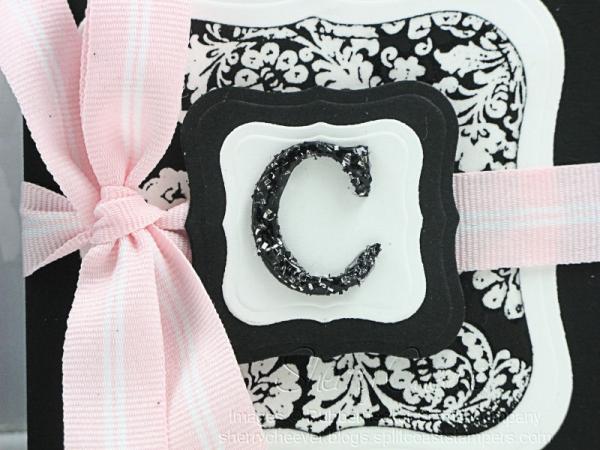
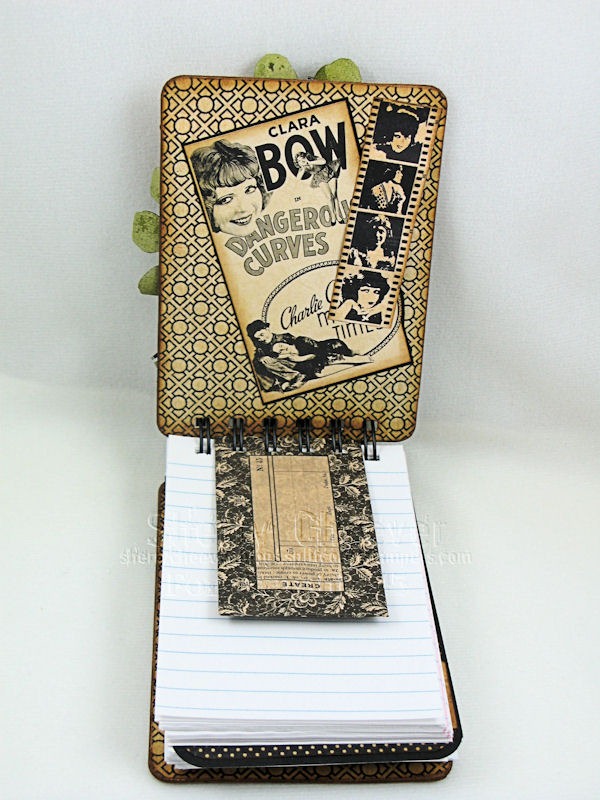
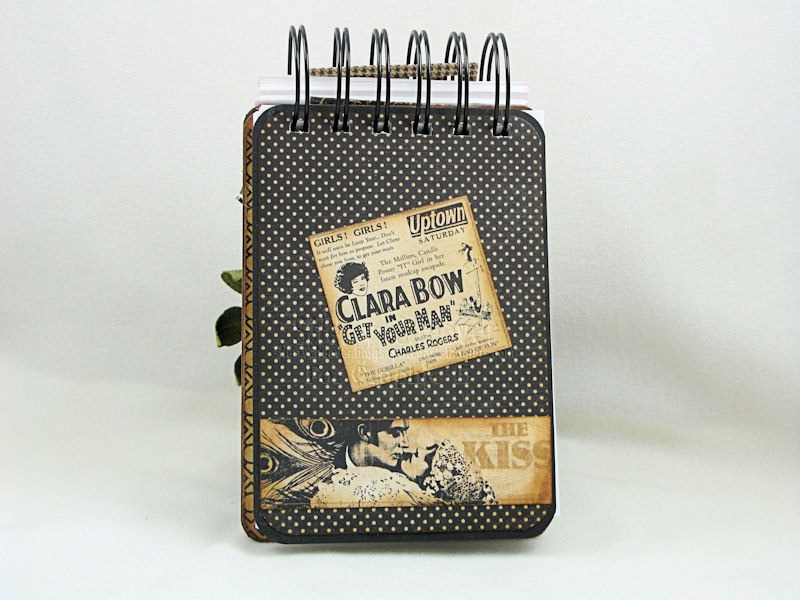
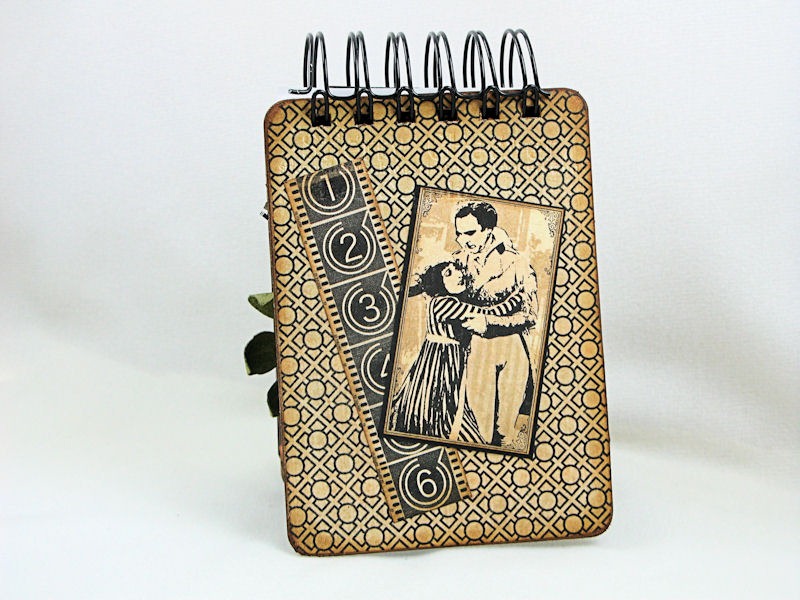
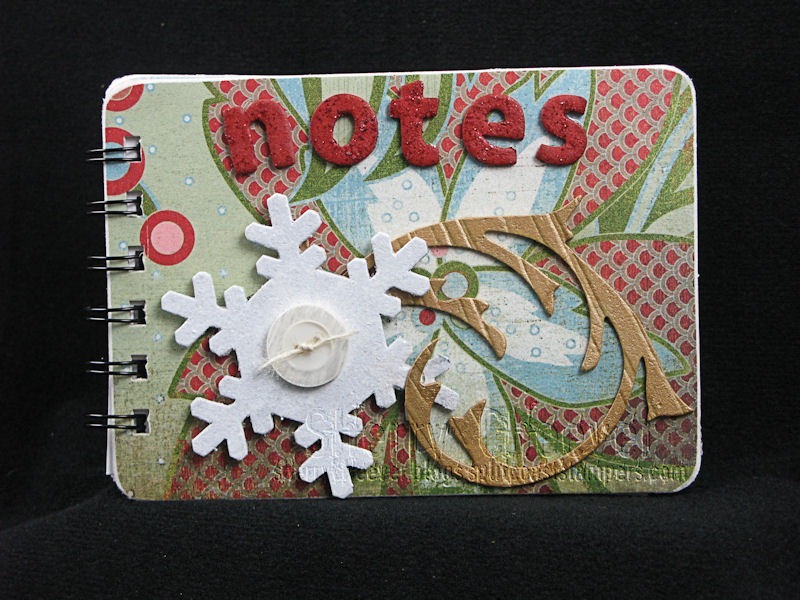
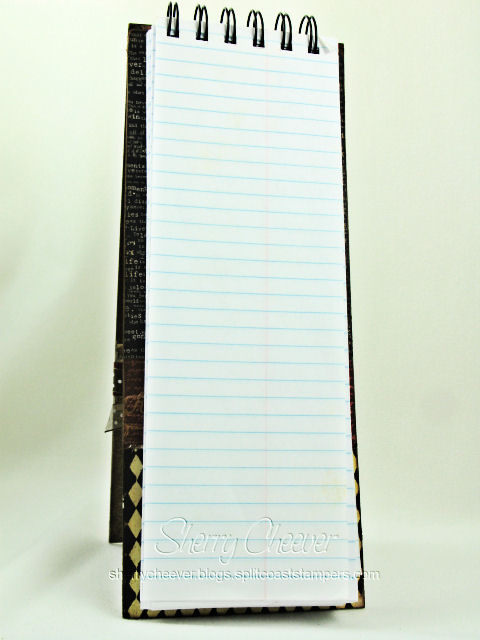
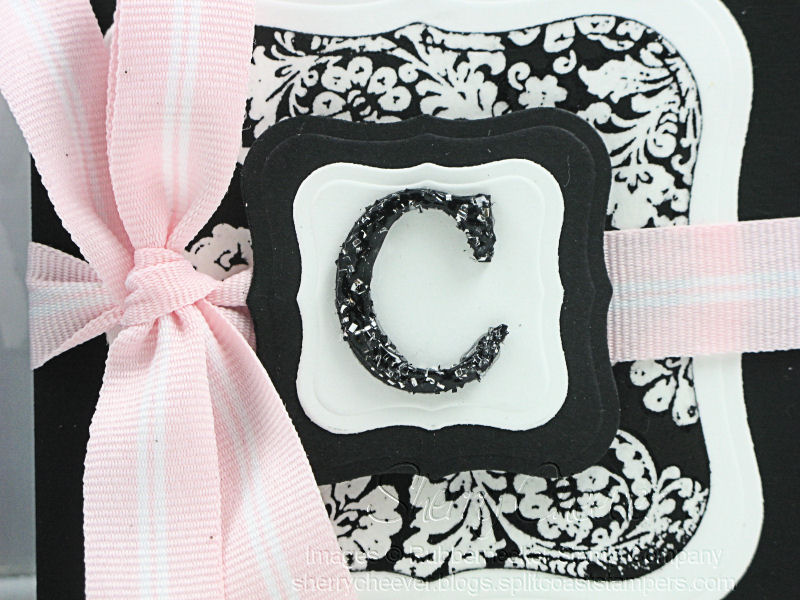
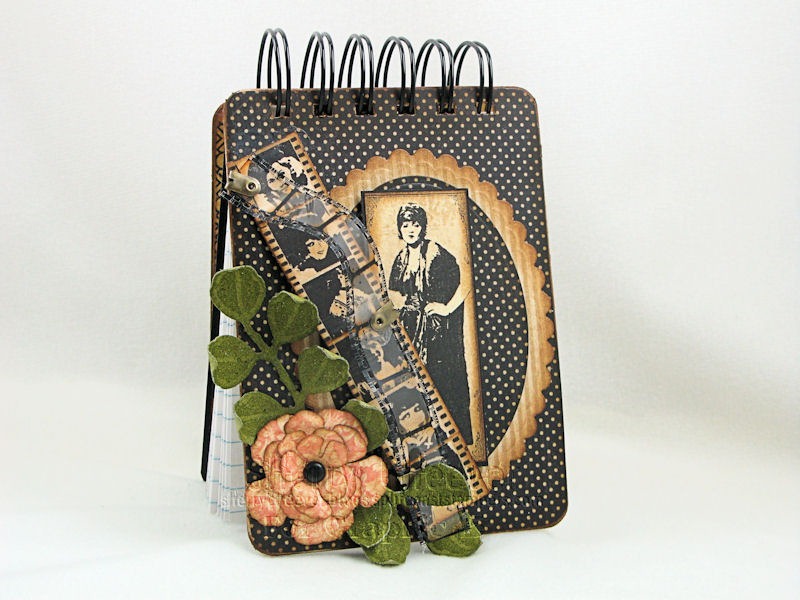
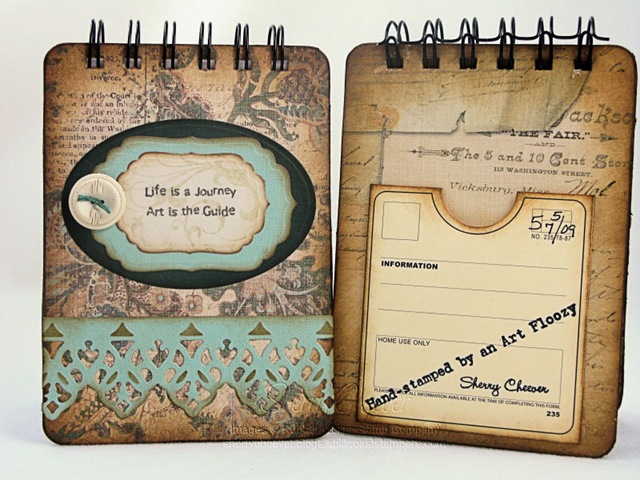
These are the notebooks that I made for them.  Each one has their initial that was covered in Ranger Glossy Accents and then sprinkled with glitter.  Once the first layer had dried, the initials were covered again with another layer of Glossy Accents.  I love how it made the initial thicker and more durable when the books are handled.

RN Monogram Notebooks

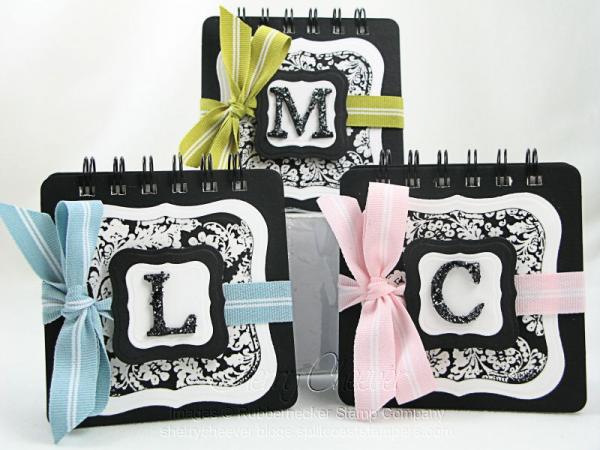
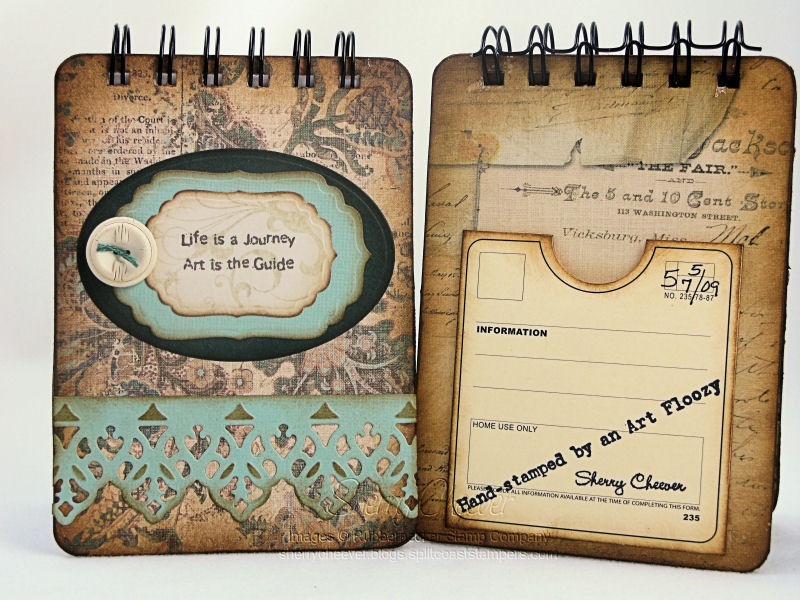
I used heavy weight chipboard coasters for the covers, painting them black with acrylic paint.  The inside pages were made from loose leaf paper that was cut to size, and then all was bound with 5/8″ O wire binding and the Bind-it-All.  For the front panels, I used Spellbinders Labels One Nestabilities and layered them all, with the monogram raised with foam tape.  The background was made by stamping my image on white paper, clear embossing and then inking in Black Soot Distress Ink.  After I had the black color I wanted, I ironed off the embossing using the Faux Bleach Technique (you’ll see more on this later).

I needed something to wrap the notebooks in, so I decided to make my own boxes using Jen del Muro‘s mini pizza box template.  Of course, I needed to make the box larger so I added 1″ to the dimensions.

LAD Snowflake Gift Boxes

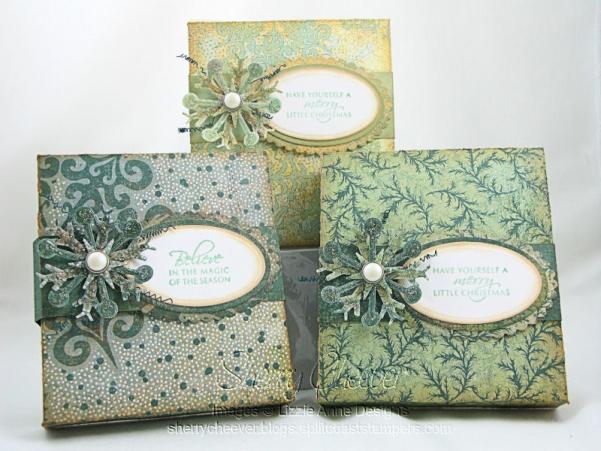
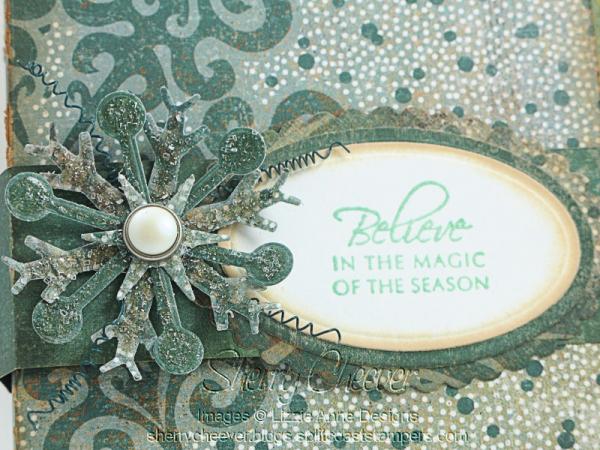
I made a band from the coordinating cardstock and put velcro on the bottom to make removal easy.  I made the snowflakes from the same paper, die cutting them with Spellbinders Snowflake Wonder Shapeabilities.  I covered each snowflake with Ranger Glossy Accents and sprinkled each with glitter.  The layers were put on a pearl brad, and to hold the wire embellishments in place, I wrapped the wire around the brad before I flattened the prongs out.    The snowflakes and sentiments were put on labels made with Spellbinders Petite Oval Nestabilities.

Oh and by the way, here’s a closeup of the monogram,

Close up of Monogram notebook

and of the gift box.

Gift Box Close up

I hope you all have a great day!

© 2015 Suffusion theme by Sayontan Sinha