BlogPreview

Welcome to day three of the Blog Hop with Ken Oliver Crafts and Stencil Girl Products.  Style Contributors and Designers from both teams have come together to create some fabulous projects using products from both companies.  We hope to inspire you!

Ken-Oliver-StencilGirl-HOP-BLOG-HEADER.jpg

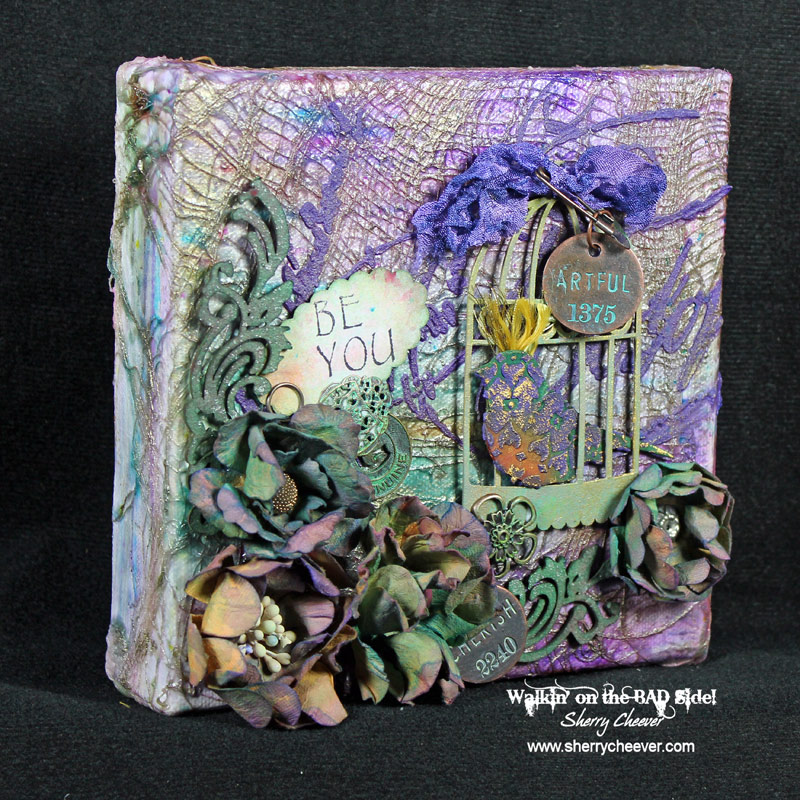
My first project is a 6×6 canvas that uses Color Burst in a variety of ways.

FullCanvas

The canvas was painted with white interior latex paint and while the paint was still wet, puffs of Color Burst were added.  Using a brush, the Color Burst was mixed in with the wet paint, spreading color across the canvas.

STEP1

When the paint was dry, a layer of surgical gauze was added across the top using Glue ’n Seal to adhere the gauze.  Much to my surprise, the more Glue ’n Seal used, the more intense the Color Burst became.  A bit of Heirloom Gold Perfect Pearls were added to the gauze as it was worked onto the canvas.

STEP2

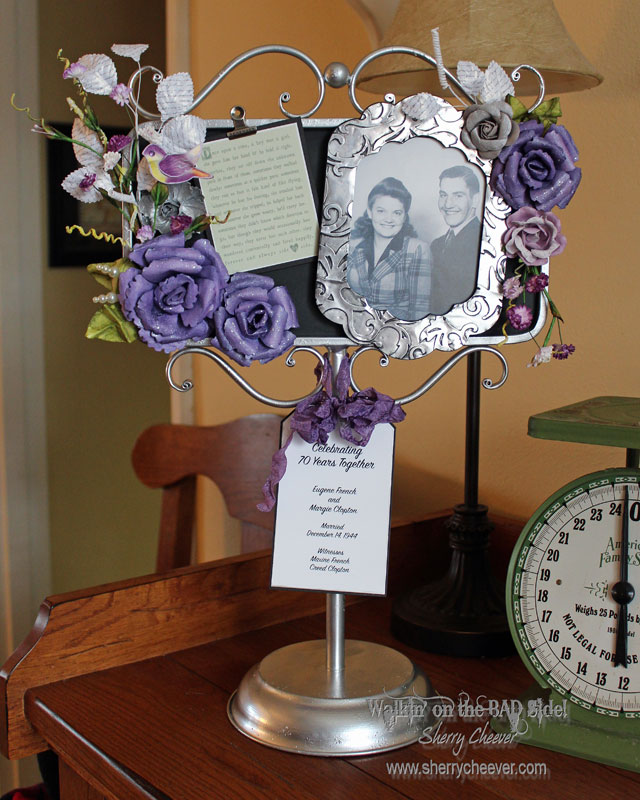
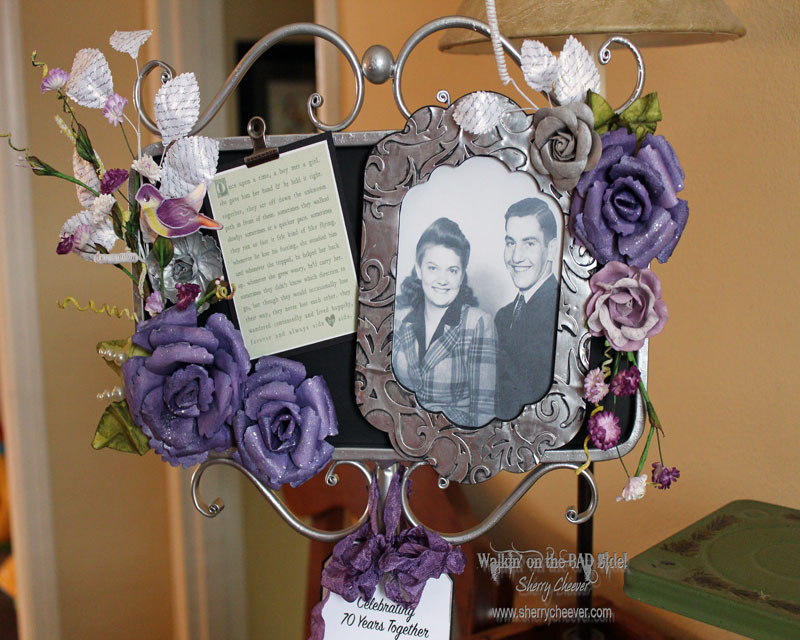
Violet Color Burst was added to white embossing paste, which was then used with the Vintage Script Stencil to add the colored embossing paste to the canvas.

STEP3

The flowers are some from Petaloo that I’ve had in my stash for some time.  There were originally a sienna color, but I thought I would try dying them with some Color Burst mist (made by adding puffs of Color Burst with water).

STEP5

Here’s a closer view of the flowers once they were dry.  The variations of color is amazing!

CloseUPFlowers

This must have been a “Use Your Stash” project, because while digging for the flowers I found an old chipboard birdcage and bird that I decided to throw on.  The birdcage was painted gray with patina paints and Inka Gold added for some dimension.  The chipboard bird was colored with Color Burst mist and Violet embossing paste was added using Bali Doily Stencil.  For a touch of personal whimsy, some gold ribbon was frayed and added to the head of bird (kinda like my own gray short spiky hair).  A bit of Inka Gold was added to the dried embossing paste on the bird.

CloseUPBird

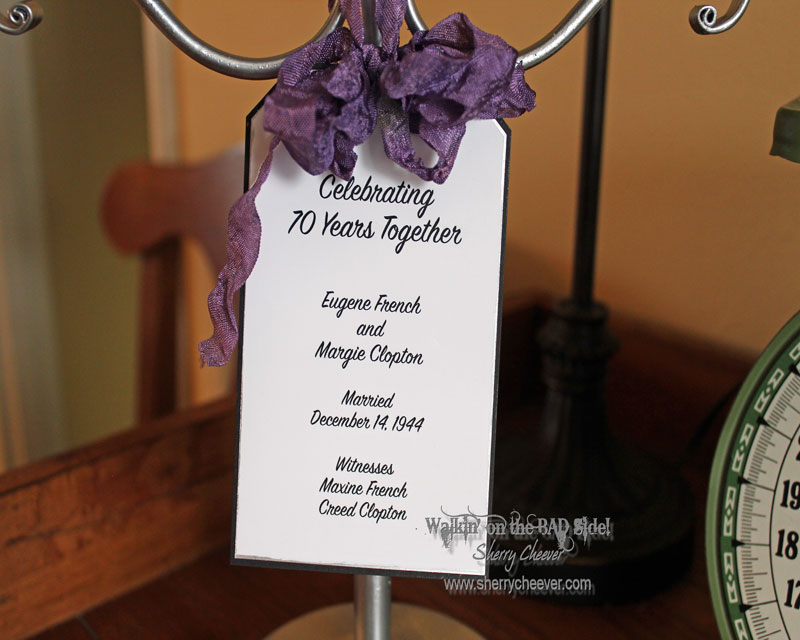
The sentiment, Be You, was created by using Ken Oliver Crafts Pegz Uppercase Alphabet.  The ribbon tied to the bird cage is seam binding dyed with Violet Color Burst.  As you can see, Color Burst is extremely versatile and can be used with so many different mediums!

CanvasSideView

While I had the Color Burst going, I decided to play with a few more cards.

SilhouetteCard

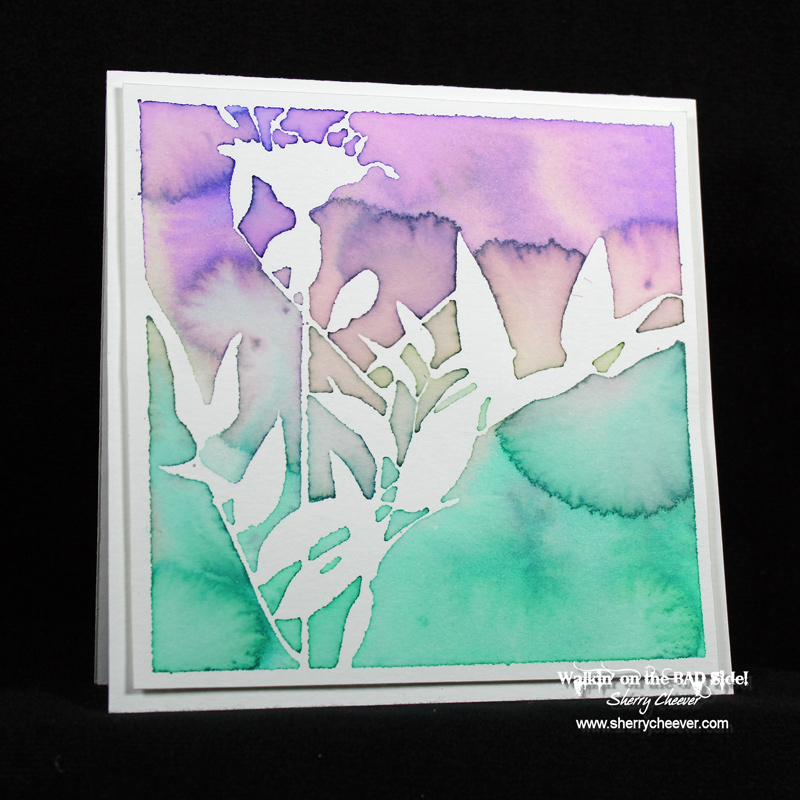
The above card was made using watercolor paper and the Silhouette of a Wildflower Stencil.   The stencil was placed on the paper, misted with water and then misted with various Color Burst mists.  The image was trimmed and then mounted on a watercolor paper card base with 3D Foam Squares.

ApterCard

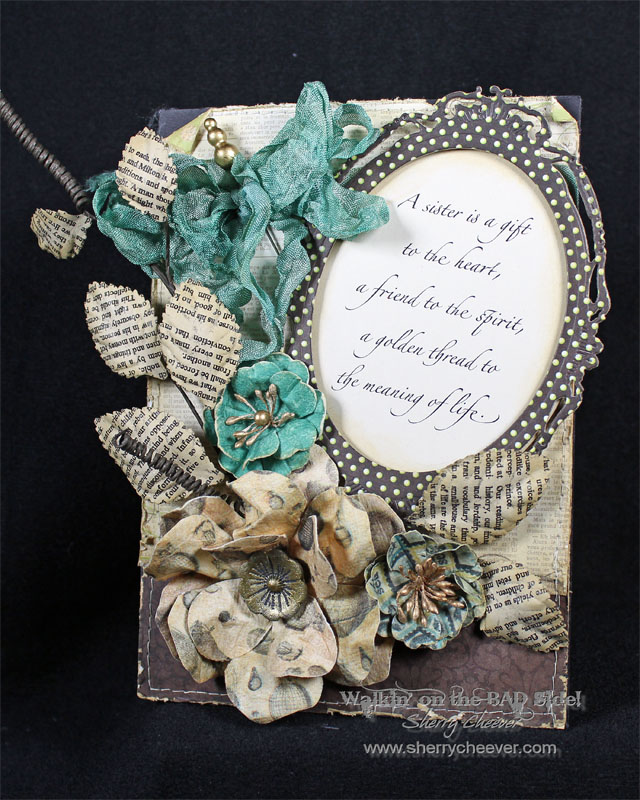
This card was made by using a previously created background and a stencil from my stash, Past Present Future Stencil, by my friend Seth Apter.    The stencil was placed on the background and then misted with water to pick out some color in the background.  The image was trimmed and added to a card base from watercolor paper using 3D Foam Squares.

Set2

and

Set1

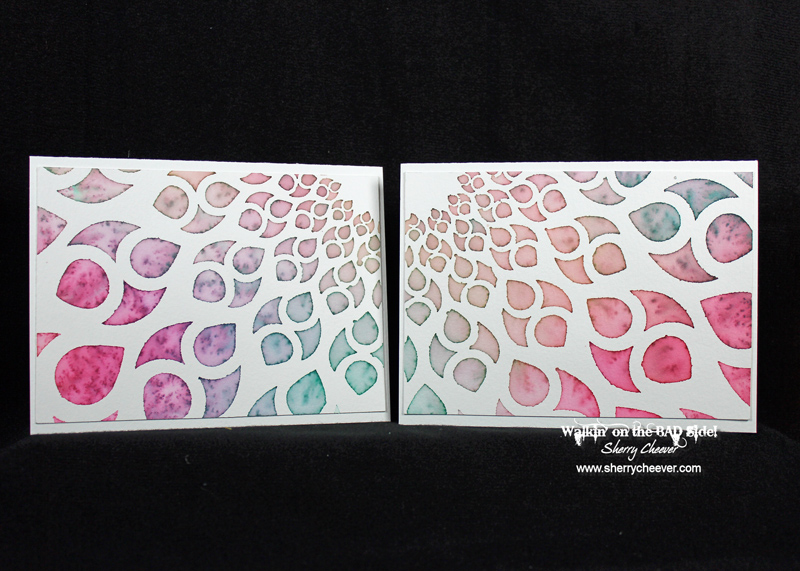
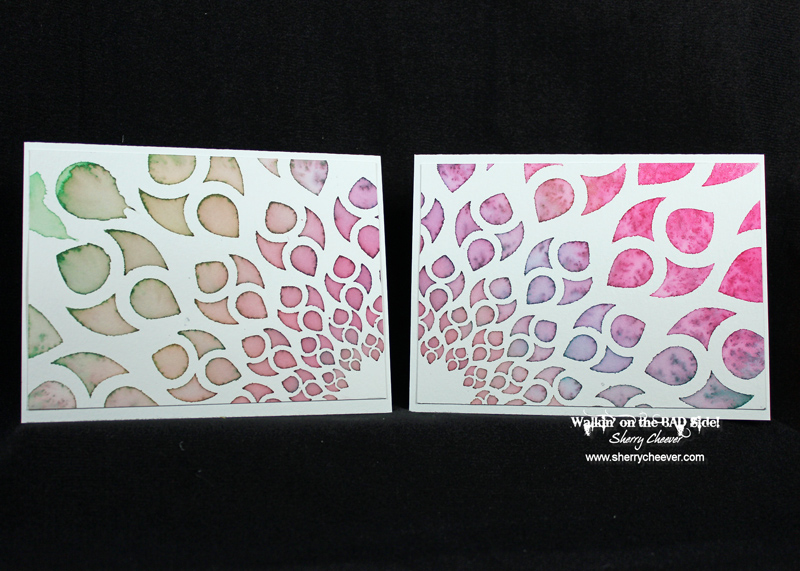
This set of cards were made by using Cornish Petals Stencil Large and watercolor paper.  The stencil was placed on the paper, misted with water and then misted again with various Color Burst Mists.  Once dry, the image was trimmed into 4 different card fronts that were attached to card bases.


Please be sure to visit the blogs listed below to see what the Designers and Style Contributors have created to share with you:

StencilGirl Talk

Sherry Cheever (YOU are HERE)

Janet Joehlin

Julia Kellogg

Thank you for visiting our blogs today and I hope that you’ll be inspired to create something wonderful with Stencil Girl Products and Ken Oliver Crafts!

We have a crafty haul of prizes from Ken Oliver up for grabs, just leave a comment below and you’ll be eligible to win!

Winners will be randomly selected from my blog, just leave a comment to become eligible for a prize.  It’s easy!  Here’s what we’re giving away!

12 Daily Prizes – 1 Pack Ken Oliver Crafts 6×6 Papers (24 pieces).

2 Grand Prizes on Friday – 1 Complete Set of Color Burst (6 Colors); 1 Complete Set of Click It Ink Pads (6 Colors); and 1 Set Pegz Alphabet Stamp Set.

Leave a comment on each StencilGirl Talk post and the team members posts to be entered to win a $50 gift certificate from StencilGirl!

Join us every day this week, you can enter every day…Friday’s grand prizes are incredible!

Thank you again and GOOD LUCK!

SHERRY SIGNATURE


Project Supplies:


One of the big projects I worked on over the Holidays, was a special gift for a family member.  Before I give you the project though, I would love to share some back story.

My grandmother was the oldest of 9 children.  She passed away in the early 80’s never having the opportunity to see my girls, her great-grandchildren.  Her mother, my great-grandmother passed away in 1985 . . . I was pregnant with my oldest at the time.  My grandmother has one sibling still living (age 86) and I get to see my Great-Aunt and her family once a year at our family reunion.  Luckily, I have been able to connect with a few of her children on Facebook and we can stay in touch more than simply at the reunion.  This past year, my Great-Aunt and Uncle celebrated their 70th anniversary!  One of my cousins who I have contact with on Facebook and who has seen my cards, canvases, etc., asked me to make something special for her parents’ anniversary.

We talked a little at the reunion this past October to firm up what they were going to do.  Since it was their 70th and platinum is the standard gift (and difficult to find), they settled on the colors of silver and purple.  They scanned and sent me a picture they had of my Aunt and Uncle when they were both young and starting out.

Knowing this project was for such a special occasion, I wanted it to be fabulous.  After thinking about it for more weeks than I want to admit, I went to work with my heart and soul to create something that would pay tribute to my Great-Aunt and Uncle.

FRENCH1

The stand is one I found at Hobby Lobby.  It was black and I believe the center might be a chalkboard.  I couldn’t say for sure, because I just didn’t think to write on it to find out.  I spray painted it silver, leaving all the rough texture from the distressed black.

Since I had the picture, I needed a frame.  Numerous pieces of chipboard were die cut, glued together to make a deep frame.  A piece of silver metal was then die cut, embossed with an embossing folder and antiqued to add just a tad of aging.

FRENCHFRAME

Most of the flowers are from Prima, but in order to add some balance and fill space, I die cut and made the larger purple roses.  I also found a poem that I printed out to celebrate the many years of the marriage.

FRENCHTag

A tag on the bottom, computer generated and backed in black, was attached with dyed seam binding, to commemorate the occasion.

FRENCHCloseup

I think that’s all . . . except to say what an honor it was for me to create this special gift to help celebrate my Great-Aunt and Uncle.  In some small way I was also able to honor my grandmothers.  As I stood in the shower the morning I was to deliver the gift, it occurred to me that my grandmother, if still alive, would be 103 years old this April!

My next big project is to make 50 fabric flowers to be attached to take-out boxes for an event the first weekend in February!  Stay tuned . . . they are of course, fabulous!

SHERRY SIGNATURE

I’ve been meaning to post this project for weeks now and just haven’t had the time to do it.  So I figure since today is gloomy and we are inside once again, no time like the present.

I was contacted by a friend to make something special for her sister’s birthday, which was days away from Christmas.  We talked about sentiments, colors, card or plaque, etc., and finally settled on something that she could set out and display.

Here’s what I came up with and I’ve been told that my friend’s sister loved the gift!  (By the way, if you click on the photos it will enlarge them and make them clearer!)

SisterPlaque

The plaque measures a little over 5×7 and is placed on a frame easel back.

SisterPlaqueBACK

The sentiment was one found by my friend, which was typed and die cut/embossed with ovals.

SisterPlaqueCloseUPSentiment

The flowers surrounding the sentiment are from Prima which I felt matched the paper (MME Lost & Found Rosy) and were in the shades of earth tones.

SisterPlaque

I love it when someone asks me to make a special gift for them and I have one more to show you that I worked on for my Great-Aunt’s 70th Wedding Anniversary . . . coming soon!

SisterPlaque3

Thanks for stopping by and joining me today!

SHERRY SIGNATURE


Project Supplies:

Wow have I been gone for a little bit.  Well, not really gone but not able to post much.  I hope everyone had a wonderful Christmas holiday and if you have the crud like the rest of us, it hit you after Christmas Day!

I’ve been busy in the studio, and have a number of things to show you . . .  now that the holidays are over . . . but first and foremost, I must show you some CHA projects I’ve been working on.

Today’s project is one I’ve worked on for my friend, Ken Oliver, using one of his new lines of paper and inks, which are premiering at CHA.

STUDIOCabinet

The paper used is Ken’s new line, Studio, and it features items that he has placed around his home and in his studio.  If you were one of the lucky one who attended  his Art at the Edge and went to visit his home, you’ll recognize some of the images in the papers.  Quite frankly, it’s quickly become one of my favorites!!

STUDIOCabinetSide

The storage unit is the Verona Creative Storage Kit in the Forever Moments line by Tonic Studios.  I will say that this storage kit is quite the endeavor, 2 or 3 days to paint and assemble . . . well at least for me . . . but I do believe it is well worth it in the end!

STUDIOCabinetBack

The flower in the center at the top was made from bits and scraps of the left over paper, using Tonic Studios Scalloped Circle Layering Die Set.

STUDIOCabinetFlower

I also need to mention that Ken’s papers come in 12×12 and 6×6, perfect for card makers and bigger projects, and it has a glossy finish making for a quite thick and sturdy sheet of paper!

STUDIOCabinetTopDown


So I think that’s all for me at this time!  Like I said earlier, I have so much to show you in the next few days . . . I’ll be back!

SHERRY SIGNATURE

Good morning!  I hope y’all are doing well and staying warm . . . it’s a whopping high temperature of 26 degrees here today (I miss my shorts and bare feet)!  Let’s see, since I was last here my sister and I walked our first 5K.  I finished in 47 minutes, which I’ll take since I didn’t jog, run or trot at all . . . just walked.  I’m especially proud of my sister!  Two years ago she fell and broke her leg right below her knee.  She had 4 surgeries in the first week and has since had two more and a bone graft.  (okay I’m guessing at the number, I might be off one or two surgeries but I’m sure she’ll pipe in and let me know for sure)   For her to get up and start walking with a 5K is extraordinary  . . . I’ve been walking all summer long and get lots of exercise chasing Hadlee around the house everyday . . . but for my sister . . . WHOA Nellie!  She did fabulous and it made her believe that anything is possible now.  I’m so proud of her!!!!

Let me see what else?  I had a crafty Monday with my sister and we made ICE Resin pendants.  We haven’t finished them up quite yet, but I’m pretty darn close to having mine all complete . . . then I can show you what I did!  Honestly, I’m thinking I need to open up an online store and start selling some stuff off . . . anyone interested?

I’ve also been working on some gift boxes for an event my sorority is having and I’ve been gathering my thoughts to create a special 70th Anniversary gift . . . so much going on in this BAD mind of mine!

The other day I was cruising around Pinterest looking for some weight loss quotes (those Daily Inspirations on Facebook) and I happened across a shadowbox.  I loved it  . . . instantly . . . and pinned it for myself because I knew that I had to try my hand at it!

Yesterday I was finishing up in the studio after a Quietfire kind of day, and remembered that I had a small wood frame in my alterable stash.  It’s something I picked up at Hobby Lobby one day a few years ago, probably with an idea for it at the time . . . but it never came to light.  I decided to fill my afternoon with paint and stencils!

Here’s my finished project.

BelieveShadowboxCover

Here’s what the frame looked like before I started.

746024

The frame was painted white, antiqued with a gray paint and then lightly sanded to add some texture to the frame.  I found one larger jingle bell buried deep in a drawer in the stash closet, which I took outside and spray painted with oil rubbed bronze, then hung it up to dry while I finished the frame.

BelieveShadowboxCloseUP

Suzanne Cannon, owner of Quietfire Design, recently created a Silhouette cutting file of her hand-calligraphy “Believe” which I knew was going to be the sentiment inside the frame.  The file with cut from vinyl so that I could make a stencil in order to paint the lettering inside the frame.

BelieveShadowbox

To finish the frame, embellishments were added to the jingle bell and it was hung from the inside top of the frame. Can I just say  . . . I’m loving this little frame and think I need to make a few more!

I guess that’s all I have for today . . . Believe it or not, I will be back tomorrow with another new project!  I know . . . don’t faint!

I hope y’all have a great day!

SHERRY SIGNATURE


Project Supplies:

© 2015 Suffusion theme by Sayontan Sinha