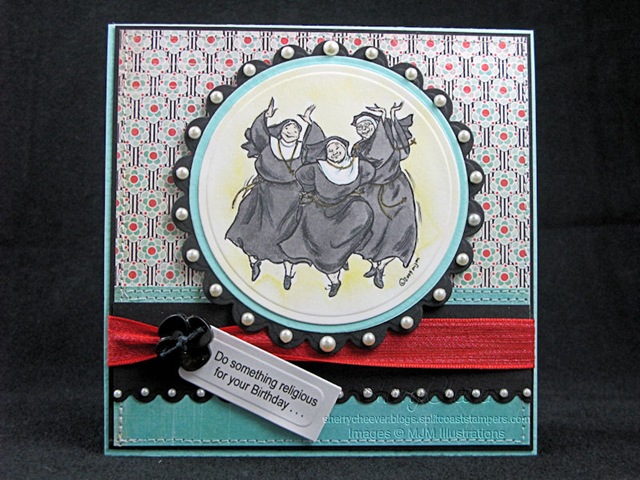
The Dancing Nuns!

I made this card (Ode to Ouiser Boudreaux) last October for my mother to give to one of her friends for her birthday.  Well, my mother has a friend in Florida who has a birthday this coming week, and she asked me to make one more.   She’s quite sure that her friend will thoroughly enjoy it!

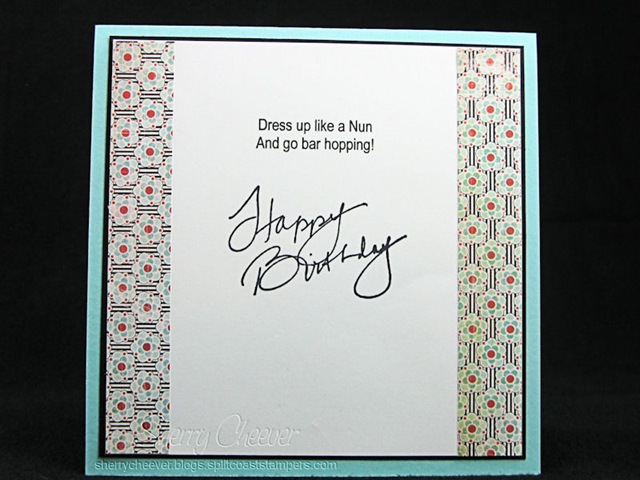
Quite frankly, this is one card that I myself enjoy making . . . it makes me want to put in “Steel Magnolias” and watch it once again!  Someday I will find the perfect images to work with all the one-liners in the movie .. . .  I’m working on it!

DancingNunsJan30

The nuns were colored with Copic Markers and then die cut/embossed with Spellbinders™ Circles.  Instead of using pearls on this card, I decided to keep it more simple and used White Opal Liquid Pearls.  I doubled one of the new Spellbinders™ Borders (Fair Isle) for my border at the bottom on the card.  The computer generated sentiment is tied to a vintage button from my stash.

Here’s the inside

DancingNunsINSIDEJan30

I hope you are enjoying your weekend!  Remember  . . . life is short, enjoy the adventures of each day!

Smiley from millan.net  Are you ready for the little Smiley from millan.net tonight?  I am!  I’ve got a basket full of candy that I don’t like (or can’t eat) to give out and we’re all set.  Smiley from millan.net

Now, how many of you are Steel Magnolia fans?  I LOVE that movie and all the great one-liners that I never get enough of.  One that constantly makes me laugh is when Ouiser is sitting in church and proudly announces that she and her friends used to dress up like nuns and go bar hopping!  When I saw Mo Manning’s drawing of Joy, I knew that I had to have that image and exactly what I was going to do with it.

 JOY

The image was printed on Neenah paper, water colored with Distress Re-inkers, then die/cut and embossed with Spellbinders™ Circle Nesties.  The sentiment on the front tag and inside the card was computer generated. 

Joy inside

I think I’ll give this card to my mother to send to one of her friends . . . they’ll get a real hoot out of it!

  • Stamps:  Joy from Mo’s Digital Pencil, and Happy Birthday from Endless Creations
  • Paper:  Neenah Classic Crest Solar White; Prism Frosted Teal; Black; BasicGrey Urban Prairie
  • Ink:  Ranger Black Soot, More Mustard, Vintage Photo and China Blue Distress Re-Inkers
  • Accessories:  Spellbinders™ S4-116 Classic Circles – Small, S4-114 Classic Circles – Large, S4-125 Classic Scalloped Circles – Small, S4-143 Long Scalloped Rectangles – Large, and S3-031 Scalloped Tags; Kaiser Craft Self-Adhesive Pearls; May Arts Ribbon; Vintage Button; Black Twine; Foam Mounting Tape; Sewing Machine

Have a Happy Halloween and thanks for stopping by!

Smiley from millan.net

Happy Hump Day!  October is a busy birthday month for my family.  Not only is it mine and Mallory’s birthday but also my aunt’s birthday month.  Actually my aunt’s is on the 13th and Mallory’s is on the 14th.  I’ve had an idea in my head for a few weeks now on what to make for my aunt’s card.  She’s not the sappy, sweet sort and like funny cards for the most part.  Remember last week when I said I was search for fairy images?  Well it was for my aunt’s card.  I did find a few I liked, but yesterday I found the perfect image.

I recently stumbled upon Mo’s Digital Pencil!  I subscribed to her blog because her images were out of this world fantastic.  Yesterday when Mo’s blog game up in Google Reader, I clicked on through and went to her site.  Of my goodness gracious!  Can this girl ever draw and actually illustrates children’s books.  I bit the bullet and purchased three of her digital images, all fairies.  If you haven’t been to Mo’s Digital Pencil, you need to visit . . . that’s all I can say!

Anyhoo, I downloaded the fairies, brought them in my photo editing software, resized the one I wanted to use and printed it out on Neenah Classic Crest Solar White.

Birthday Fairy

I used Copic Markers to color the Fairy and die/cut embossed the image with Spellbinders Classic and Scalloped Nestabilities.  The background paper was stitched to a second layer and a border made from Spellbinders Scalloped Borderabilities was added.  The sentiment was stamped on white and then cut/embossed with Spellbinders Tags 5.  There’s actually glitter on the wings but you can’t see it in the photo . . . bummer!

Now we get on the outside that this is a Birthday Fairy who has come to wish my aunt a Happy Birthday!  But on the inside:

Birthday Fairy Inside

I truly could not help myself . . .  it’s just way to much fun being me!

  • Stamps/Images:  Happy Birthday from Endless Creations; Say it in Script from Lizzie Anne Designs; and Fairy 2 from Mo’s Digital Pencil
  • Paper:  BasicGrey Wisteria; Papertrey Rustic Cream; Prism Wizard Medium; Neenah Classic Crest Solar White
  • Ink:  Ranger Archival Jet Black and Milled Lavender Distress
  • Accessories:  Spellbinders S4-081 Tags 5, S4-114 Classic Circles – Large, S4-121 Scalloped Circles – Large, and S4-174 Petite 5-1/2” Deckled Scalloped Borderabilities; Copic Markers; Papertrey Vintage Cream Ribbon, Button and Rustic Cream Button Twine; Foam Mounting Tape; Sewing Machine; Tsukineko Sponge Daubers; Computer to Generate Inside Sentiment

I hope you have a fantabulous day and thanks for stopping by!

© 2015 Suffusion theme by Sayontan Sinha