Good morning y’all!  All weekend, I’ve been playing with Ken Oliver’s new product, Color Burst!  I have to admit that I messed with Color Burst a little at CHA, and watched Ken for hours making backgrounds (distress without the mess) and showing us the ins and outs of the product; but until I actually got it in hand and started playing with it myself . . . Well, Oh My BADness!

First thing that took me by surprise (and I truly can’t believe that it did), was that it’s a powder.  A very concentrated powder . . . why did I not realize this at CHA?  I have no earthly idea!!!  Maybe it was the fact that I watched Ken mist the paper and then sprinkle on the Color Burst . . . and it immediately burst into color all across the page.  Then he would mist it with water and it would spread even more . . . Yes, call me a ditz!  The first time I used it here at home, I had to ask my other teamies if mine had dried up or was it actually powder . . . okay slap my forehead!

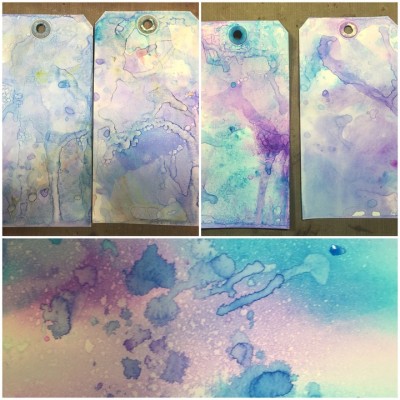
I know I’ve mentioned this here before, but the first few things that ran through my mind when I saw Ken work with Color Burst was Faux Batik and of course, distress without the mess.  One thing I played with this weekend was using Color Burst for a “Layered Textured Wash”.  I misted my craft sheet with water, sprinkled on the Color Burst, misted with water again and watched the color “burst” on the craft sheet.  I tried watercolor paper and then white coated tags.

988946_10153344923395839_1303161359888974131_n

As I picked up color each time I was amazed that no matter how muddy my craft sheet looked (ink pooling all over the place), when dried on the paper the colors didn’t muddy!  I LOVE it!!!

One of the other things I thought of immediately was the Faux Batik Technique.  (That link is to an old tutorial I did using alcohol inks . . . I think I need an updated video!)

SpringGarden2

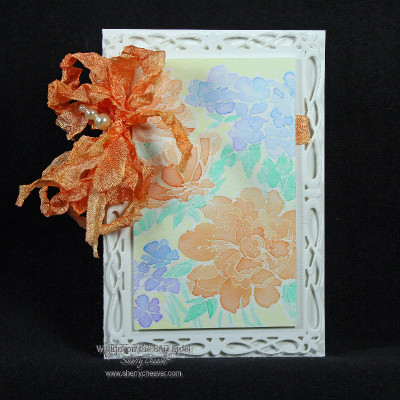
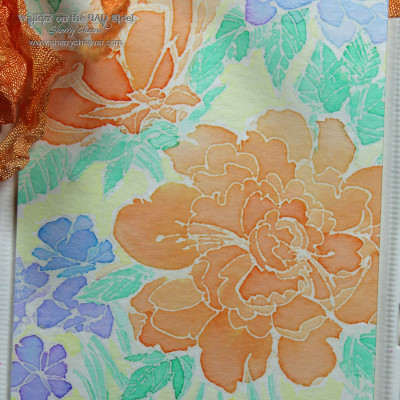
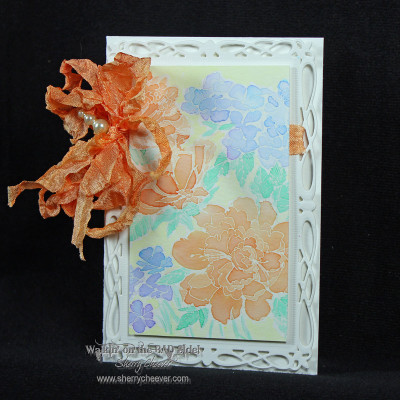
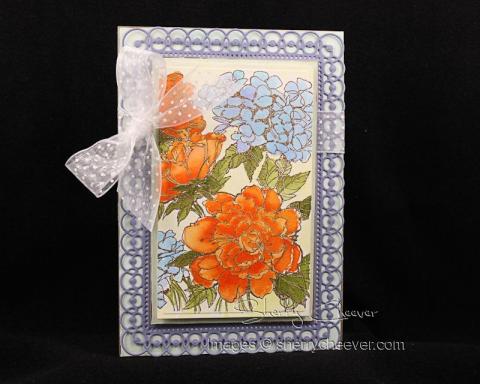
This card is really very simple to do.  The image was stamped with VersaMark on watercolor paper and embossed with clear embossing powder.  Using Color Burst to watercolor with, the image was watercolored and when dry, the embossing was removed with a craft iron (see tutorial or either video) creating the Faux Batik.

SpringGardenCloseUP

The seam binding was dyed with Orange Color Burst to match the color in the flowers.  I haven’t made any mists up yet, so I misted my craft sheet with water, sprinkled on the Orange Color Burst, misted with water again and dropped in my damp ribbon.  As I dried the seam binding, I continually picked up the color off the craft sheet.  Love all the shimmer and different shades achieved with the Color Burst!

SpringGarden

A background for the image was die cut/embossed from watercolor paper with Romantic Rectangles.  The image and the card base then trimmed to fit the die cut rectangle.

By the way, the stamp used is Stampendous Garden Background.  I’ve had it for a few years and when I searched for it online, it’s not on the Stampendous website.  I did however, find it at Frantic Stamper, Amazon and 123Stitch.

That’s it y’all!  Thanks for stopping by and visiting with me today!

SHERRY SIGNATURE


Project Supplies


Good morning!  Wow I feel like it has been forever since I’ve been able to get my craft on.    I’ve got some great ideas for projects but I’ve been waiting on supplies and mainly just having some uninterrupted crafty time.    I’ll need to be kicking it into high gear here over the next week or so . . . I’m way behind in design teams projects and my month is slowly disappearing.

I tried to get a little inky over the weekend but I’m afraid the mojo up and ran away . . . everything I tried was nothing that I felt comfortable with.  I was able to salvage one image and believe me . . . what looks like it took 30 minutes actually took 2 days.

I decided to watercolor one of my favorite Stampendous images, Garden Background.  The image was embossed with Queen’s Gold Embossing Powder and then water colored with various Distress Ink Refills.  (I’ve listed them all below in the supply list).

StampendousGardenFeb2013(3)

I wasn’t very neat with my water coloring on purpose.  I was trying for the free flowing look with lots of water and dropping in the inks.

The image and the layer behind it was die cut/embossed with the new Spellbinders™ 5×7 Matting Basics.  At first I thought I wanted to go with just a plain white layer behind the flowers, but it was a little to stark for me.  I ended up sponging on some Tumbled Glass and Antique Linen Distress Inks to tone down the white, then edged the layer with Krylon Gold Leafing Pen.  I liked the look so well, that I ended up doing the same thing with the white paper layer behind the 5×7 Detailed Scallops layer.

I think I was in a springy mood when I was water coloring the image.  I’m tired of cold weather!  It can be 60 here one day and 30 the next . . . ah the joys of living in the Ohio Valley.  The daffodils have been peeking out of the ground for a month now and I noticed last week that the Naked Ladies are popping up in the boulevard  . . .  I’m ready to get outside and take some baby walks!

Well, that’s all for me today.  I’ve got a project to work on for Quietfire that needs to be posted tomorrow . . . so I guess I’ll see you tomorrow!  Thanks for stopping by today!!

SHERRY SIGNATURE

Project Supplies:

or a Bad Witch?

Happy Thursday!  I’ve got another Halloween card to share today but first let me answer a question about the Vintage Glass Glitter from yesterday.  I’ve been using this glitter for a number of years now and for me, there’s nothing else that compares to it.  My favorite and what I used on the snowflake in yesterday’s post is Barbara Trombley’s Art Institute Glitter.  I personally like the shards in Krystallos.   You can find it at the links above, or at Simon Says Stamp.

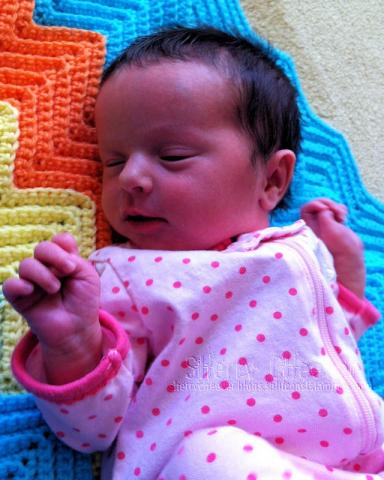
Now for my card!  A week or so ago . . . honestly I can’t remember when exactly . . . a lot of my time has been spent helping Katie and the new wee one . . .

Hadlee Monday

who has literally stolen each of our hearts . . . especially her Auntie Mallory’s!

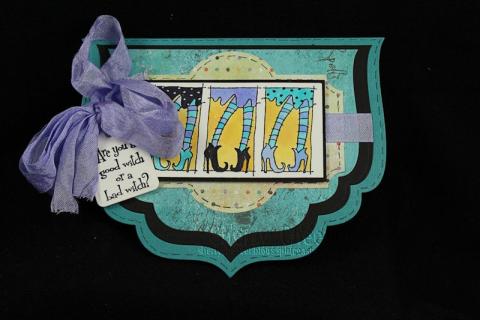
Anyhoo . . . back to the card!  I pulled out some of my favorite Halloween stamps, Stampendous – Witch Shoes and Inky Antics – Good Witch, and this is what I came up with.

SCheeverGoodBadWitchOct2012(3)

The image was water colored with Distress Ink Refills and the seam binding was dyed in matching Shaded Lilac Distress Ink.

That’s it for me today!  I have to tell y’all that there is already new Winter CHA Product hitting my doorstep . . . deadlines looming . . . . no wonder it feels like this year is flying by!

Thanks for stopping by!

SHERRY SIGNATURE

Project Supplies:

Wow it’s been a while since I posted!  I’ve finally settled down a little this weekend and allowed myself some studio time.

Before I get to today’s project, let me fill you in over the past week.  My sister, Carrie, returned home last night after a weeks stay in the hospital.  Unfortunately, my brother-in-law had to take her back overnight because she couldn’t breathe . . .  it ends up she has pneumonia . . . but it back at home for a few days.  She had 3 surgeries last week to correct the Compartment Syndrome, and finally on Thursday they were able to stitch up the last fasciotomy.  Her next surgery is on Wednesday, when they will try and fix the tibia . . . I’m assuming that is, if she can withstand another surgery with the pneumonia.  Why they didn’t keep her in the hospital is beyond me (more than likely the insurance company said enough is enough, send her home).  I myself first thought it would be good for her to come home for a few days since her room was on the top floor and it was like 90+ in her room.  Very little air and outside it’s sweltering.

Anyhoo, that’s all the medical updates I have right now . . .  next week holds more doctor visits for other members of the family . . .

I’ve had lots of Zentangle Time . . . .

I’ve made lots of Zentangles . .  . .

I need to take pictures . . .

In the meantime, here’s a little card I worked up today.

FloralBackground(3)

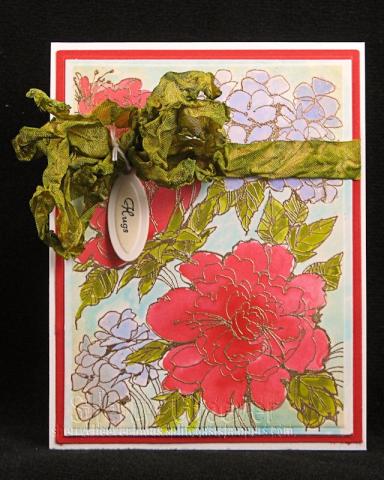
Sadly it’s hard to tell how all the colors really are in this photo.  The image was embossed with Queen’s Gold Embossing Powder and then water colored with Distress Inks.  I used the new Spellbinders™ Card Creators for the background image and the red layer of the card.  I cut the base of the card at 4.25” to work with the die template.  I haven’t made a card this size in I don’t know how long!

I didn’t try to be very neat with the water coloring, letting the paper show through in spots and going out of the lines in others.  It was one of those fast, not much detail painting things.

I guess that’s all for now.  Thanks for stopping by today!

SHERRY SIGNATURE

Project Supplies:

© 2015 Suffusion theme by Sayontan Sinha