Hey y’all!  I hope everyone has had a blessed holiday season and you’ve been able to enjoy some time with family and friends.

I don’t know about you (and even though winter has only begun), I’m so tired of wearing long underwear, fleece pants and fur-lined boots that I could just spit!  I’m ready for shorts and sandals . . .

so today’s card is inspired by my need to have a little sunshine and warmer weather.

FromTheGarden

The panels (including the base) for the card were all die cut/embossed with Spellbinders® 5×7 Matting Basics.   Once the top panels was die cut, the leaves and flower were stenciled in using Studio 490 From the Garden Art Stencil.  The background was then stamped in Sepia using Fun Stampers Journey Script background.  The panel was placed back in the die template and the edges were sponged with Antique Linen Distress Ink.

FromTheGardenCloseUP

The remaining two flowers were stenciled on a separate sheet of white cardstock and then trimmed out.  They are raised on the front of the card with foam mounting tape.

The sentiment “thank you” is from the Fun Stampers Journey set, Little Big Greetings.  It was stamped in Sepia and then die cut/embossed with Back to Basics Tags.

FromTheGardenLeftAngle

Before the card was assembled, all the edges were trimmed with a Krylon Gold Leafing Pen.  The tag was then tied to the ribbon with gold chord in my attempt to bring it together.

That’s it for me right now.  Thanks for stopping by today!

SHERRY SIGNATURE

Project Supplies:

Happy weekend!  I hope everyone is enjoying their weekend so far.  I really thought I would be back with a project before now, but as luck would have it this past week was a real bear.  Once again Mallory ended up in the emergency room and we spent close to 11 hours waiting while they ran a few MRIs and got the results.  We left still not knowing what is wrong with her and had orders to follow up with more doctors.  We did the follow ups a day or so later and still are no closer to a diagnosis than we have been for the past 2 years.  We have finally received approval to take her to one of the larger clinics but we are trying for a referral to a neurologist here first.  A neurologist is the only specialist we have not seen yet . . . .

If anyone has any experience with these symptoms, we would love to hear from you:  muscle/joint aches and pains, left arm and leg going numb, hand tremors, blurred vision, deep chesty cough, fatigue, headaches . . .

We’ve had a number of people (not doctors) mention MS to us . . . and quite frankly her symptoms are all there . . . but we’ve thought about a number of other things too.

In the meantime, I got some studio time yesterday afternoon and was able to finish up a quick card this morning.

FromTheGardenCard

I’ve been waiting for the Studio 490 From the Garden Stencil for Art and it finally arrived this week.  I couldn’t wait to do something with it.  The flowers were stenciled 3 different times, with the top two trimmed out and popped up over the one on the front of the card.

FromTheGardenCard CloseUP

I left a sentiment off on purpose, because every time I turn around Mallory or someone else in the family is needing a card . . . this way we can add a sentiment to the inside when it is needed.

That’s all for today.  I’ve got one more project for tomorrow, so I’ll be back then!  Thanks for stopping by.

SHERRY SIGNATURE

Project Supplies:

Welcome to eclectic Paperie’s Belated Birthday Bash!  Today we’re celebrating the (belated) one year anniversary of the store’s new ownership! It’s been an amazing year, full of inspiring projects, wonderful classes, and many, many new products!! eclectic Paperie wouldn’t be where it is today without the ongoing support of our customers and as a BIG “thank you”, you’ll have an opportunity to win lots of great prizes! eclectic Paperie will be giving away the following prizes (you have until midnight tomorrow (9/20) to comment):

  • A full set of Tim’s NEW Distress Paints
  • 6×6 Paper Pad Bundle
  • Dylusions Stencil Bundle
  • A set of NEW Wendy Vecchi Archival Inks
  • Crafter’s Workshop Stencil Bundle

To be entered into the prize drawing, please be sure to comment on the eP Blog and on each of the eTeam blogs.  Check out all of the thumbnail links below to view the rest of the eTeam projects!  (SIDE NOTE:  I have entered the code, but there is a possibility that it will not work on my blog . . . please be patient with me until I can come back and manually add the names, BUT in the meantime, please visit the eP Blog for the complete list.)

Powered by Linky Tools

Click here to enter your link and view this Linky Tools list…

Now for my project!  I was over the moon ecstatic this week when I saw that eclectic Paperie had added the Crafty Individuals line of stamps to the shop!   Some of my favorite stamps (that I haven’t had the opportunity to use for some time) are from this line.  I purchased maybe 10 stamps from Magenta about 5 or 6 years ago while I was at Stampaway (all of them Crafty Individuals) and luckily a couple of the ones I have, Kim has in the store!   SO what that means, is that I got to use one of my all time favorite stamps for my project today!!

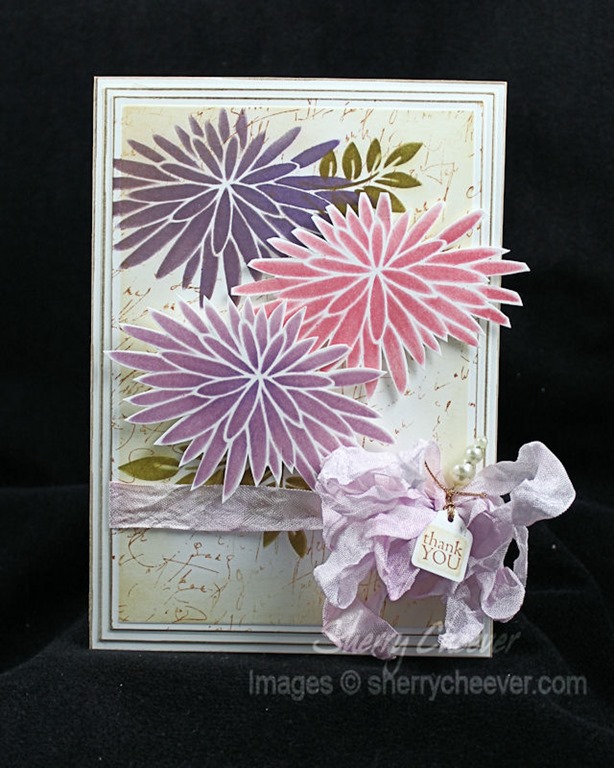
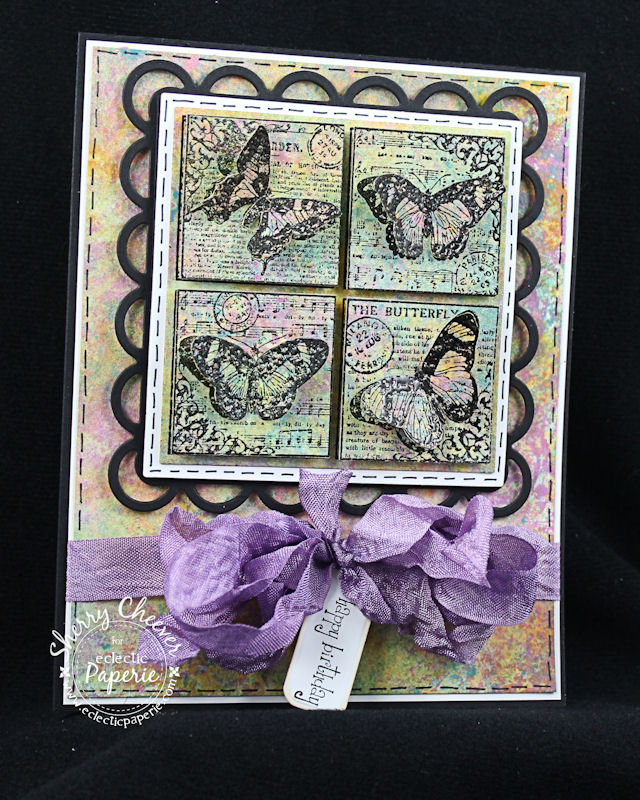
The background for both the card and the image, was made by sponging Lowe’s Valspar indoor paint samples on watercolor paper.  The image was stamped in black and embossed in clear, three separate times.  The first image was die cut/embossed with Spellbinders® Classic Squares SM, mounted on white that was die cut/embossed with Classic Squares LG, and then mounted on black that had been die cut/embossed with Lacey Squares.  For the second butterfly image, each individual square was cut out and mounted on the coordinating square of the main image.  Using the third embossed image, each individual butterfly was cut out and mounted on the second image squares.

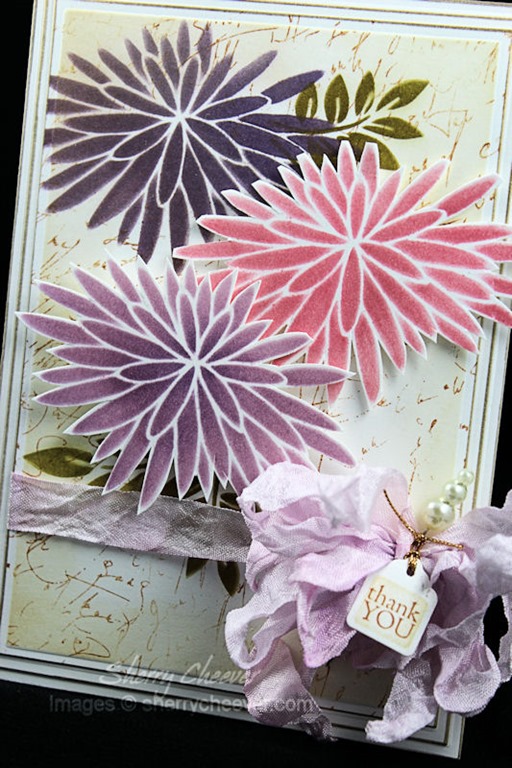
Hopefully you can see all the dimension and layers in the above image.

I don’t remember what color the seam binding was dyed.  I had made it for another project, didn’t use it, and it ended up in my ribbon jar.  As I was searching for a matching ribbon for the background this color just popped out at me!

The small “Happy Birthday” sentiment was stamped in black StazOn and then die cut/embossed with Back to Basics Tags.

That’s all I have for today!  Thanks for stopping by and I hope you enjoy the hop!

SHERRY SIGNATURE

Project Supplies:

Well as always, I’m running behind in trying to get my projects done for the month . . . so I spent the better part of the day today in the studio working on a tag and on another yet unfinished project.

My tag is made from chipboard and Graphic 45 Olde Curiosity Shoppe Collection (which I still have pads and pads of)!

G45Tag

For the tag itself, a piece of chipboard was die cut using Spellbinders® A2 Matting Basics A and then for the top, a piece of the Olde Curiosity Shoppe Collection was die cut with the same die template.  Measuring 3/4” from the top along the sides, both pieces of paper were cut at an angle.  The center of the chipboard piece was marked and then using die #1 from MD1-007 Circles One, a small hole was die cut (which I ran the ribbon through).

Using one of my new stamps from Fun Stampers Journey, Script, was stamped on the chipboard tag in Memento Tuxedo Black.  After distressing the edges of the G45 paper and adding some Memento Toffee Crunch, Peanut Brittle and Rich Cocoa ink along the edges, the G45 paper was sewn to the chipboard tag.

G45TagFlower

The top of the G45 paper was rolled down at an angle and the flower (made with S5-085 Bitty Blossoms) was tucked into the roll.  If you look closely in the above photo, you can see the stamping on the chipboard tag.

“Thanks so Much” was stamped in Salon Jet Black and die cut using S4-367 Back to Basics Tags.

G45TagSideAngle

For the ATC image, I took a white shipping tag and misting with ink sprays.  I made the ink sprays using Memento Ink Refills in Toffee Crunch and Peanut Butter by adding about 10 drops of ink into water in a mini mister.   The image (Fun Stampers Journey – Shabby Chic ATC) was stamped on the tag in Salon Jet Black.  Once trimmed, the edges were distress and then sponged with the same colors of ink used for the spray.

The seam binding ribbon was dyed with the Memento ink sprays as well.  I was surprised how well they worked actually!

That’s all I have for now.  Thanks for stopping by and once my other project dries  I’ll be back!

SHERRY SIGNATURE

Project Supplies:

© 2015 Suffusion theme by Sayontan Sinha