
Oh my BADness, I really didn’t mean for it to be so long before I shared my last Majestic Labels One project. This one didn’t make the cut for CHA, which in one way makes me very happy . . . it will now have a permanent spot on my studio wall!
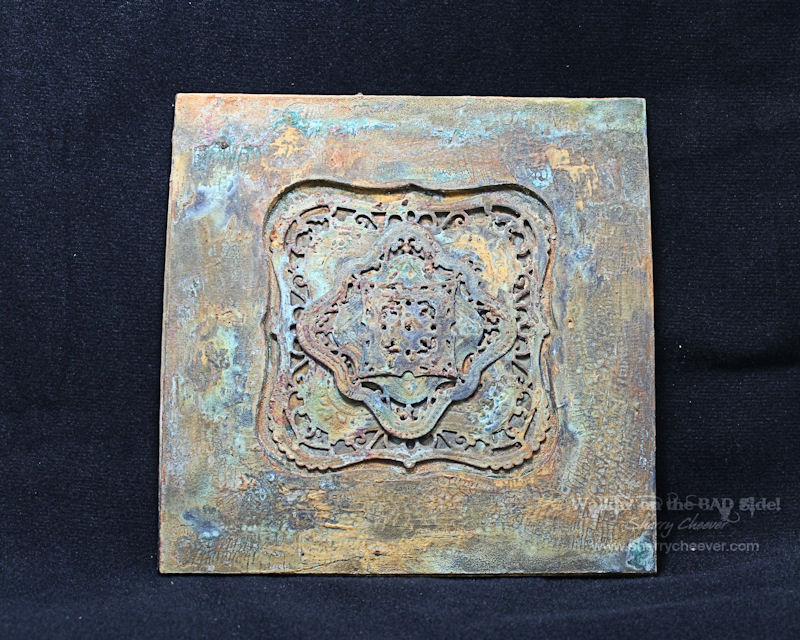
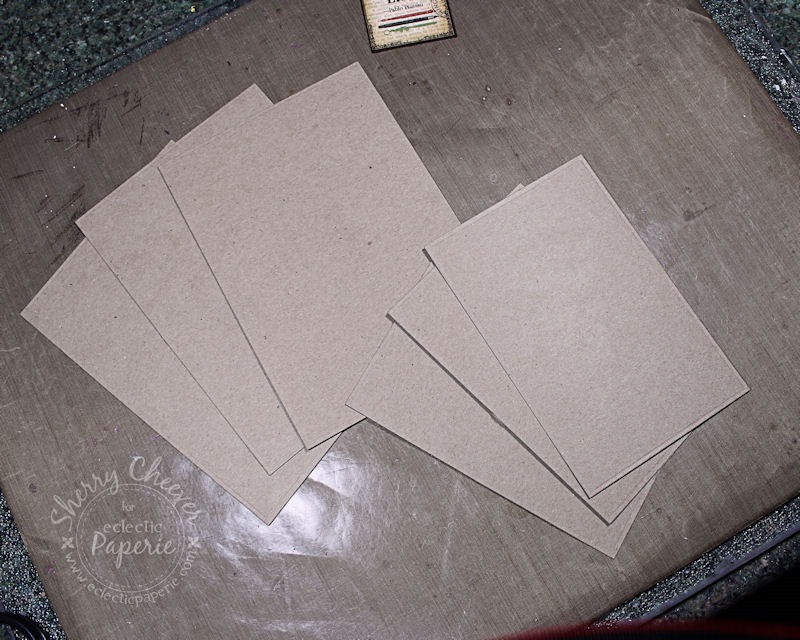
Lets talk about the frame first. It’s made from chipboard that was die cut with Spellbinders® Grand Squares. There were four pieces die cut with the square to form the actual base, that were all glued together and set aside. The top part of the frame was made by leaving the Grand Square taped to the base plate and adding the Grand Labels One in the center. Four or five pieces of chipboard were die cut for this layer and then glued together with the base piece that had been set aside.
(I failed to take pictures of this process, but if there are enough interested in the process leave your comments and I’ll recreate it for you).
The frame was painted black and portions of it were covered in white crackle embossing paste. (I thought the frame was going to process from there into something I could submit for CHA . . . but I changed my mind at the last minute and pulled out my Ten Seconds Studio patina paints.)
I started applying layers of bronze and iron patina paints, letting them dry thoroughly. From there additional layers of paint were applied and misted with patina solution. Ten Seconds Studio has excellent video tutorials on this process so I won’t re-create the wheel . . . Please hop over to their YouTube Channel and see what the fuss is all about.

The inside of the Labels One opening is watercolor paper that I die cut/embossed with Majestic Labels One painted in the same way as the frame. My post on the mini pizza box tells in detail how the Majestic Labels One were die cut/embossed.
Just look at all the wonderful patina and textures created. The orange patina is from the Iron paint, the greens are from Bronze and Copper paint.
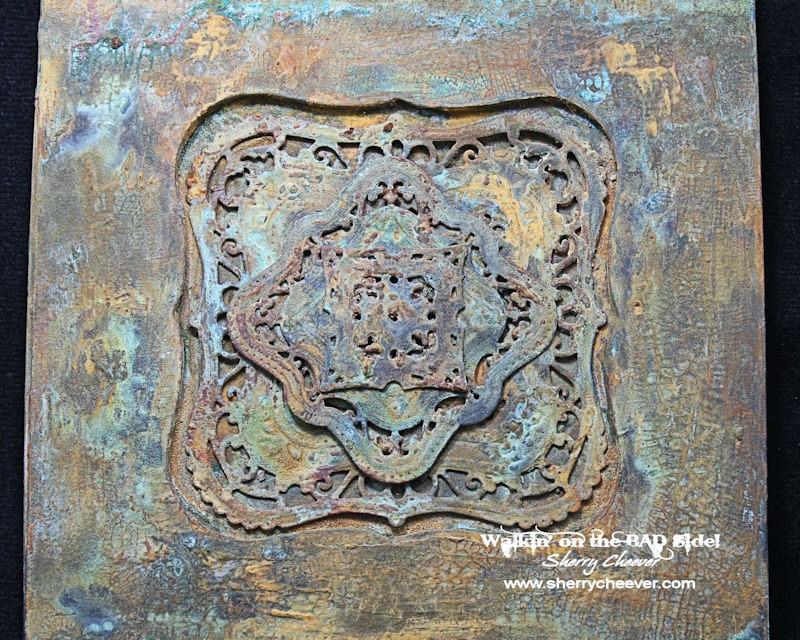
I absolutely love how the patina ran into the cracks of the crackle embossing paste! This entire piece reminds me of an old kitchen tin tile that has been left out in the weather for years and years.
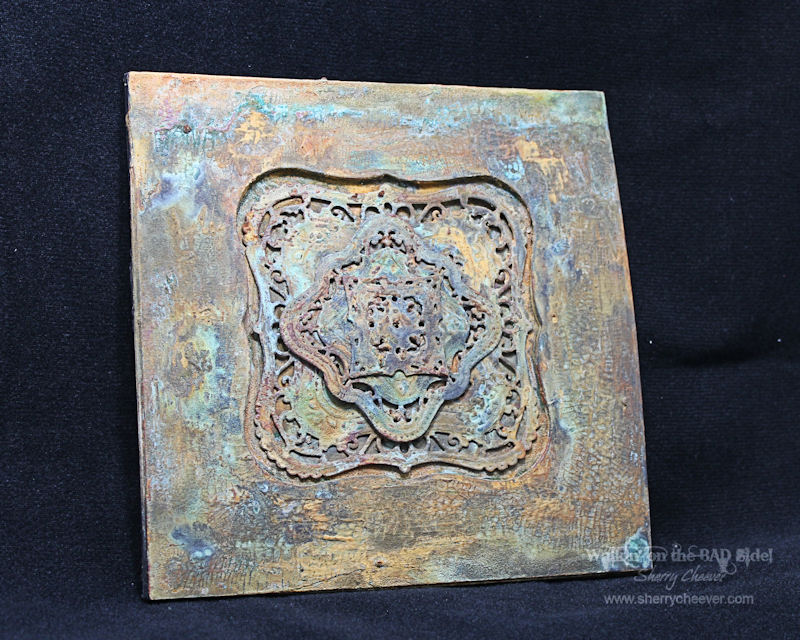
I am amazed at the results achieved with simple chipboard and some paint! The middle pieces were glued down with E6000 adhesive.
I wonder how cool it would be to make three more of these, all with different elements, and made them into a larger wall hanging? Hmm maybe some projects down the road!
Well anyway, that’s my CHA reject. So happy that it was because it sure wouldn’t be here with me!!
Thanks for stopping by and joining me today!

Project Supplies:

I know I’m a few days late ringing the new year with you, but better late than never. I spent the first running around to junk stores with my mom and sister. Got some great buys and had a fabulous day! We ended up at Cracker Barrel for lunch and of course, they were serving black-eyed peas. Now they are not one of my favorites, but in the hopes of changing my luck for the upcoming year that I had to indulge a tiny bit! My sister said they tasted like dirty feet . . . I have to agree . . . but I still ate a few spoonful’s. All I can say, is that the grilled chicken and baked sweet potato tasted a hell of a lot better!
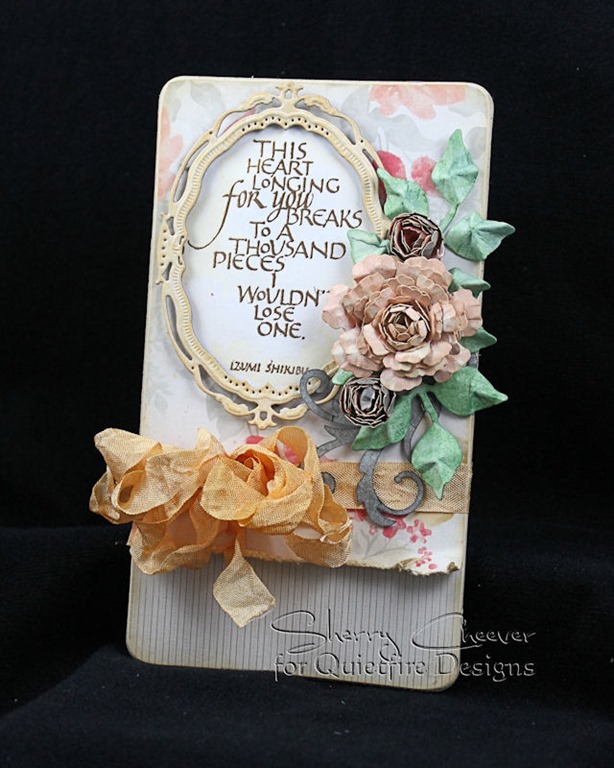
Today is my day to post over on the Quietfire Creations Blog! I’m sharing a chipboard plaque that I made using one of the newly released companion sets, This Heart Longing for You.

All the details and more pictures can be found on the designers’ blog, Quietfire Creations. I hope you’ll stop by and take a peak!
Thanks for joining me here today!

Project Supplies:


Good Monday morning! I hope everyone had a great weekend and didn’t get into too much trouble. I spent Saturday cleaning up the basement after the sump pump failure the week before (yes, we are still trying to get things moved around, stuff we don’t need tossed out, and more of the carpet out of the downstairs room of stash). Sunday was household chore day . . . and racing of course!
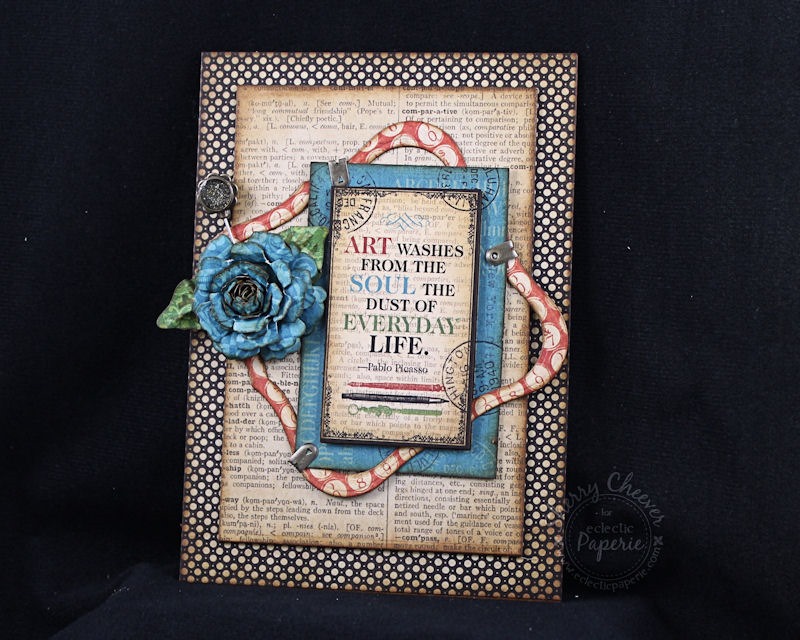
Last week was a busy week with lots of blog hops, etc., and on Saturday I not only had the Quietfire Design/Dreamweaver Stencil hop, but also had a post go live on the eP Blog. Typically I give you more info over there, but I saved most of it for here today because most of the project was created with Spellbinders®.

The project can either be a wall hanging or with an easel back attached could be set out on a shelf. I just received the Graphic 45 Typography Collection and couldn’t wait to make something with it. Actually this is the first of a number of projects I have envisioned. Love this collection!!
The base is lightweight chipboard (because its easy to die cut with Spellbinders die templates). Three separate pieces were die cut for the bottom base and then three more for the top layer. Once die cut, they were glued together to make a sturdier base so the project wouldn’t bend or warp.
The sentiment is from the Typography Collection which was cut out twice, with the top trimmed and placed with foam mounting tape over the full bottom sentiment.
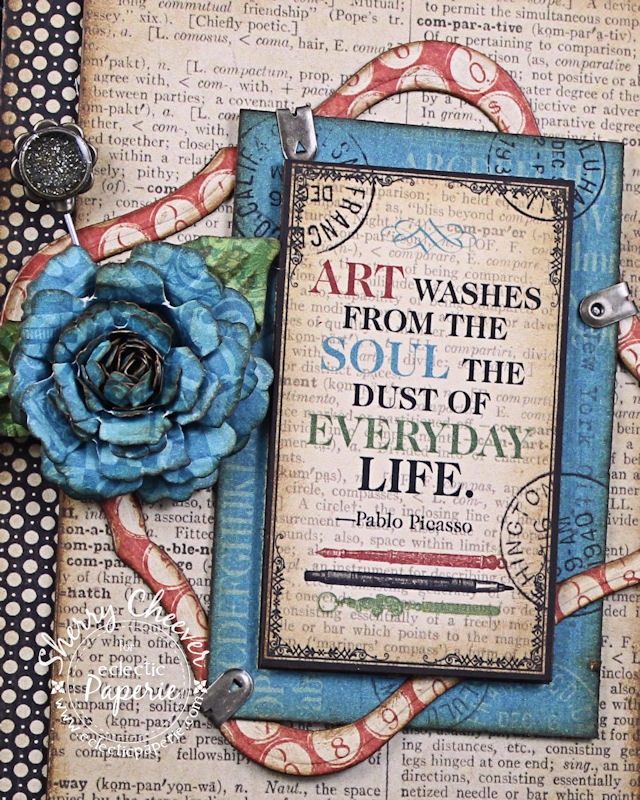
The flower was die cut/embossed with Bitty Blossoms. The frame was made with Labels One. The frame and the sentiment panels were all mounted on chipboard before cutting. The embellishment is the new Circle Hatpin from the Spellbinders Media Mixage line. I added some glitter and then poured ICE Resin® into the bezel.
That’s all I have today. Hopefully I’ll be back in the next day or so (depending on studio time this week) with another project.
Thanks for stopping by!

Project Supplies:
|
|


