
If you’ve been following me on Facebook, you’ve seen pictures of my newly remodeled bathroom. I haven’t shared them here for no particular reason; except that I didn’t want to bore everyone to death with my elation of finally having a new bathroom. Today I’m going to share one of the photos because I’ve worked on a bathroom project and I want you to see the area where I have some things sitting.
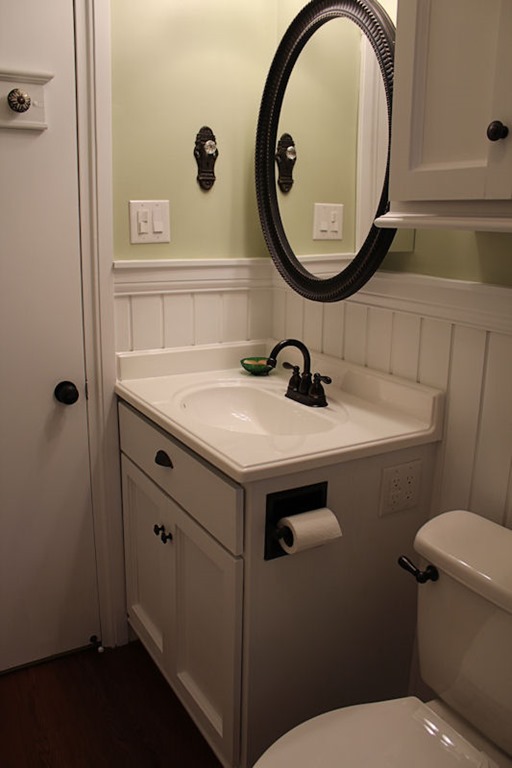
Okay so this is my new vanity area that shows all the rubbed oil bronze fixtures that I went with.

Even the custom-built base for the new light fixture was spray painted with bronze spray paint. The mirror actually set the tone for the entire bath. I told my builder that I wanted a farm house feel . . . white and that I loved the look of oil rubbed bronze. He found the mirror and then everything else came together from there.
Anyhoo, I ended up purchasing some green glass jars and dispensers from Target that had a vintage feel to them but it didn’t take us long to realize that visitors might have a problem with the dispensers sitting on the sink counter.

As you can see, the lotion and the soap look identical. Only Mallory and I knew what was the lotion (the taller) and the soap (smaller). I told her I would make us some labels and I’ve been looking for different images on the internet that I could use. While working with ICE Resin® the other night a brain storm hit . . . and YES, it did hurt! So I made the tags that you see above.
Both are made from Spellbinders® Media Mixáge™ Line silver square bezels that I painted with the same bronze spray paint used on the wood base for the light fixture. Pretty clever I thought!
Both have a square of Graphic 45 Old Curiosity Shoppe paper die cut with the coordinating Spellbinders square die template (which was sealed with glossy accents) and glued into the bezel.

I die cut a capital “L” (lotion) from chipboard that I painted with the wall paint (same color as the walls) and applied some DecoArt Crackle Medium. Once dry, some Ten Seconds Studio Bronze VerDay Paint was rubbed over the crackle with the excess wiped away. The “L” was then glued onto the paper in the bezel.
Beads were added to the bottom of the bezel just for some more decoration. Of course, I learned after I made both sets of beads that the one for the soap needed to be shorter . . . go figure . . . it’s a shorter dispenser.
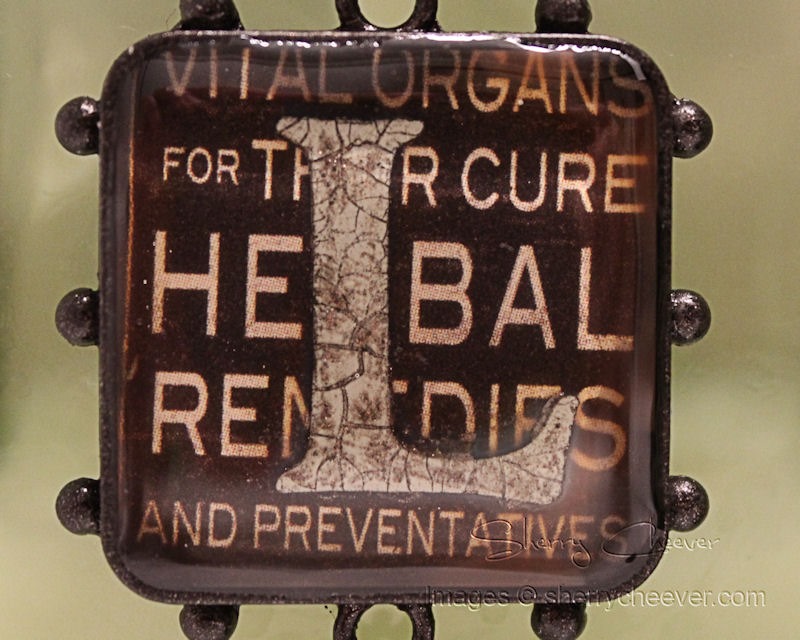
I LOVE the vintage distress look of the “L” and the “S” with the crackle and the VerDay rubbed on to show all the crackle. It’s perfect for my country/farmhouse bath and all the other antiques I’ve added over the last few months.

The bezel for the soap dispenser was made the same way as the other . . . except that I die cut the letter “S” for soap.
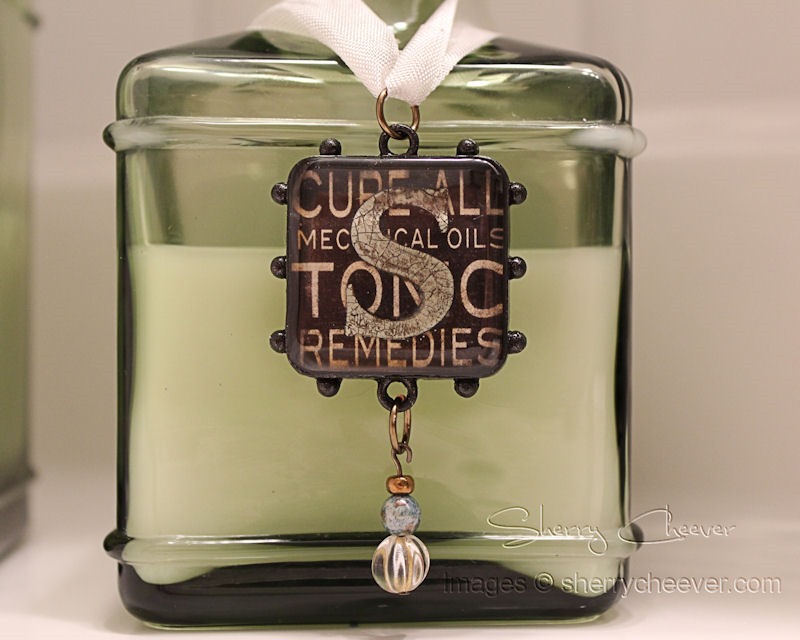
As you can see from this photo, I had to remove three of the beads for the soap dispenser . . . but that’s okay . . . it still matches the other.
Both bezels were tied to the dispensers with seam binding that I didn’t care got wet or dirty. To me it will look all the better when the ribbon shows a little wear and tear.
I’ll devote another post to some of the antiques and other goodies I’ve added very soon. I still have a few things to finish up before I’m ready for that! Oh and before I forget, the dispensers sit in the corner of the vanity to fill up all the space!
In the meantime, thanks for stopping by today!

Project Supplies:
|
|
Good morning! Wow what a whirlwind it has been around here. First, there was the Spellbinders Designer Retreat last week! It was fabulous and inspiring in more ways that one can imagine. The best part was not just spending time with some old friends, but also meeting all the designers in one place at the same time! We were kept busy for four days straight and I have to tell you . . . I came home completely amazed and inspired! I only hope that now I can find some studio time to play with all the ideas running around in my head.
When I got home I realized that we would be having Hadlee overnight on Monday . . . which made unpacking and getting ready for a meeting on Tuesday loads of fun! But this tired old grandma made it . . . barely!
Last night I was able to get in the studio and complete this project for the eP Blog today.
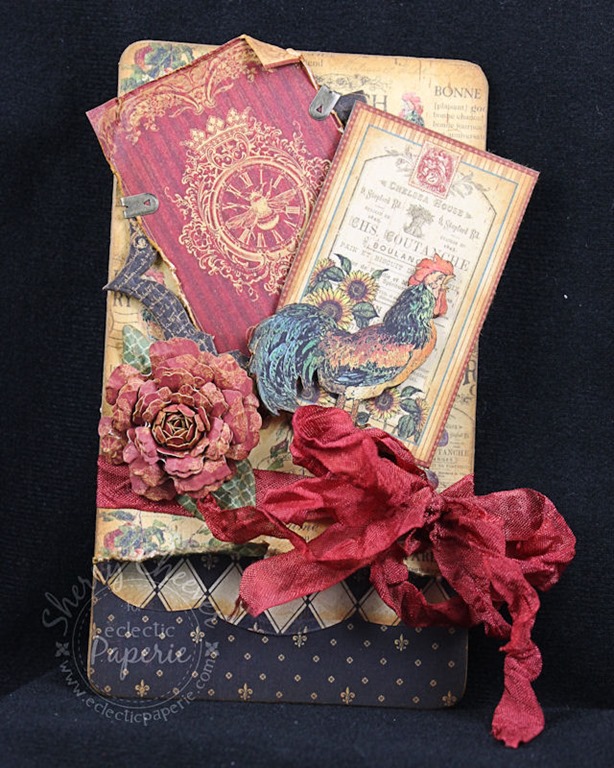
You’ll find more pictures and all the details on the eP Blog, but I will tell this much . . . it’s the first card I’ve done in a very long time with no Ranger ink. That’s right! No Ranger inks (well except the ribbon which was already dyed and in my jar). At the Spellbinders Retreat, John Peterson from IMAGINE Crafts (also on the Spellbinders Mixed Media Team) gave all the designers a box of Tsukineko goodies and taught a class on the inks. SO, I promised John I would try NOT to use the other inks on everything . . . I gotta tell ya . . . I loved the colors of the Memento Inks I was working with. They seemed to blend much better with the Graphic 45 papers. (that’s my epiphany for the week)
Well, that’s all for me right now! I’m dying to get in the studio and work with some metal and other goodies . . . did I mention that Julianna Hudgins was also at the retreat and we made bracelets with her new Jewel Loom . . . Oh my BADness. Totally hooked!!
Thanks for stopping by today and remember . . . life is short, enjoy the adventures that come your way today!

Project Supplies:
|
|


