Well, it’s the beginning of a new week and so far, I think, it’s going to be a quieter week than last.  My sister is finally home and on the mend.  She had her fourth surgery last week . . . this one to add screws and metal plates to her knee and tibia.  Mallory had some more tests last week, and we still don’t have the answer to what is causing her problems.  Grasping at straws and on some advice from one of my sister’s nurses, we are now thinking gallbladder . . . hopefully I can talk to the doctor today about it.  That’s the family update for now . . .

Saturday I was browsing around the internet, doing a little shopping of this and that, and decided that I needed to go through my Studio 490 sets to see what I was missing and needed.  (Well of course I need them all, but  . . . there is this green stuff . . . ).  I was flipping through Wendy’s Studio 490 Book VI and one of her projects, Remembering Paris, on page 41 struck me.  It was more her Art Parts for the project and all the layering.  I was inspired!

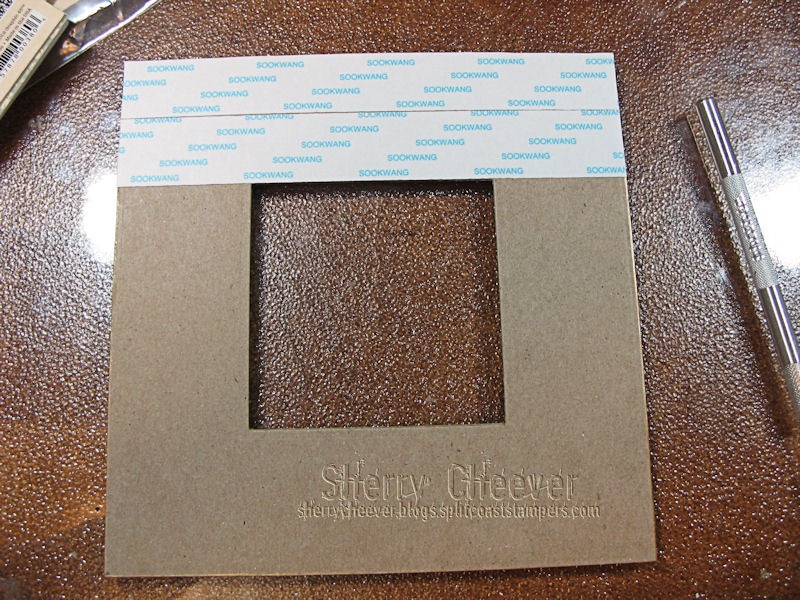
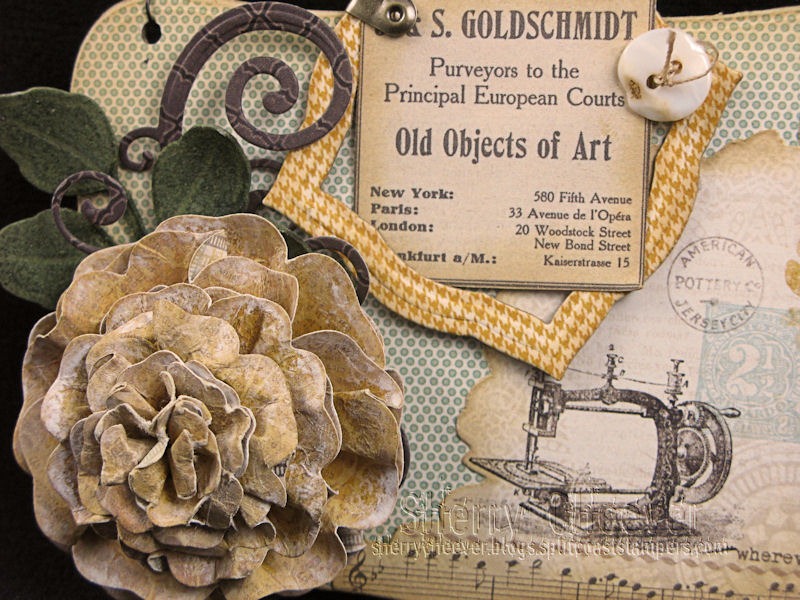
Off I trotted to the studio and decided to try my hand at making the base pieces of the project with Printers Chipboard and my Spellbinders™.  I couldn’t decide if I wanted to use Graphic 45 Olde Curiosity Shoppe or A Ladies’ Diary, but got this wild idea to pull out an old Inky Antics sentiment stamp which led me to use A Ladies’ Diary.

The base was made from Printers Chipboard die cut with Grand Labels Eleven.  The next layer is one die smaller with a Grand Oval in the middle, also die cut from Printers Chipboard.

ObeyAllTheRulesFull

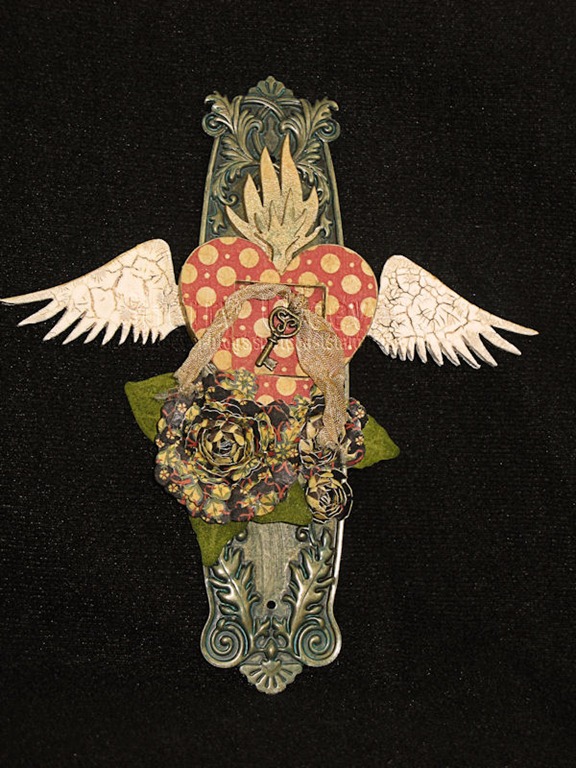
From this angle, you can see the depth of the die cuts and all the layers.

ObeyAllTheRulesSideView

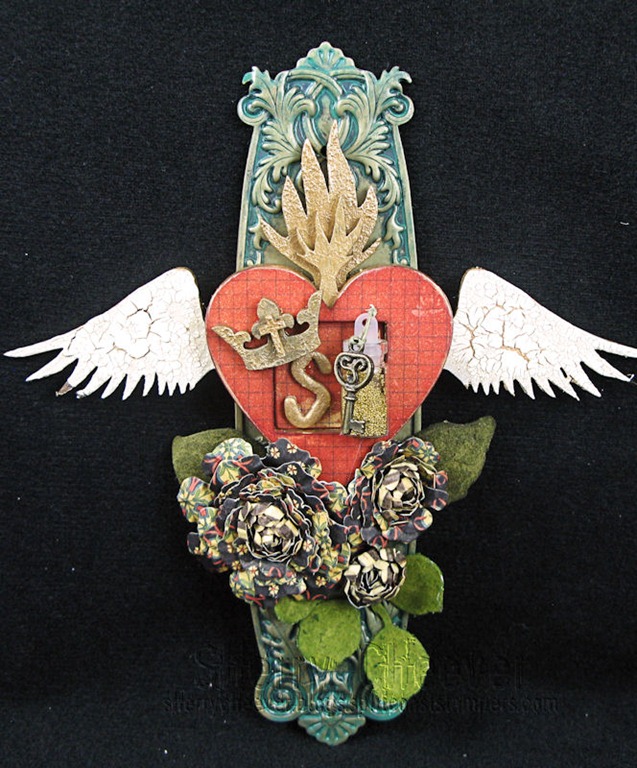
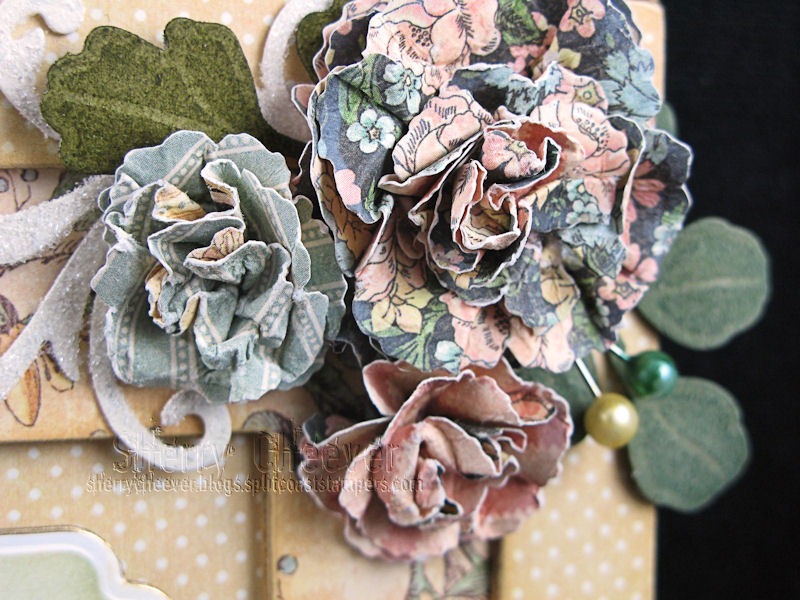
The large flower was made with Grand Peony Creations and the small flowers were made with Bitty Blossoms.

ObeyAllTheRulesFlower

The sentiment was stamped on a manila tag that had been covered with Antique Linen and Bundled Sage Distress Ink.   It was die cut/embossed with Labels and Tags, then stenciled with Tumbled Glass.  Can you see the faint white stamping?  That’s the leaf border from Studio 490 It’s Face Art stamped in Jasmine Mix’d Media Inx.

ObeyAllTheRulesSentiment

I think I’m tired of obeying all the rules . . . I need a little fun in  my life!  Speaking of fun . . . it’s Summer CHA time.  I had to pass on going this summer because of all the family stuff going on, but I’ll be looking for photos, videos and anything else I can find online!

Thanks for stopping by today and remember . . .  life is short, make the most of the adventures that come your way!

Oh and don’t forget to come back tomorrow  . . . it’s Tangle Time Tuesday #2!

SHERRY SIGNATURE

Project Supplies:

Good Wednesday morning!  Geeze there were a lot of great comments on yesterday’s post.  I hope some of you leaving comments are going to play along with your own Zentangles and link them up!  I’m way too excited about seeing what you are doing with your tangling.

During my morning blog browsing on Monday, I was quite drawn in by the Simon Says Stamp and Show Challenge for the week . . . Layered!  I was also very inspired by one the projects posted by the team . . . the frame by Terry. I kept looking at it, the depth of the frame and was wondering what she had used to make it.    The more I looked at it, the more inspired I became . . .

SO yesterday I ran down to the studio and pulled out some printers chipboard and my Square Nestabilities®.    My final project ended up being this frame.

ARTFrame

While I was working I decided to take pictures to show you how I went from single sheets of chipboard to the completed frame.

My first instinct was to make my frame from the ground up, so I pulled out my Square Nestabilities.  The first layer is two pieces of chipboard die cut with the larger die you see below.  The shape below is for the middle section, which was die cut only once.  Sadly I didn’t get a picture of it, but the top section was die cut with the same largest square and then two steps down still in the Grand Square family.

ARTFrameDieSetForInside

Below is what all three layers looked like after die cutting, a little gold paint added to the edges, and before paper.

ARTFrameUncoveredUnassembled

My vision was to have the layers deep so that there would be some dimension to the frame.  However, I didn’t want open sides that you could see through so I knew I needed to build up the back of the second layer.  When I started die cutting more layer to add, I was having problems getting everything lined up correctly and NOT thinking straight, I decided to start building up the back with strips of the chipboard.  Sadly I ended up trimming away the excess and if I HAD thought, I could have still layered the die cut versions and then trimmed that excess away.  It would have been more timely and less cutting.  LESSON LEARNED and something I want you to remember . . .

Because I was working with chipboard, I used the Sookwang Scor-Tape to stick all the layers together.  You can see  by the lines in the chipboard where I was building up the bottom layers.  I think there are 6 in all and I would alternate the cuts to make the piece stronger.

ARTFrameBackShowingBuildUpandTape

This is the front before I added all the tape and the Graphic 45 papers.  I would use the mat knife for trimming on the glass surface . . . went way fast and super easy!

ARTFrameFrontwithTape

Here you can see all the layers with paper attached before they had all been assembled.

ARTFrameCoveredUnassembled

Thought it would be fun if I showed you the scrunchy new flowers I’ve been making.  They were die cut with the new Spellbinders™ die template S4-370 Blossom Five.  The edges were sponged with Mix’d Media Inx Jasmine, misted with water and then squeezed and scrunched to form the shape.   I heat set them to not only dry them, but to also help keep the shape.

ARTFrameFlowersUnassembled

These are the flowers on the bottom left.  The embellishments are white corsage pins that were colored with Alcohol Inks.

ARTFrameFlowersLowerLeft

Flowers on the top right.

ARTFrameFlowersTopRight

This is a close-up of the a flourish die cut from chipboard with the new Spellbinders release S5-118 Venetian Accents.  The flourishes were painted with Antique White acrylic paint, covered with Glossy Accents and then sprinkled with Vintage Glass Glitter Diamond Dust Fine.

ARTFrameGlitter

The sentiment, Art Soul from Hampton Art, was stamped in Coffee Archival on Neenah Classic Crest Solar White with Labels Twelve, stenciled with Antique Linen and Bundled Sage Distress Inks.    The sentiment was then mounted on a piece of chipboard also die cut with Labels Twelve then raised with dimensional foam squares.

ARTFrameSentiment

At this angle you can see all the dimension and layers.

ARTFrameAngle

That’s all for today!  Thanks for stopping by.

SHERRY SIGNATURE

Project Supplies:

Good Saturday evening!  I truly meant to have this post up earlier today, but due to some family medical issues  . . . well, it just didn’t happen.

It hasn’t been a great week around here for my family and their health.  Of course, I’ve told you Mallory has been undergoing tests and we still don’t know what’s wrong.  Katie has had to increase your anti-seizure meds this week (the pregnancy has taken a toll on her levels and we can’t have her having a seizure in the later stages).  I’ve told you I’ve been spending lots of time in waiting rooms!

Some of the doctors I’ve been visiting have been with my mother, who had a biopsy on her thyroid last week.  Unfortunately, the biopsy came back abnormal and she will be seeing an oncologist in a few weeks.  Thankfully I have decided not to attend CHA  . . . I’ll be here for her next doctor’s appointment.

THEN last night, my sister and her husband were down at our riverfront for a concert and car show.  She was walking down the terraces at the waterfront to the stage, and not realizing the terrace levels were about 3 feet high, she took a step down and fell, shattering her left knee (which has also been made worse by compartment syndrome).  She was transported to our local hospital but when they realized the break was as severe as it was, they transferred her across the river to Louisville.  She had surgery this morning and will have another on Monday to deal with the wounds made to ease the muscle swelling.  They did insert pins and a rod this morning, and said that in two weeks they would go back in with screws and plates.  She has a long road ahead of her and apologized over and over today for leaving me alone to take care of mom.  Fortunately there are a few of us here, so both of them should be very well taken care of!

Keep your fingers crossed that my aunt and I stay safe and well over the next few months!  Now you know why I’ve been able to practice on Zentangle so much!

Anyhoo, here are the projects I promised that I would have.  The first is a quick card I did for Spellbinders, using one of my Karen Lockhart stamps that had not seen ink yet.

RoseOfSharonCard

The second project is the original Doorplate that I practiced on for my classes.

G45DoorPlate

I didn’t use the design because I thought the center of the heart was too plain.

So that’s it for me tonight.  I’ll be in the studio as time allows . . . I know that I’ll be using my studio playtime as “me” time to unwind!  I did have to laugh today when Carrie piped up with the fact that Mallory had to defer TFA for a reason . . . It may have been the drugs talking too!

SHERRY SIGNATURE

Card Project Supplies:

Doorplate Project Supplies:

Well it took me most of the day, but I finally got one project done.  That is after helping Mallory wash all 3 dogs in the sweltering heat and spot cleaning on the deck some more.  I think I finally have it where it needs to be and ready for Mr. Stodgy to waterproof in the morning.  I spent 2 days pressure washing the entire deck . . . love that pressure washer . . . YES I do!

After starting one or two cards, trying some techniques here and there, I finally ended up with a small wall hanging.  I’ve been playing with a new flower, some I made for CHA, and wanted to try another today.  This one is made with Spellbinders™ Blossom Three.

SunshineWallhangingFlowerCLOSEUP

Before assembling the flower, each edges of each layer were inked with Jasmine Mix’d Media Inx, misted with water and shaped.

SunshineWallhanging

The paper is My Mind’s Eye Lost and Found – Sunshine.  That flourish is a new die, S5-143 Jewel Flowers and Flourishes.  The base for the hanging is made from printer’s chipboard that was die cut with Labels Eight, 4 different times and clued together.  The holes at the top were punched with my ever faithful Crop-o-dile.  For the hanger itself, I used black Artistic Wire winding it around with the Artistic Wire Coiling Gizmo.

I guess that’s all for me right now.  I’m heading back into the studio and to watch the Olympic Trials.

Thanks for stopping by!

SHERRY SIGNATURE

Project Supplies:

Happy Tuesday!  I hope your holiday weekend was a good one . . . we had Mallory’s Graduation Party on Sunday and then spent yesterday recuperating from all the prep work we had to do.  It was nice to sit on my butt all day and watch movies.

When I was prepping for my classes at The Queen’s Ink, I found that I was going to have a number of Graphic 45 doorplates left over from the Chunky Tag.  I remembered a project that Nicole Eccles had posted and sent her an email asking her if she minded if I used a variation for my class.  I couldn’t find the project of Nicole’s blog, but I did find it at Retro Café Art.  Thankfully Nicole said it was okay and I began ordering product to sample.

Here’s what I came up with . . . using a different Shrine Kit from Retro Café Art.

WingedHeartDoorplate

This was a fun project to make and hopefully everyone in the class will enjoy it as much as I did!

That’s it for me today, except . . . to say thank  you to everyone who left encouraging comments on my last post.  I didn’t realize there were that many of us all thinking the same things!

Thanks for stopping by and remember to enjoy the adventures that come your way today!

SHERRY SIGNATURE

Project Supplies:

© 2015 Suffusion theme by Sayontan Sinha