
The E-Team has a new challenge from Daisy this coming year. Today is the first in a series where we will be journaling, inspired by quotes that Daisy sends us each month . . . “Inspired by Words.” We also have a new set monthly date for our Blog Hops, the fourth Wednesday of each month . . . mark your calendars now because we are also asking you, our readers, to take part in the journaling with us. There’s more than one reason for this, the first being we are curious as to what you are up to, but also we will be picking some Guest Designers from the entries. Daisy will have more about this on the eP Blog and on the eP Facebook Page, but here is what I know:
Follow the hop to each member of The E-Team and leave a comment for a chance to win a $25 eP Gift Certificate. Comments can be left from tomorrow until Sunday, April 29th. Winners of $25 GC will post on Monday.
Play along with us by posting a picture of your journal cover on the eP Blog by Friday, May 4th, and you will have a chance to be one of two Guest Designers with The E-Team next month!
The E-Team:

Now for my journals. YES, I said journals. The first one I want to show you is the original one I made, giving great thought to how I wanted the journal to work for me. I made up my mind that I did NOT want a spiral-bound journal like I kept finding the in the stores. First, I did not want to have to work around the wires when I was making a project . . . SO I purchased a Canson Mixed Media Pad and started from there. The paper is double-sided, one side smooth and the other side with texture. It is also 96lb weight which I wanted for working with water. I removed the back cardboard from the pad and used that for my journal covers, cutting it in half and covering it with some favorite Graphic 45 paper from Olde Curiosity Shoppe.

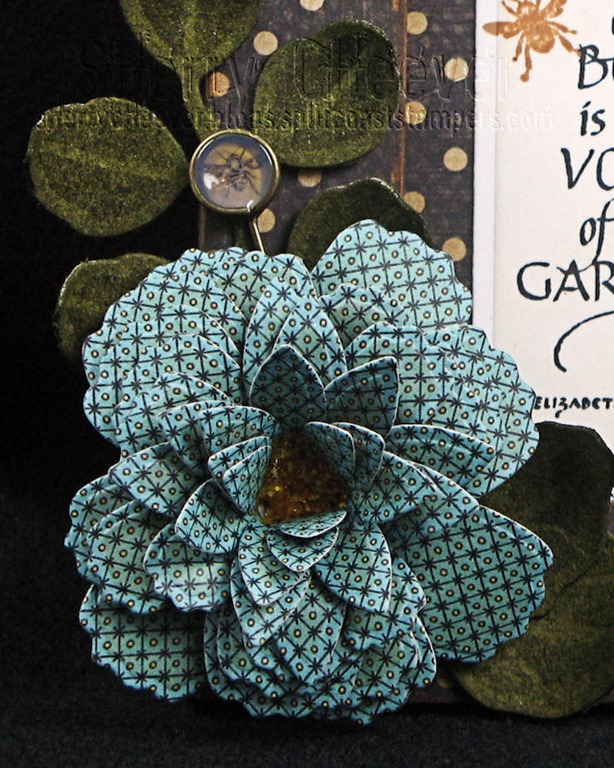
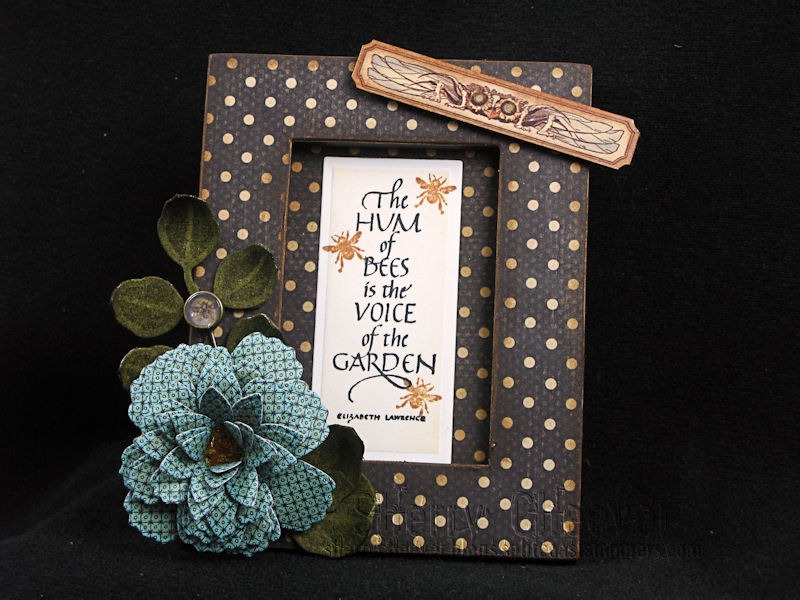
Have you figured out yet that my continued use of the heart and three flowers is actually a take on the boots in my blog banner? I actually have my uncle’s cowboy boots and plan on decorating one like those above when I have some spare time. In the meantime, I keep using the heart and flowers in my project work. The heart is from Studio 490 Art Parts – Dress Forms and More.

The stamping on the heart is with the background from It’s More Flower Art. The flowers die cut from Graphic 45 Steampunk Debutante Collection were made with Spellbinders™ Grand Peony and Rose Creations.
Now I know you are looking at the cover thinking . . . BUT it’s spiral bound! Yes, but once you open it, this is what is there.
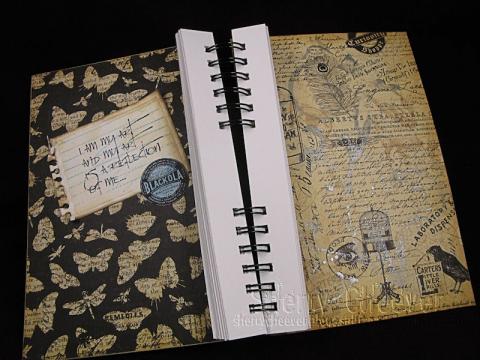
Strips cut from the edge of the paper, that have been punched and bound with the covers. The remaining paper is trimmed to fit in the journal and scored off center for a fold, so that I can tape and/or glue the paper in the journal once it’s done to the strip in the book. This way, I can work on a single sheet of paper without messing up the entire book while I work and have the freedom to move around the entire page. See that mess of shimmer on the right hand side. That’s left over shimmer spray from the front of a stencil used on the front. I just turned it over and smacked it down to dry off the stencil.

In the above picture you can see the shimmer on the front cover and the outline of the flourish stencil used.

The close-up above shows the Studio 490 sentiment from I Am My Art that I so love. It’s die cut/embossed with Office Supplies from Spellbinders. The sticker holding the sentiment to the inside cover is made with the Blackola sticker from Studio 490 For the Arts. It was stamped in archival Jet Black ink onto a mailing label, colored with Stormy Sky Distress Ink and then die cut out with Classic Circles. Just peel the backing off and I had a sticker! Can you see where I dropped the lined background stamp after everything was done . . . I left it thinking it added some character to the page!
Now I have to admit that after I looked at this journal cover for a few days, I was a little upset with myself. It looks just like everything I’ve done for the past year and definitely did not stretch my creativity. . . well except for trying to decide on what paper to use for the flowers. So while I was out running errands yesterday morning, I found the below journal at Hobby Lobby. It is exactly what I was wanting in the first place, bound with no wires.
Here’s the thing! Today is my last day with the Graphic 45 Design Team. They actually are giving me a farewell today on the Graphic 45 Blog, showcasing some of their favorites of my work I’ve done for them this year. Since my year has come to an end and I’m ready to move in another direction and take a new path, I had to make another journal. This will be my “MESSY” journal! One I won’t mind if the other clean pages get covered in a little ink and one that I can explore new directions in.

There was one piece of Sticky-Back Canvas in my drawer of stash, that could be trimmed down to the first the outside cover. It was misted with water, covered in Tumbled Glass and Picket Fence Distress Stains, then misted with more water and dried. Now I have to tell you . . . if you decide to use this canvas, tear away the backing and just stick it to your craft sheet. With it stuck down, the edges won’t curl up on you and it won’t move around the craft sheet.
There’s lots of background stamping, sea sponging and over-stamping going on.

The leaf from Studio 490 Nature’s Art were stamped repeatedly across the top in Olive Archival Ink. The white dots were made with the Picket Fence Distress Marker and then the leaves were outlined with a black artists’ pen. When you first work with the Picket Fence marker, the white does not show up . . . but once it dries . . . it’s like magic!

I drew the heart free-hand with pencil, covered the area with water and then dotted the Fired Brick Distress Stain in the middle. I love they way the stain bled out to the edges (you can barely see the feathering in the photo). It needed a little something, so the white marker was added, then still needing that extra touch the black outlines were added. For the finishing touch Specimen #1 from Art in Bloom was added in the center.

The bottom sentiment is from I Am My Art (there’s that set again), stamped in Archival Jet Black. A bit of crazy stitching around the edges and the canvas was ready for the front of the journal.
Since this journal is bound, I will have side-by-side pages to work on, if I so choose.

This layout is great for messy stamping, smashing the pages together, and just all around inky fun . . . the kind where your fingers are covered in ink and you have to wash your hair to get all the ink off! YES, before the Ranger Craft scrubbie it was shampoo to get all that distress ink off!
Well, that’s it for me . . . two art journals done in two different ways, for two different reasons! I guess it will depend on my mood and the WORDS that Daisy gives us on which one I use. Hell who knows, I may never use one of them at all!
Thanks for stopping by today, and don’t forget . . . visit the other members of The E-Team to see their journals and don’t forget to leave them a comment. I sure hope you decide to play along with us because as some of you who email me your projects know . . . I LOVE to see what you make!
I’m hopping over to the Graphic 45 Blog now to see which of my projects were their favorites . . . you can join me too! It will be fun! An aside note: this by no means is any indication that I will quit using Graphic 45 papers and other products. Heck I LOVE the new Halloween collection and have already made plans to order it when it is released!

Spiral Bound Journal Supplies:

Canvas Journal Supplies:


