Good Wednesday morning!  Smiley from millan.net It’s my turn this week to host the Rubbernecker Blogger Challenge.  My challenge is to make a card that is any shape other than 4.25×5.5 and it must include snowflakes.  I think I scared some of the Design Team Members, some of them were complaining yesterday of losing their mojo . . .  Oh please! Smiley from millan.net

For my card, I made an ornament.  I was actually inspired by the vintage ornaments that I have on a wreath and on a smaller tree.  Most of them belonged to my grandparents and then some came from my mother.  They are my most prized Christmas decorations.  I’ll get a picture in a few days and show you!

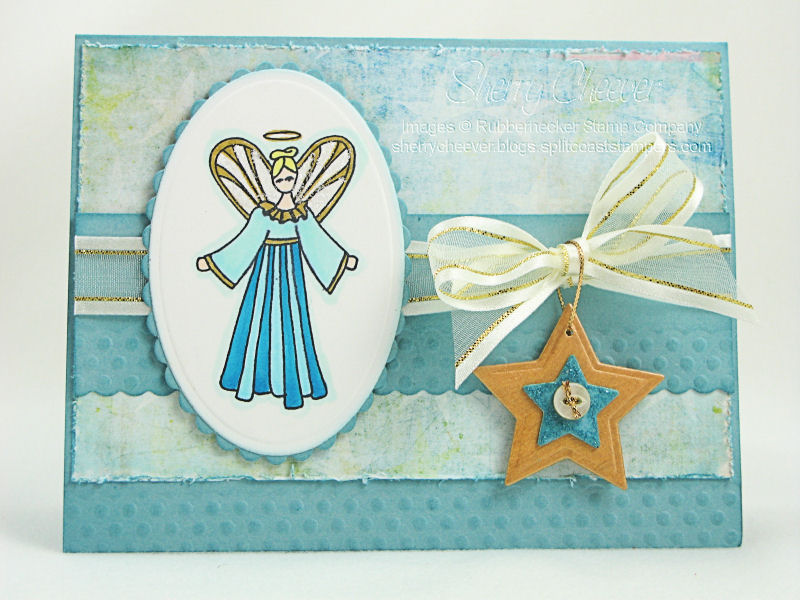
I cut and embossed the largest of the Spellbinders Classic Scalloped Circle Nestabilities to make the card base.  Then cut and embossed BasicGrey Wassail paper with the largest Spellbinders Classic Circle Nestabilities for the pattern on the ornament.

RNB13 Snowflake Ornament Card

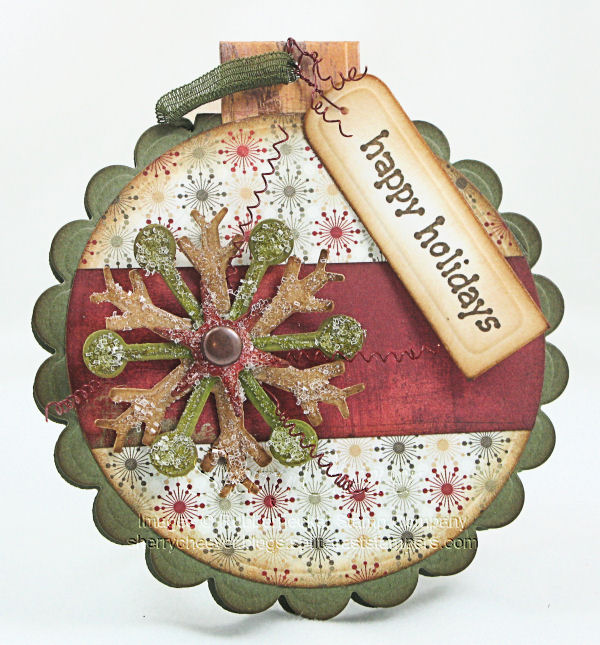
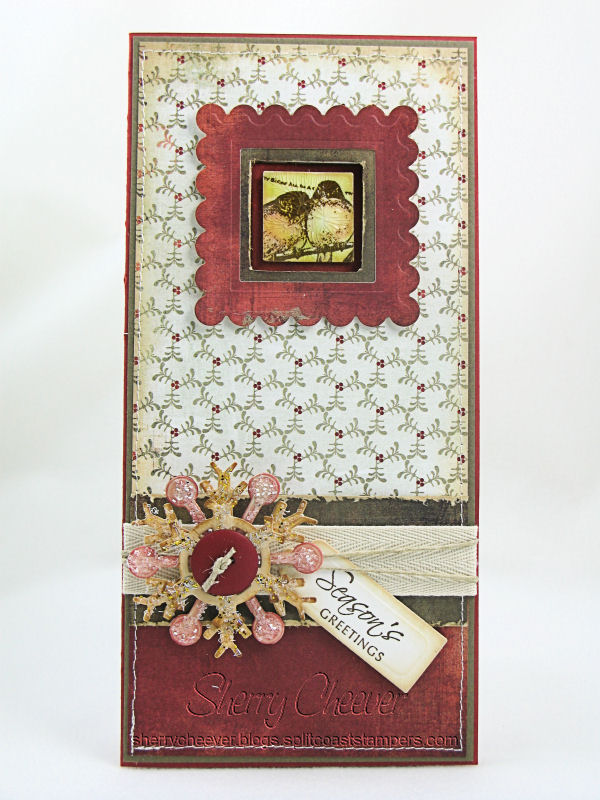
Of course, I said the card must include snowflakes, and I could help but pull out my Spellbinders Snowflake Wonder Shapeabilities.  I’m hooked on these snowflakes . . . yes, hooked!  I inked the different snowflakes, covered them with Glossy Accents and then sprinkled on Diamond Dust and Crystal glitter.

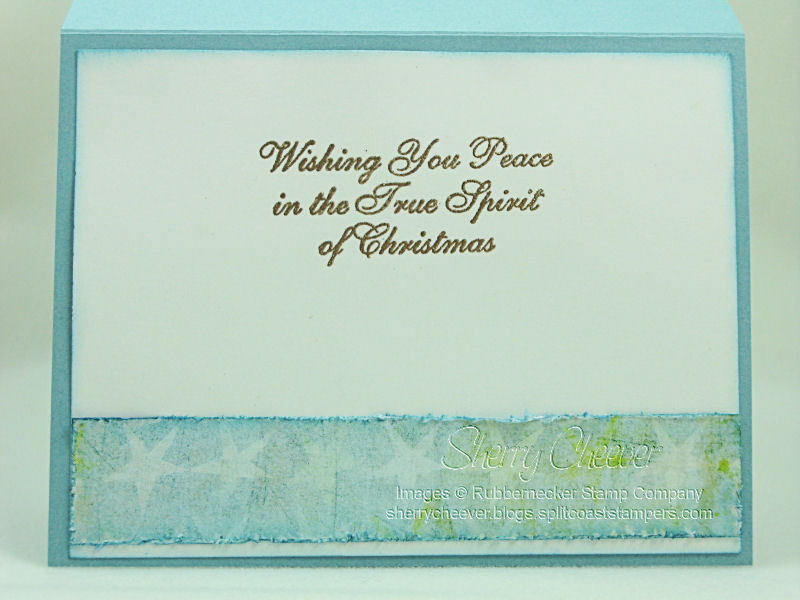
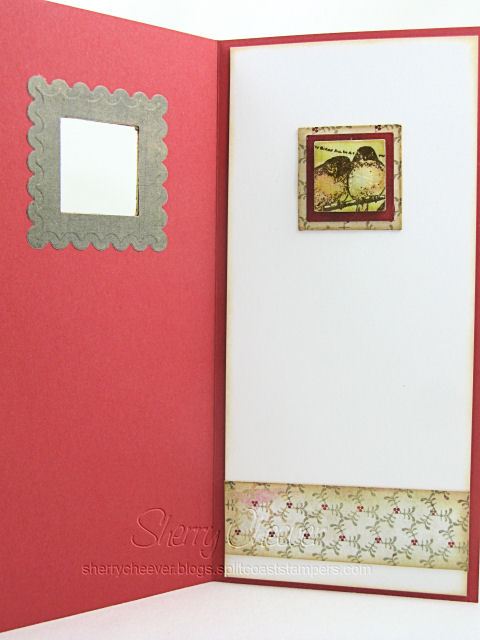
For the top hanger of the ornament, I cut and embossed some scrap white cardstock with the Spellbinders Long Classic Rectangles.  I covered part of the paper with gold acrylic paint, sponged on some Vintage Photo ink, and then went back over with copper acrylic paint to create a more vintage look.  On the inside of the card is a white circle to write a personal note on.  Too darn clever if you ask me . . . I have a card and it can then hang on the tree as an ornament!

  • Stamps: Happy Holidays Sentiment from Rubbernecker Stamp Company
  • Paper: Neenah Classic Crest Solar White; BasicGrey Wassail; SU Always Artichoke
  • Ink: Ranger Archival Coffee, and Vintage Photo, Antique Linen, Peeled Paint and Aged Mahogany Distress
  • Accessories: Spellbinders Classic Circles and Long Classic Rectangle Nestabilities, and Round Top Tag and Snowflake Wonder Shapeabilities; Ranger Glossy Accents, Gold and Copper Acrylic Paint Dabbers; Venture Foam Tape; Making Memories Wire; Vintage Glass Diamond Dust Glitter and Crystal Glitter; Ribbon; Brad; Tsukineko Sponge Dauber

May your day today be filled with great adventures!

Good Tuesday morning!  Oh yeah, I said Tuesday and that means its Treasure Hunt Tuesday at Rubbernecker.  There’s also a big sale at Rubbernecker now through December 16.  You can get all the details about the sale plus a list of the Designers who are participating today over on the Rubbernecker Company Blog!   A couple of those Designers are offering Blog Candy today.

Since I’ve been feeling in an angelic mood recently (BWAHAHAHAHAHAHA) I decided to use one of the KK Originals angels.

KK Angel Card

I colored the angel with Copic Markers and highlighted parts of her robe and wings with a Spica Gold Glitter pen.  For a fun touch I added Frosted Lace Stickles to her wings.  Wings should shimmer!  The angel and the background panel were die cut using Spellbinders Petite Oval Nestabilities and I lightly sponged both edges with Broken China Distress Ink.  The bottom of the card and the middle band were cut and embossed with Spellbinders Deckled Scalloped Borderabilities and then I highlighted the edges and the embossing with the same Broken China Distress Ink.  The stars were cut from lightweight chipboard with the Spellbinders Stars 5 Shapeabilities.  The larger star was painted with gold acrylic paint and the smaller star was inked with Broken China ink, then covered with Broken China Distress Stickles.  I found an old button in my stash and tied it on with gold cord.

Since this is a card that I plan to send, I wanted to finish the inside.

KK Angel Card Inside

I ran a band of the same DP I used on the outside, and then embossed my sentiment with Ranger Queen’s Gold EP.

Have a great day today!  I’m off to the studio . . . many projects that need to get done!

Good Monday morning!  I have to admit that I overslept this morning . . .  Or slept in.  However, you want to look at it.  I don’t set an alarm now that the girls are gone, and today I was a little surprised when I rolled over and looked at the clock . . . 9:00 a.m.  Not a good day for this, since I have so much on my plate today.  Not only do I have a couple of projects that need to be finished up today, but Mallory is driving home this morning for a doctor’s appointment.  Thankfully the weather is not bad today and this mom won’t be worrying too much . . . well I still worry when she’s on the road . . . but at least there’s no snow or ice on the roads.  Of course, she’ll be leaving early evening to avoid rush hour traffic to go back, and I’ll get to worry just a little more until she returns back to school safely.

Enough of my morning babble . . . I’m still working on the coffee Smiley from millan.net (only had half a pot so far).  Yesterday I promised to show you a project that I worked on over the weekend.  This one I’m quite taken with, even though the hubby didn’t like it as well as the Birds of a Feather card.

I made a gift box, using Jen del Muro’s Mini Pizza Box, and of course had to cover it with snowflakes!

SP Snowflake Gift Box

I used a piece of BasicGrey Dasher to make the box.  To keep the box closed, I used a coordinating sheet of paper and made a band that easily slides on and off.  So that the tag could be removed and kept, I attached it to the band.  To make the tag, I used Spellbinders Label One Nestabilities and for the snowflakes I used Spellbinders Snowflake Wonder Shapeabilities.

To make both the snowflakes and the tag, I swiped Broken China, Peeled Paint and Antique Linen Distress Inks on my craft sheet, misted with water and then laid my paper into the water/ink mixture.  Because I wanted muted colors, I ironed the paper dry between each layer of color.  Stamped lightly in the background of the tag is music and then the sentiment was stamped in Distress Embossing ink and embossed with Broken China Distress EP.  I sponged more color on the embossed areas of the snowflakes, covered with Glossy Accents and then sprinkled with glitter.

SB Gift Box Close up

I knew I would love making these snowflakes . . . way too much fun!

Enjoy the adventure that today brings!

Happy Sunday!  I know I’ve been MIA for a few days, and I really have no excuse.  I didn’t feel that well the later part of last week and never wandered into the studio once.  When I finally went in yesterday and turned on the lights, I had a project sitting on my work table I had completely forgotten about.  I got it done yesterday, but you’ll have to wait until tomorrow to see it.  What I have today is for yesterday’s Inspiration Challenge on Splitcoaststampers, Images under Glass.

When I saw the inspiration pieces for the challenge, I immediately thought of making my own acrylic pieces . . . and I did!  However, they turned out yellow (forgot I had added some flex to the UTEE), so I’m calling those practice pieces.  I’ll need to work on that technique at a later time.

What I did instead, was make an inchie that I covered with Crackle Accents.  I mounted it on a square of illustration board, and then I had a brainstorm (yes, it actually hurt) to make a window card.

IC157 OUTSIDE

I used Spellbinders Classic Square Nestabilities for all the image layers and the window frames.  Here’s the inside of the card:

IC157 INSIDE

And a close up of the birds, which is actually on the inside of the card.

IC157 INCHIE CLOSEUP

To finish off the front of the card, and add my sentiment, I tried my hand at glittering a few of the snowflakes that I cut using Spellbinders Snowflake Wonder Shapeabilities.  I have been so taken and awed with Anna’s snowflakes that I couldn’t wait to get the snowflake dies and play with them.   I inked each snowflake, covered each with Glossy Accents and then sprinkled with glitter.  For this one I added a button and tied it to the front of the card with twine.  The sentiment was stamped and then die cut using Spellbinders Scalloped Tag Shapeabilities.

IC157SNOWFLAKE

  • Stamps: Birds from Magenta; Holiday Script from Lizzie Anne Designs
  • Paper: Neenah Classic Crest Solar White; SU Always Artichoke and Riding Hood Red; BasicGrey Wassail
  • Ink: Ranger Archival Coffee, Antique Linen, Vintage Photo and Aged Mahogany
  • Accessories: Spellbinders Classic Square Nestabilities, Snowflake Wonder and Scalloped Tag Shapeabilities; Sewing Machine; Ranger Glossy and Crackle Accents; Tsukineko Sponge Dauber; Tonic Paper Distresser; Crystal, Pixie Dust, White/Silver Mix Glitter; Twill Tape; Hemp Twine; Button

Enjoy the rest of your weekend . . . you might find an adventure or two!

Good morning!  How many of you have been checking out Tim Holtz’ 12 Tags of Christmas?  He never ceases to amaze and inspire me! I used yesterday’s alcohol ink technique on my card today.  I guess you could say this is my take of Tag #2, with a little bit of inspiration from Wendy Vecchi thrown in.

This card is also for today’s Rubbernecker Blogger Challenge, Nix the Ribbon.  This week’s challenge is hosted by Bev Gerard, and you can find all the info and deets on the Rubbernecker Blog.

RBC12

I made the background using Eggplant, Stream and Gold Metallic Alcohol Inks.  I smeared them on my Ranger Craft Sheet, added some Alcohol Blending Solution and then swirled and swiped white glossy cardstock through the mixture.  I loved the results so much, and it actually reminded me of snow, ice and northern lights.  Here’s where I decided to add a Grunge Board tree, inspired by the Grunge Board flowers made by Wendy Vecchi.  I stamped the tree image three separate times on a piece of plain Grunge Board.  I cut them out, each time leaving off one layer of the tree.  Each individual piece was inked with Pine Needles Distress Ink and then Gold Stickles were added to the exposed areas for each layer.  It’s hard to see in this picture, but the ends of each layer are curled up to add some fun dimension.

Instead of using Grunge Board for my sentiment, I die cut a piece of light weight chipboard with the Spellbinders Ribbon Tag Trios, applied my ink and then embossed the sentiment.  Since we were to use no ribbon in today’s challenge, I went digging through my button collection for some old buttons, and tied them on using gold cord.

  • Stamps: Rubbernecker Winter Holiday – Tree With Snow set SKU:52-0206; Stamp Oasis Graphics – Music Background SKU:543 SO and Winter Holiday – Season’s Sentiments SKU:153 SO from Rubbernecker Stamp Company
  • Paper: White Glossy; SU Elegant Eggplant and Baja Breeze
  • Ink: Ranger Archival Jet Black; Embossing, Pine Needles, Dusty Concord, Broken China, Old Paper and Vintage Photo Distress; Stream, Eggplant and Gold Metallic Alcohol Inks
  • Accessories: Spellbinders Ribbon Tags Trio Shapeabilities; Ranger Non-Stick Craft Sheet, Gold Stickles, Queen’s Gold EP, Alcohol Ink Blending Solution, Inkssentials Ink Blending Tool; Tim Holtz idea-ology Plain Grunge Board; Venture Foam Tape; Gold Cord, Old Buttons; Light Weight Chipboard

Have a great day and remember

Take the path less traveled – there’s always an adventure waiting for you!

© 2015 Suffusion theme by Sayontan Sinha