Some time ago, and I can’t remember if it was before CHA or after, Joan Fricker of At Joan’s Garden, asked me to be a Special Guest for one of her blog challenges.  So this is what I know (and no, I don’t know what her challenge is).  Joan offers up the challenge based on my project and gives you two weeks to complete your project.  You can read all about it on Joan’s Blog, At Joan’s Garden . . . how to enter, where you can post, etc.  I think there are prizes involved too . . . you need to check it out!

Here’s my project:

JoansGardenAugust11

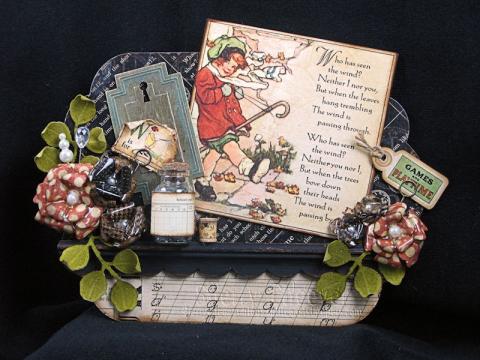
To begin, the base is three pieces of printer’s chipboard that were die cut with Spellbinders LF-246 Grand Labels Eleven and then glued together with Claudine Hellmuth Studio  Multi-Medium Matte.   A piece of Graphic 45 ABC Primer was then die/cut embossed with Grand Labels Eleven and the bottom 2 inches were cut off and flipped over for the bottom border.  Both pieces were then glued to the top of the base.  The main image on the wall hanging is an image from the ABC Primer that was trimmed down with Spellbinders LF-126 Grand Squares to fit the base.  The shelf is made from hobby wood trim cut to size, painted black and then sanded in various spots to show wear and tear.  Vintage Photo Distress Stain was then ran over the sanded areas to highlight the sanded areas.  The metal tag in the background is from Graphic 45.

JoansGardenAugust11FlowersCLOSEUP

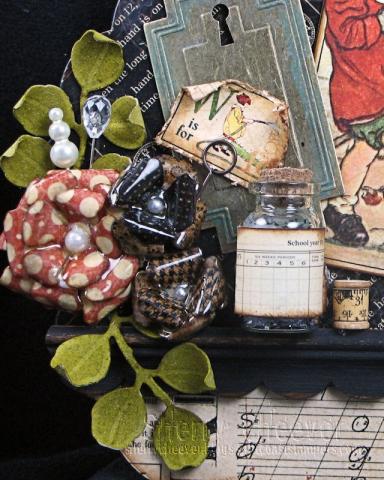
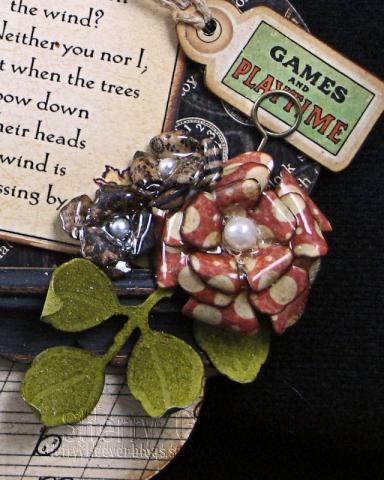
The leaves in the photo above are die cut from GrungePaper using Spellbinders S4-328 Foliage die templates.   They were inked on both sides with Crushed Olive Distress Stain and then shaped by rolling the ends of each leave.  A strip of a ruler from ABC Primer was wound around a mini spool.

The flowers were made from ABC Primer paper, die cut/embossed with Spellbinders S5-050 Rose Creations, and my Faux Porcelain Technique.

Here is my original Faux Porcelain Flowers video:

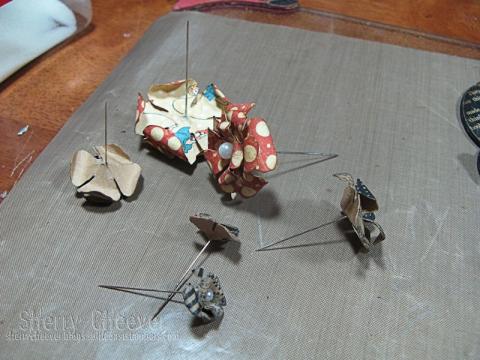
I found for what I make, it was much easier to make the flowers first and then dip them into the UTEE.  Here are my flowers made and ready.  You’ll notice that I used corsage pins for the center of each flower.

JoansGardenAugust11Flowers

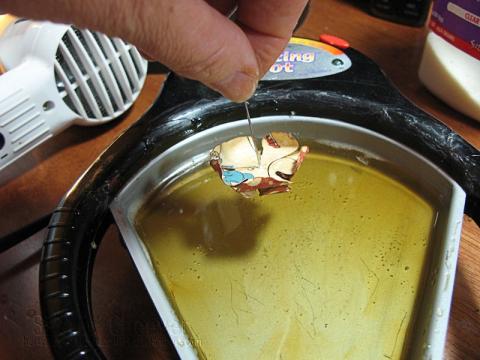
By holding the end of the corsage pin, it is very easy to dip the flowers and then hold them up to drain.  I stick the pointed end in a piece of foam then for the flowers to dry.

JoansGardenAugust11DippingFlowers

Here are two that I made from the smallest of the Graphic 45 Flowers.

JoansGardenAugust11FlowersCLOSEUPRight

When I’m ready to attach the flowers, I simply cut the pin off at the back of the flower and glue down with a hot glue gun.  I use a hot glue gun on every wall hanging I make . . . especially when using GrungePaper.   The hot glue seems to hold embellishments better than anything else.

I’m not going to give the photo links like I normally do on a post because this post is for Joan.  All/most items used on this project are available from Joan/At Joan’s Garden.

Project Supplies:

  • Paper: Graphic 45 ABC Primer; idea-ology Grunge Paper; Printer’s Chipboard
  • Ink/Paint: Ranger Vintage Photo Distress Ink, Vintage Photo and Crushed Olive Distress Stain; Black Acrylic Paint
  • Embellishments: Graphic 45 Metal Tags and Flowers; Maya Road Vintage Pearl and Crystal Trinket Pins, Mini Spools; idea-ology Memo Pins; Corsage Pins; Twine; Mini Bottle; Black Glitter; Hobby Wood Trim
  • Tools: Spellbinders LF-126 Grand Squares, S5-050 Rose Creations, S4-328 Foliage and LF-246 Grand Labels Eleven; Sanding Tools; Hot Glue Gun; Ranger Matte Accents, Ultra-Thick Embossing Powder (UTEE), Melting Pot, Claudine Hellmuth Studio multi-medium matte

Well, that’s it for me today!  Thanks for stopping by and remember  . . .  life is short, embrace the adventures of your day!

SHERRY SIGNATURE


g45-bloghop-1

Good morning and welcome to the third day of the Graphic 45 and Want2Scrap Blog Hop!  I hope you’ve been following along all week.  There have been some outstanding projects posted by the designer for both teams!  In case you haven’t and want to catch up, here’s a list of all the designers participating:

Graphic 45 Facebook

Want2Scrap Facebook

I almost forgot to tell you this . . . there are prizes!  Randomly chosen design team members from both Graphic45 and Want2Scrap will pick a random winner from their blog, and both Graphic45 and Want2Scrap will be picking a random winner from Facebook.  That means there’s 4 chances to win amazing prizes this week!

Now for my project!

CurtainCallWallHanging(Want2ScrapHop)

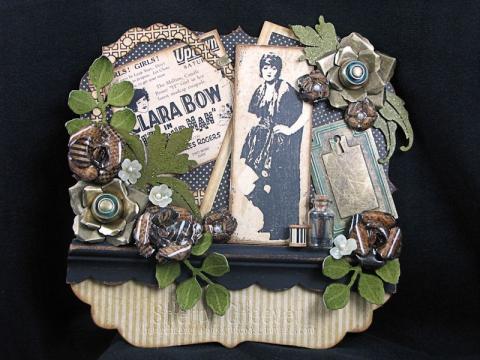
For my project (wall hanging) I used one page from the 8×8 Decorative Design Chipboard Album from Want2Scrap as the base.  It was covered with Graphic 45 Curtain Call paper using matte multi-medium and the excess was sanded off.  Vintage Photo Distress Ink was used to sponge all the edges.

The frame in the background (covering the Clara Bow ad), was made by die cutting printer’s chipboard with Spellbinders™ Labels Four.  Printer’s chipboard is thin cardboard that I purchase at my local office supply store.

CurtainCallWallHanging(Want2ScrapHop)FlowerClusterCloseUp

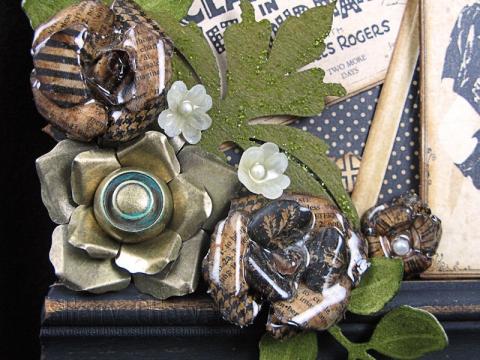
To accent the metal flowers, I made some smaller ones with Graphic 45 Flowers and small white corsage flowers, that were dipped in melted UTEE (Faux Porcelain Flowers).  The floral accents pieces are Chipboard Embellishment Style A from Want2Scrap, that were painted with Peeled Paint Distress Stain and then covered with Peeled Paint Distress Stickles.

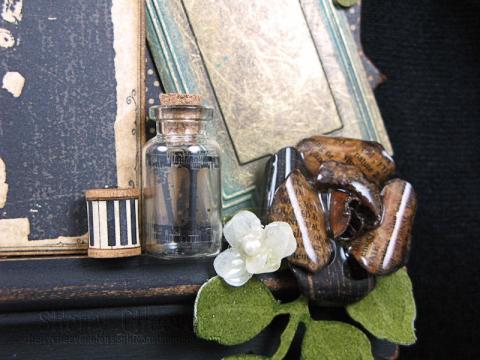
CurtainCallWallHanging(Want2ScrapHop)BottleCloseUp

For trim on the shelf (which is made from hobby wood trim, painted and sanded, and highlighted with Vintage Photo) I added a Maya Road mini spool and a mini bottle.

  • PRODUCT/SUPPLIES:
  • Graphic 45: Curtain Call, Flowers, Metal Tags, Metal Flowers and Metal Buttons
  • Want2Scrap: Chipboard Embellishment Style A, Page from 8×8 Decorative Design Chipboard Album
  • Spellbinders: S4-142 Long Classic Rectangles – Large, S4-328 Foliage, S4-190 Labels Four and LF-190 Grand Labels Four
  • Ink/Paint: Ranger Vintage Photo Distress Ink, Claudine Hellmuth Studio Charcoal Black Acrylic Paint, Peeled Paint Distress Stain and Distress Stickles
  • Embellishments: Maya Road Mini Wooden Spools; 7 Gypsies Paper Fasteners; idea-ology Film Strip Ribbon; Florist Pins and Mini White Flowers; Mini Glass Bottles
  • Miscellaneous: Ranger Claudine Hellmuth Studio Matte Multi-Medium, Matte Accents, Melting Pot and UTEE; idea-ology GrungePaper; Tweezers; Scissors; Sanding Tools; Hot Glue Gun; Hobby Wood Molding

Well, that’s all for me today!  Thanks for stopping by and don’t forget . . . life is short, embrace the adventures of the day!

SHERRY SIGNATURE

Happy Monday!  The weekend around here was so quiet.  My girls went on a weekend road trip with my mother . . . I’m gonna guess there was plenty of shopping going on!  What this truly means, is that Mallory wasn’t around and I didn’t have to cook.

On Sunday I got some much needed book work done, and on Saturday I had some play time in the studio.  Remember this video on Faux Porcelain Flowers that I originally posted in November of 2009?

I really love this technique and from I can tell doing some searching, it’s been very popular.  (The Duke of Dirt . . . oops, the Duke of Distress . . . actually taught it during the Melt Art class at CHA [or so I’ve been told].)

I know the video is somewhat dated (and I plan on making  a new one) because now there is an easier way to apply the melted UTEE.  Make your flowers first and then dunk them in the UTEE, then pick them out and let the UTEE drain back into the pot.  Oh so simple!  However I did make a few my old way and still liked the process of shaping as I go . . . plus you don’t waste all the time gluing them all together first.

I was sitting at my work table Saturday working on a Graphic 45 project when I said to myself . . . you really should make these flowers shiny so they’ll pop on the page . . . so, I DID!  (said in my best Bette Midler voice)

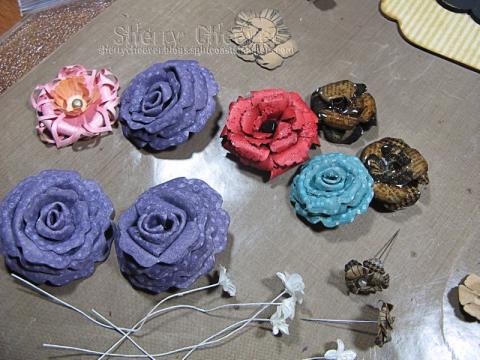
Here are some flowers that I was playing with.

FauxPorcelainFlowersBEFORE

You’ll recognize some of them from recent projects.  Meaning they were already made and were dunked in the melted UTEE.  See those little brown flowers in the right front?  Those were shaped and then a florist pin was pushed down through the middle.  The pin was perfect to hold onto while dipping the flowers.  I cut them off after the flower was dry so I had a flat surface to glue to the project.

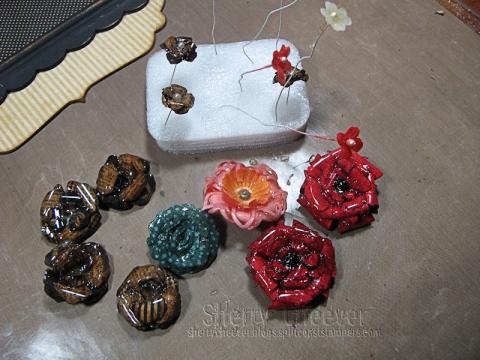
These are the finished flowers.

FauxPorcelainFlowersAFTER

I LOVE them . . . I think I’ll leave my melting pot out for awhile!

I really must hurry my post today.  I’m heading out to take some classes from Karen Lockhart, who is teaching at Papertrix in Nashville today.

Thanks for stopping by and I hope your day is filled with adventures!

SHERRY SIGNATURE

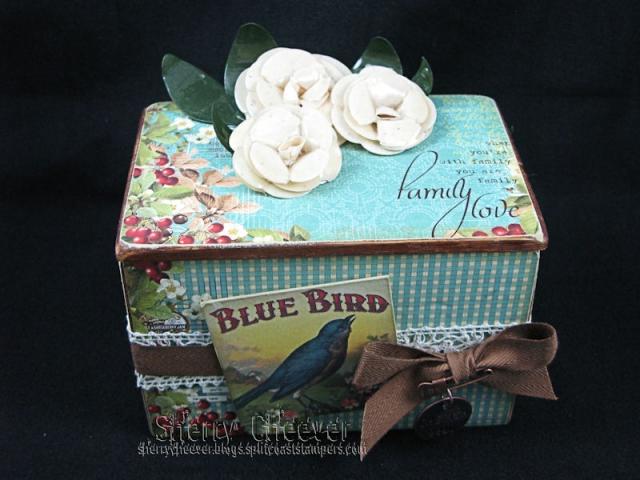
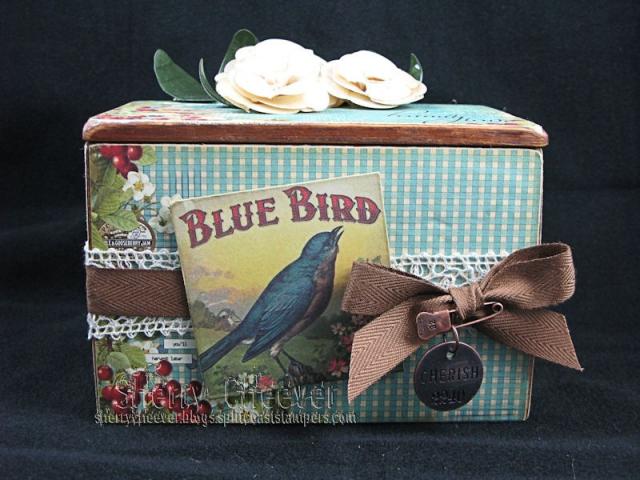
Smiley from millan.netGood Monday morning!  I hope y’all have a fabulous weekend and got to do what you wanted to do.  I spent both days in the studio and it great fun!  Remember back last September when I told you about my purchase of a bunch of wood cigar boxes?  No I didn’t alter a cigar box, but I did alter an old wood recipe box that I found a few months after that.  One day I was out with my sister, aunt and mom, and we decided to wander into the Peddler’s Mall, and that is where I found the recipe box.  I may have paid $2.00 for it . . . I know I wouldn’t have paid much more.

RecipeBoxFULLMarch1

I covered the box with Webster’s Pages Postcards from Paris, sanding down all the edges and then sponging on Old Paper Distress Ink.  I loved the idea of leaving some of the old wood exposed and did a quick sand on those areas to remove some of the old shellac.

RecipeBoxFRONTMarch1

May Arts Ribbon was wrapped around the outside and the twill was tied into a bow. To add a quick embellishment to the bow, I added a Trinket Pen and Philosophy Tag.  The blue bird image was mounted on illustration board for added dimension, and then the edges were sponged in Old Paper Distress Ink.

RecipeBoxTOPMarch1

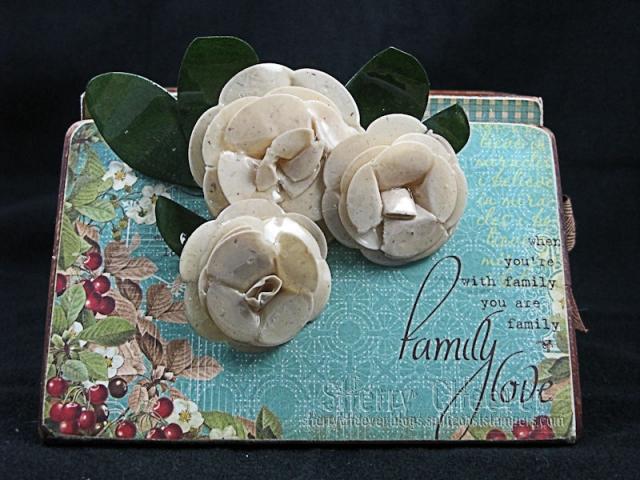
The flowers on the top were die cut with Spellbinders™ Blossom Nesties from cream cardstock.  Following my Faux Porcelain Technique, each flower was dipped in melted UTEE and then stacked.

Thanks for stopping by and remember . . . life is short – take advantage of today’s adventures!

SHERRY SIGNATURE

Smiley from millan.net

Good morning!  Well, I finally did it  . . . I got all 12 tags completed.  I had such a wonderful time creating each and every tag.  I have to say that doing this project has completely rejuvenated me and I have new ideas flowing.  That’s a good thing!

Here’s T!m’s Smiley from millan.net Tag 12 and mine is below.

Tag12

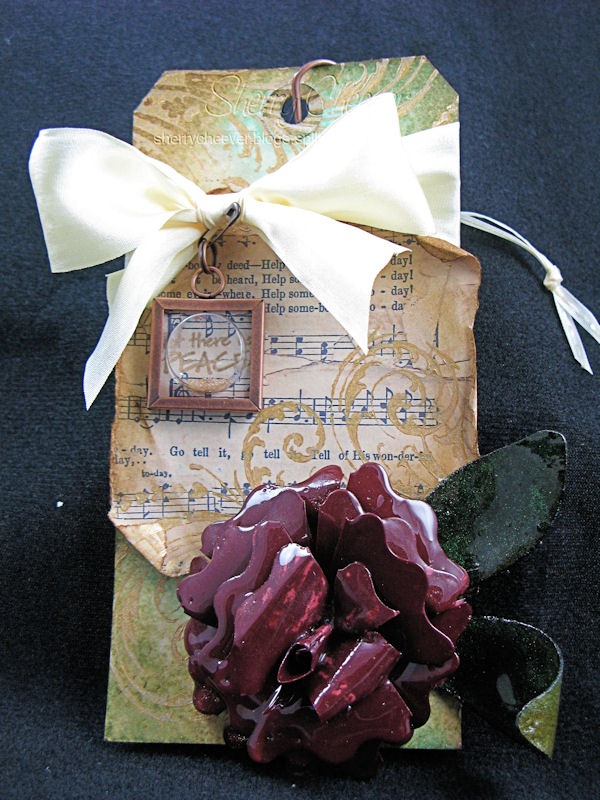
The background was made with the Wrinkle Free Distress Technique using Broken China and Vintage Photo Distress Inks.  Gold Perfect Pearls mixed with water was then sprayed over the tag and dried.  I copied a page from one of my old Hymnals that was torn and halved already.  I completed the look by distressing the edges and sponging with Vintage Photo.  The flourish was stamped over the background and the music in gold acrylic paint.  Using a piece of the music paper, I stamped the sentiment “let there be Peace” and embossed it in gold.  A Memory Capsule was filled with gold beads and put in front of the sentiment.

The flower was made using my Faux Porcelain Technique using Cranberry Crisp paper and Grunge Paper.  I actually made the first flowers with Grunge Paper and they came out so dark (because I couldn’t decided on the color and kept playing) that I went with regular cover stock.  The leaves are made from Grunge Paper that was colored by misting with a Shabby Shutters/Forever Green Pearlized Distress Mist.

  • Stamps:  Pollen Dust from Fancy Pants Designs; En Francais from SU; Snowman for Peace by Anna Wight from Whipper Snapper Designs
  • Paper:  Manila Shipping Tag; Printer Paper; Cranberry Crisp
  • Ink:  Ranger Distress Embossing, Broken China, Vintage Photo and Shabby Shutters
  • Accessories:  Spellbinders™ S4-109 Flower Creations 3 and S4-193 Peony Nestabilities; Ranger UTEE, Melting Pot, Mini Misters, Non-Stick Craft Sheet, Forever Green and Gold Perfect Pearls, Gold Acrylic Paint Dabber, 1” Memory Frame and Memory Capsule, Matte Accents; Tim Holtz idea-ology Mini Pins and Swivel Clasps; May Arts Ribbon; Old Hymnal; Gold Micro Beads; Hot Glue Gun

I hope you have a fabulous day, and thanks for joining me on the BAD Side for a little bit!

© 2015 Suffusion theme by Sayontan Sinha