Good morning!  Smiley from millan.net I hope you all had a fabulous holiday weekend, whether it was spent with family or just lolling around.  Mallory was home for the weekend and went back to school early yesterday afternoon.  We missed Kate being here because she had to work over the weekend, but she did drop by for a quick visit yesterday.  Her Aunt Carrie had made her a plate of leftovers from the barbecue, so she had to come by.  All and all, it was a nice and relaxing weekend. Smiley from millan.net

I finally made it into the studio last night.  I was too darn busy lying on the couch watching the Murder She Wrote Marathon – oh and napping just a bit.  I’ve had so much fun playing with new techniques lately, and I decided to use one of my favorites for today’s card, brushless watercolor.  This also happens to be the September Technique Challenge on Tim Holtz’ blog.

Before I show you my card today, I need to remind you that it’s Smiley from millan.net Treasure Hunt Tuesday at Rubbernecker.  You can find the clue and all the necessary information and other deets on the home page.  Don’t forget to check out the weekly sale product, too!  I have blog candy today, but don’t forget to visit the other designers as well.  I’ll be giving away two $10 Rubbernecker Gift Certificates this week.

RNBC Gift Card

To have a change at winning, leave me a comment telling me what your favorite stamping technique is.  I’ll announce the winners on Wednesday.

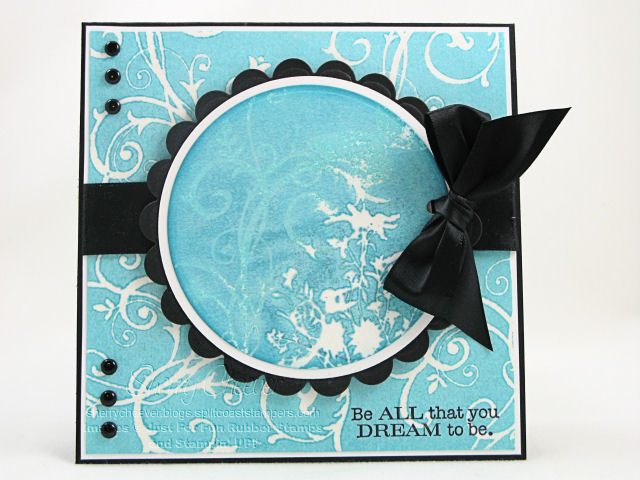
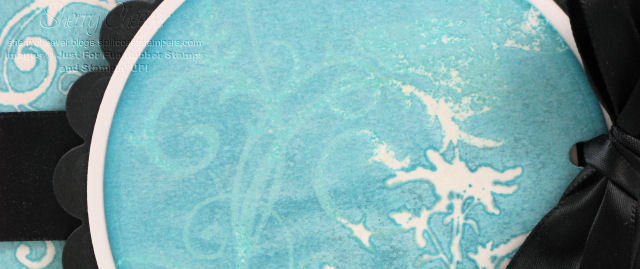
Now for my card.  If you’ve been reading my blog for awhile, you know I love to ink solid images, mist with water and then stamp.  I started doing this a few years ago as a variation of the Misting with Markers and the Wet Paper Watercoloring Techniques on Splitcoaststampers.  I like what Tim Holtz called this technique, Brushless Watercolor, because that is what it is.  It’s neither wet paper nor markers.  It’s stamping the ink pad on your image, misting the stamp with water, and then stamping on dry watercolor paper.  For a variation, I did add some ink splatters using a toothbrush.  Now that was fun!

Brushless Watercolor Silhouette

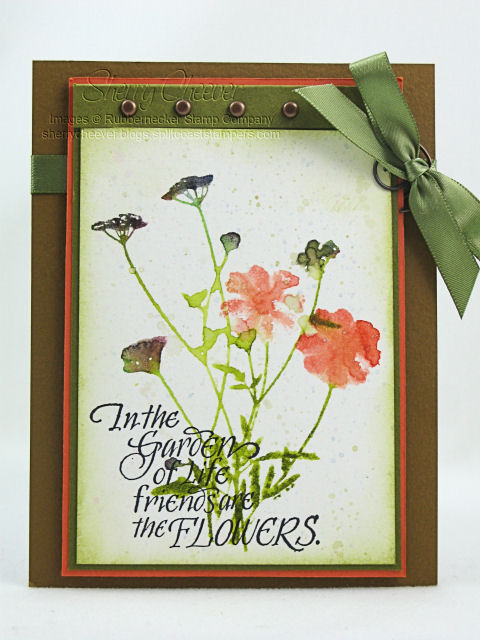
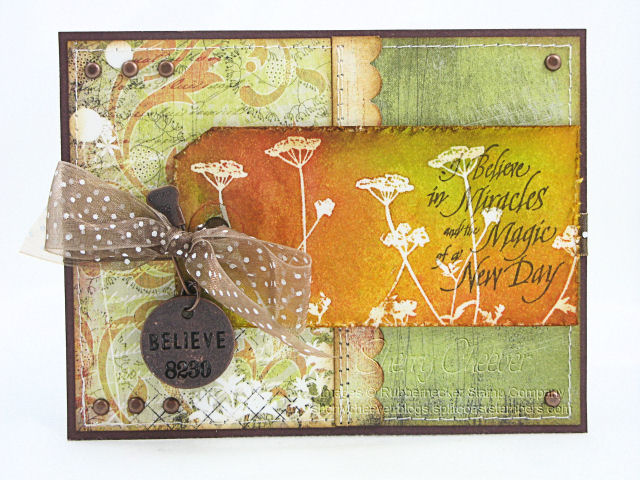
  • Stamps: Jeanne Streiff Collection Red Flower SKU:403-01 and White Flower
    SKU:403-03, and Rubbernecker Sentiment 2 Collection Garden of Life SKU:198-07 from Rubbernecker Stamp Company
  • Paper: Canson Watercolor; Prism Tawny Dark and Spring Willow Dark; SU Tangerine Tango
  • Ink: Ranger Adirondack Sail Boat Blue, Purple Twilight, Lemonade, Red Pepper, Lettuce; Archival Jet Black; Tim Holtz Old Paper Distress
  • Accessories: Ranger Mini Mister and Craft Sheet; Aged Copper Hardware; Venture Foam Tape; Tsukineko Sponge Dauber; Ribbon; Toothbrush

Well, that’s just about it for today – I hope you have good one!

I hope everyone is having a great weekend so far. I’ve been fairly lazy myself today. It took me forever to walk down to the studio and stamp a little. Mallory came home last night, and there just seems to be a lot going on in the house. Tomorrow I will be having the family over for a barbecue. My sister’s excuse for coming to my home, was that I grill better than she does. My mother used to always do something for every holiday, but now it seems that if Carrie or I don’t plan it, it doesn’t happen. So we did the morning phone call thing and planned the menu. Now I’ve got to dust and clean the bathrooms — Smiley from millan.net household cleaning. Doesn’t she know that I would rather be creative than clean? Smiley from millan.net

Talking about being creative, not too long ago I mentioned that I had been missing some fun in my stamping. Well, I have to say that over the last two weeks I’ve had more fun trying new techniques and just letting the mojo flow. I myself feel that I’ve done some of my most creative work recently. (No heckling from the peanut gallery.)

What I have for you today is a card I made for the Inspiration Challenge on Splitcoaststampers. We were given pictures of hotel rooms from the Hotel Fox in Copenhagen, Denmark, as our inspiration piece. This is the room that I chose.

IC143 Room

This is the card that I made.

IC143

I used a variation of the Faux Bleach Technique that I used earlier in the week. I stamped the flourish and a butterfly in VersaMark and heat set. The floral silhouette was then stamped in VersaMark but was embossed with clear EP. I sprayed the image panel with a Broken China/Pearl distressed pearlized spray, and then placed the image between two pieces of copier paper and ironed. As you can see from this close-up, embossed area when ironed takes on the color of the background paper. However, the images stamped in VersaMark and not embossed, picked up a faint color from the distressed pearlized spray.

IC143 close up

The background panel was stamped with the flourish, embossed with clear EP, and then ironed (the faux bleach part of the technique).

  • Stamps: SU Baroque Motifs and Happiness Always; Wildflower Silhouette from Just for Fun Rubber Stamps
  • Paper: SU Whisper White and Basic Black
  • Ink: Tsukineko VersaMark; Ranger Archival Jet Black and Broken China Distress
  • Accessories: Spellbinders Plain and Scalloped Circle Nestabilities; Ranger Mini Mister, Pearl Perfect Pearls, Super Fine Detail Clear EP, Craft Sheet; Brads; Ribbon; Iron

I hope you all have a great weekend, and if you are doing family things – have a great time!

Smiley from millan.net

One more card from me! This is for today’s SCS Sketch Challenge. I love this sketch and especially liked being able to use a little tag on the card. For the tag itself, I used the Color Wash Faux Bleach technique. I learned this technique in the Ranger class I took at Summer CHA, and just went looking for a tutorial for you. I may have overlooked it, but I didn’t see one, so I’ll try to explain the best I can.

SC191

I picked a medium size white tag to start. The image was stamped on the tag in VersaMark and then embossed with clear EP. Now the next step is the messy part, so I always prepare my work surface first. I preheat the iron, lay down a few layers of paper towel and grab a sheet of printer paper which is folded in half. At another table is where I spray the Color Wash. I have an old box with the top flaps folded up that I place a few more layers of paper towel in the bottom of. I place my embossed image on the paper towel and then spray with the Color Wash. The box keeps the Color Wash from going all over the place and the paper towel soaks up the mist on the bottom of the box. Because your paper is very wet and runny, pick it up with the paper towels and carefully take it to your printer paper. Remove it from the messy and wet paper towel and play it on your printer paper, making a sandwich fold the other end of the printer paper over the now Color Washed image. Carefully iron the top of the printer paper until you see the embossed image come through the paper. That’s when you know that the EP has melted and the printer paper has picked it up. You’re done! Now you can embellish and stamp on the image to your heart’s desire. For this one, I distressed the edges, sponged on some Vintage Photo ink and stamped a sentiment.

My background paper is BasicGrey Scarlet’s Letter, which I sponged the edges on and then stitched to the front of my card. The tag was raised with foam mounting tape after I tied the ribbon and added my hardware.

  • Stamps: Jeanne Streiff Collection White Flower SKU:403-03 and Stamp Oasis Petite Word Set Petite Believe SKU:2000-04 from Rubbernecker Stamp Company
  • Paper: Medium White Tag; BasicGrey Scarlet’s Letter and SU Chocolate Chip
  • Ink: Ranger Vintage Photo Distress; Archival Coffee; Lettuce, Butterscotch and Red Pepper Color Wash; Tsukineko VersaMark
  • Accessories: Ranger Inkssentials Ink Blending Tool, Ultra-Fine Clear EP; Tonic Tim Holtz Distress Tool; Tim Holtz idea-ology Philosophy Tag and Trinket Pin; Tsukineko Sponger Dauber; Sewing Machine; Iron; Ribbon; Brads

Darn it all, I just realized where I first saw this technique – after I have typed the whole thing out. It’s right here on t!m’s blog! Well anyway, I hope you have a great day!

Avast ye mateys! It be Tuesday, Smiley from millan.net Treasure Hunt Tuesday at Rubbernecker! You can find today’s clue and all the necessary deets on the Rubbernecker Home Page. While you’re there, take note that this week’s Sale Product is the Mini Scor-it. The Colorbox Fluid Chalk Pads are on sale for one more week too.

Don’t forget to visit the blogs of the Design Team Members to see what they have for you today.

Bev – Savor the Journey


Broni – Splashes of Watercolor (Blog Candy)


Candy – Candys Land


Jules – Stampin with Inky Fingers


Kittie – Kittie Kraft


Linda – Linda’s Works of Heart (Blog Candy)


Shelly – Stamp with Shelly


Tami – A Walk on the Mild Side

As you know, I’ve become addicted to soldering. Well . . . over the weekend I was working on a project using chalk inks. When it was complete, I kept looking at it thinking okay, I can solder this and it can become

Faux Sea Glass Sun Catcher Door

A Sun Catcher!

A few days ago, I was browsing some of my favorite blogs and sites, and ran across this video tutorial by Suze Weinberg for Faux Sea Glass. I just HAD to try it. The top piece of the sun catchers is a 2″ square of Frosted Memory Glass. Instead of using pigment inks that Suze did in her tutorial, I used chalk inks. Actually I made two, one with chalk inks and one with pigment inks. I like the one with the chalk inks better, and the technique works just as well as with the pigments that Suze demonstrates. I’m not going to go into detail here. It’s all on Suze’s video. If you don’t see it right away, click one of the videos and then stop it. A panel will come up across the bottom of the screen and you can search for Faux Sea Glass.

The bottom panel is a piece of 1×3 Memory Glass that I inked the back with chalk inks and then embossed with two coats of clear UTEE. The sentiment was stamped on the front of the glass in Archival Jet Black Ink. To finish off the sun catcher, I added some wire and beads so that the sentiment panel would hang below the diamond. The hanger is double wire looped at the top so that I can hang it in my kitchen window (when it’s clean). By the way, when you solder the Faux Sea Glass, the UTEE on the front will melt, so be careful. I actually thought that the melting gave the glass a more distressed look and LOVED it!

I had a heck of a time getting decent pictures, but here is one of the sun catcher showing the actual colors of the glass.


Faux Sea Glass Sun Catcher

  • Stamps: Stamp Oasis Face ATC Set from Rubbernecker Stamp Company
  • Ink: Pink Pastel, Lavender, Aquamarine and Ice Jade Colorbox Fluid Chalk, Ranger Archival Jet Black
  • Accessories: Ranger Perfect Medium, UTEE, Gold and Pearl Perfect Pearls, 2″ Square Frosted Memory Glass, 1×3″ Memory Glass; Soldering Tool and Solder; Wire; Beads; Copper Foil Tape; Jump Rings

I hope you’ll be back tomorrow, when I post the first Twisted and Demented Challenge. I am sooooooooo excited!!!! Hints: socks, swingin’ and now tails!

Have a great day!

Happy Monday! Smiley from millan.net I hope everyone enjoyed their weekend. I stayed in all weekend, cleaned in the studio, stamped a little, watched the Bristol race and then the Closing Ceremonies for the Olympics. As much as I enjoyed watching the Olympics, I was very glad to have them over. I was so engrossed with them, which was the only thing I watched all day long. The only thing I’m sad about is that the USA Taekwondo Team won medals and we didn’t get to see them action. Bummer since I do enjoy watching a good sparring match!

I have a couple of projects I’ve been working on this weekend, but I’m not going to show you today. Smiley from millan.net Nope! One is for the Twisted and Demented Challenge I’m going to post on Wednesday (remember yesterday my hint was socks). Today your hint is swinging! The second project I hope to have for you tomorrow – I have to sneak laundry in sometime.

Today’s card is for the Try a New Technique Challenge on Splitcoast, Faux Dry Embossing. Such a fun technique and some of the cards I’ve seen, actually look like they’ve been embossed. I don’t know if I’m too happy with my card, I picked the cardstock and ribbon colors based on the Designer Paper I decided to use. See what I mean:

TLC81

I used another new silhouette image I got at Stampaway from Just for Fun Rubber Stamps. The image panel is SU Soft Sky, which I stamped the image in white pigment first and then in Soft Sky again. The card base was stamped with the flourish from a Tim Holtz set in the same way, but I didn’t worry about lining it up like I did the main image. I picked a piece of Memory Box Aerial paper to use and wanted to bring out the yellow and orange in the birds. Thus, the reason for the orange ribbon and the yellow cardstock.

  • Stamps: Floral Script Collage from Just for Fun Rubber Stamps; Birthday Sentiment and Tim Holtz Anthology by Stampers Anonymous from Rubbernecker Stamp Company
  • Paper: Memory Box Aerial; SU Soft Sky and Baja Breeze; Prism Sunflower Medium
  • Ink: SU Soft Sky and Baja Breeze; Ranger Adirondack Snow Cap Pigment and Archival Jet Black
  • Accessories: SU Photo Corner, Circle and Scallop Punch; Brads; AC Ribbon; Ranger Inkssentials White Opaque Pen

Well, I suppose I should go start some laundry and try to get some household chores done. Hope you have a great day! Smiley from millan.net

© 2015 Suffusion theme by Sayontan Sinha