blogheader30910

Good morning!  Are you ready for a blog hop?  Today is the monthly Stamp Simply Ribbon Store Blog Hop!  This month we were challenged to make a 3D Altered Project.  Before I get into my project, let me tell you a little about the hop and how to win some Blog Candy.  One lucky winner will receive a wonderfully decorated assortment of Barb Schram’s ribbon flowers and a generous selection of ribbons from the Stamp Simply Ribbon Store.  Not to beg for comments or anything, but if you leave a comment on each of the designer’s blogs, you’ll have more opportunities to win these most gorgeous ribbon flowers.   The designers participating in today’s hop are:

Sharon Johnson – Stamp Simply Ribbon Store blog

Michelle Woerner

Linda Duke

Holly McMillen

Barb Schram

Sherry Cheever (you are here)

Deborah Saaranen

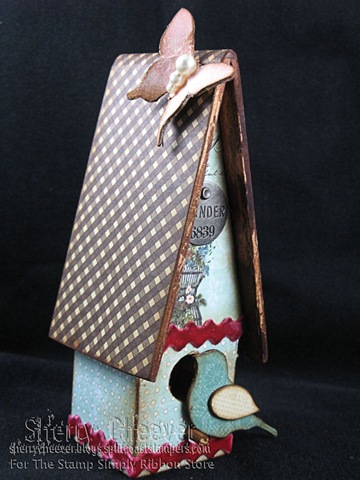
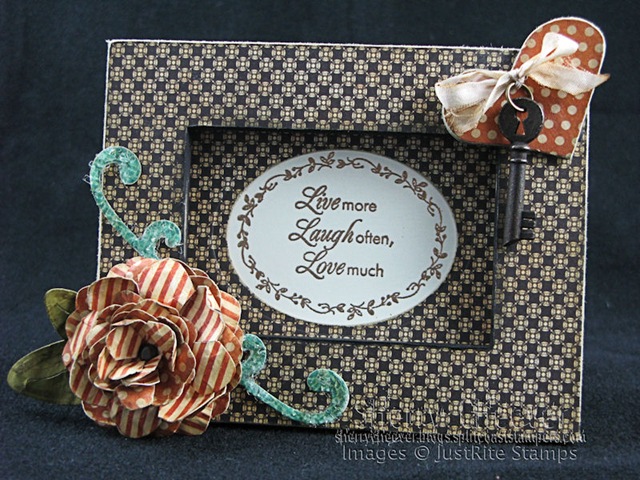
Now for my project.  I went shopping the other day and found these little wood frames with easel backs for a whopping price of 69 cents.

blank frame

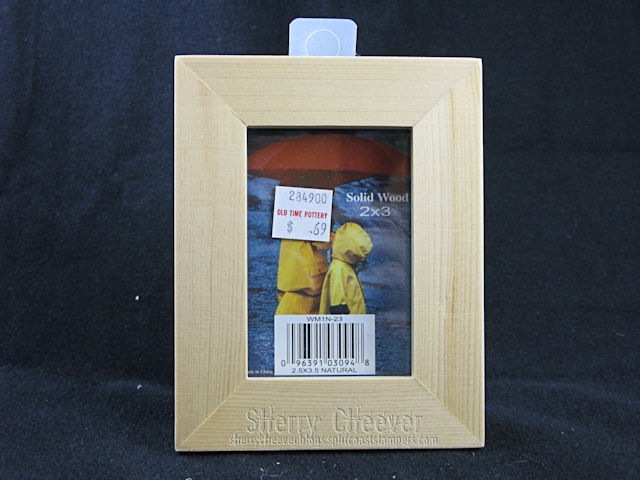
I love bargains like this and of course had to pick up 4 of them in case I needed any in the future.  When I put them in the cart, I was thinking of the new Graphic 45 papers and what I could do with them.  It didn’t take long to get the first idea.

SherryCheeverJRAlteredFrameMarch8

The entire frame was covered with some papers from Graphic 45 On the Boardwalk.  I die cut/embossed two different pieces of coordinating paper with Spellbinders™ S4-191 Dahlia to make the flower on the bottom left corner.

SherryCheeverJRAlteredFrameMarch8FLOwER

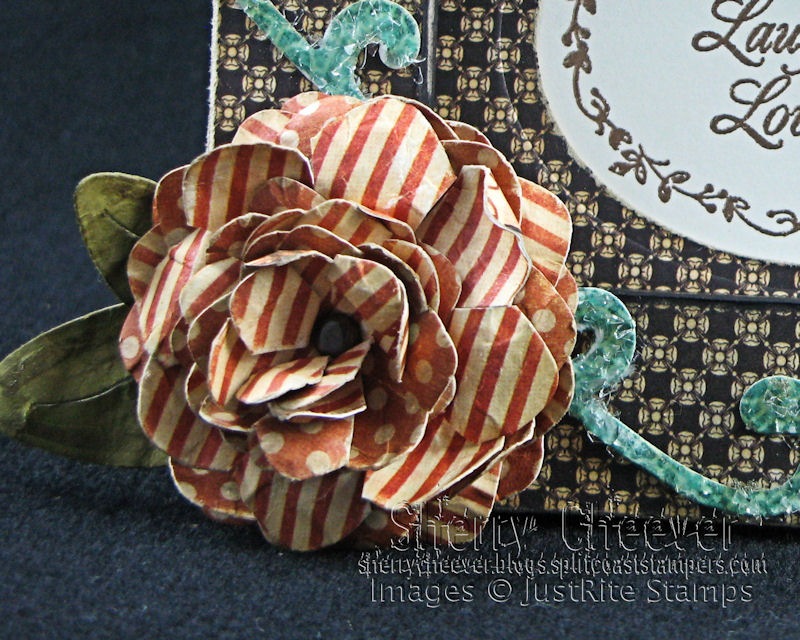
The leaves were die cut/embossed with Spellbinders™ S4-058 Daisy Heads and the flourishes were die cut/embossed with Spellbinders™ S4-198 Flourish Accents.

SherryCheeverJRAlteredFrameMarch8RIBBON

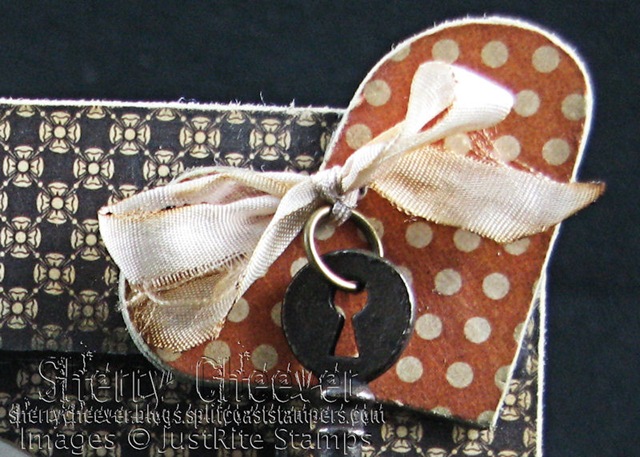
To balance the frame a heart was used in the upper right corner.  I didn’t have any thin ribbon that matched what was going on here, so I dyed the 1/4” White Silk May Arts Ribbon with Vintage Photo Distress Ink.  To age the ribbon even more, I burnt the edges with my lighter and kept pulling to fray it even more.

For the inside of the frame, I embossed one of my favorite sentiments on vanilla.  The mat, die cut and embossed with Spellbinders™ S4-110 Classic Ovals – Large, was placed over the sentiment in the frame.

  • Stamps:  Joyful Hearts and Romantic Sentiments by JustRite 
  • Paper:  Graphic 45 On the Boardwalk
  • Accessories:  Spellbinders™ S4-110 Classic Ovals – Large, S4-058 Daisy Heads, S4-198 Flourish Accents, and S4-191 Dahlia; 1/4” White 100% Silk May Arts Ribbon

**All Product Listed Above from Stamp Simply Ribbon Store**

Thanks for stopping by today and don’t forget to visit the other designers’ blogs and leave them a comment.  You never know what blog the name is going to be drawn from!

SHERRY SIGNATURE

Good morning and happy Monday!  I hope y’all had a great weekend.   I had the fam damily in on yesterday to celebrate Kate’s birthday!  It was so nice to have them all in again . . . I think it’s been since last July when we could all gather together here.  My uncle felt like coming over and they got to stay for a couple of hours.  AND

speaking of Kate’s birthday.  It was some months ago when both my girls complained that I NEVER made anything for them.  So, remember this recipe box I posted last week . . . . I made that for Kate!  The funny thing was, when she saw the alcohol ink vase the next day, she asked if it were her present because she really, really liked it.  I told her no, but she could have it if she wanted.  When she left today she had the vase in her arms as well.

Being on an altered kick these days, I decided that Kate needed one more thing for her birthday.  I decided to alter a wood birdhouse that I picked up at the Peddler’s Mall to go along with the recipe box.

BirdHouseFront

No stamps here, just Webster’s Pages Postcards from Paris Kit from Stamp Simply Ribbon Store and a grunge board butterfly and bird.  To stain the edges of the birdhouse and under the overhangs, I used a watercolor wash of Ranger Vintage Photo Distress Ink.

BirdHouseSide

I’m off to finish up some blog hop projects (tomorrow is the Stamp Simply Ribbon Store hop) and I need to finish working up my Wednesday alcohol ink class at Lavender Sentiments.

Thanks for stopping by and have a great day!  Remember  . . . life is short, enjoy the adventures that come your way!

SHERRY SIGNATURE

Good morning!  Can you believe it’s Friday already . . . wow the week has just flown by, and I haven’t moved as fast as the week!

There are some exciting things happening with Just For Fun® this week.  First, we would like to announce and welcome a new designer to the team . . . Kat Tucker!  Kat is so talented and her work is so inspiring . . . . I can’t wait to see what she designs for Just For Fun®.

Another thing we are excited about is the launch of the new Just For Fun® Blog!  You’ll be able to find albums for all the designers on the right hand side where you can view all their designs in one place.  You’ll want to check out the new Designer page where you can read more about your favorite designers and get to know them better.

Saving the best for last . . . . we are announcing a new weekly color challenge . . . Just For Fun® Fridays.  Each Friday there will be a new color challenge posted on the Just For Fun® Blog and samples will be posted on each Designer’s blog.  We are inviting you to play along with us and want to see your work!  There will be a Mr. Linky at the end of each Friday’s post for you to link to your own card. 

This week I challenged the team to use Pink, Green and Brown and here are links to all the designers and their projects:

Just For Fun® Blog
Broni Holcombe
Heidi Blankenship
Kat Tucker
Linda Duke
Sandy Sandrus

Sherry Cheever (you are here)
Starla Nelson
Terre Fry

Make sure you visit the Just For Fun® Blog and leave us a link to your own project!

Now, here’s my project for today!

SherryCheeverJFFCC1March5

Not too much to talk about here . . . stamping, sewing, die cut/embossing!  The general everyday stuff I do!  However, the flower was made by die cutting/embossing two each layer, cutting the petals toward the middle and a little scrunching.  A vintage button from my stash holds it all together.

Don’t forget to visit the other designer’s and I hope you take part in our little challenge!  Thanks for dropping by and remember . . .  life is short, enjoy the adventures of the day!

SHERRY SIGNATURE

Good morning!  Well, I’m still trying to play catch-up with some projects I need to get done!  I think I need to get off my butt during the day and head into the studio . . .  classes to prepare for, blog hops to get ready for, and THEN I found out tonight that I have just a few weeks to get my projects ready for my class at Stampfest Orlando.  I need to make my to-do list and put it somewhere I can find it.

I’m still working on samples for my alcohol inks class and one thing I wanted to show my class is how different papers effect the outcome of the alcohol inks.  One of my favorite techniques with alcohol inks is faux bleach.  The results you get are so different than those with actual dyes.

This is the sample tag I worked on last night trying to find the right mix of stamps and inks.

Alcohol Ink Faux Bleach Tag

Its probably not what I’m going to end up with, but it’s a starting point.  The wildflower silhouette was embossed first and then the alcohol inks were applied over the top.  The grid background is stamped with a combination of more blending solution than ink to get a light detail.   After the grid was stamped, the embossing was ironed off to show the white base tag.  The image on the back of the fragment was done the same way.  For more information on these steps, you can find my tutorial here and one with color wash here.  I’ll be doing a video for these soon for you!

  • Stamps:  F2714 Wildflower Silhouette, G2552 Sketchy Grid and G3354 Floral Flourish from Just For Fun® Rubber Stamps
  • Paper:  White Coated Tags
  • Ink:  Ranger Cool Peri, Citrus, Aqua and Lake Mist Alcohol Inks; Ranger Distress Embossing and Archival Jet Black; Ranger Gold Metallic Paint Dabber
  • Accessories:  1.25” White May Arts Crochet Lace, 1.25” and 1/4” Violet May Arts 100% Silk, and Ivory May Arts 100% Jute from Stamp Simply Ribbon Store; Ranger Non-Stick Craft Sheet, Ink Applicator Tool, Felt, Blending Solution; Tim Holtz idea-ology Tag Fragments; Craft Iron; Button

Thanks for stopping by today and remember . . . life is short, enjoy the adventures of the day!

SHERRY SIGNATURE

Good morning!  Boy I don’t know what happened to yesterday.  I got up with all intent of going into the studio and spending the day and it was maybe 6:00 when I finally went down.  Maybe it’s the lack of sunshine in this part of the state . . . I’m saying it now . . . no more snow, no more gray skies, no more dreary days!  But now let’s think about this . . . . 24 years ago yesterday, March 2, 1986 it snowed!  How do I remember . . . . that was day that Daughter #1, Kate, was born!  However that private island is calling me, cabana boys waiting  . . . . .

I’ll be teaching alcohol inks at Lavender Sentiments this month and want to have an altered project for the class as well as cards.  I’ve had this idea for a few days now and rummaged around in the cabinets to find something I could use for a trial.  What I’m going to show you is my second attempt . . . the first was too dark and blender solution made it all disappear!

So here’s what I did!  I dropped alcohol ink onto the vase and sprayed it with canned air, letting the ink run and go as it wanted.  I kept it up until I thought I had most of the vase covered.  So you could see the colors better I rolled up a piece of white paper and dropped it into the vase.

vase-with-paper.jpg

So how could you use this?  My mind didn’t now immediately go to this, but you could poor in some white fluffy stuff (whatever florists all it) and put in some flowers (real or silk).  What I have used this vase for in the past is this.

vase-with-candle.jpg

To hold a candle . . . . either a pillar or a votive.  I’ve found that if you put a pillar in it, and the wax drops down the sides of the candle, you’re going to play hell getting the candle out!  It would make a great accent candle on a patio late at night when you are sitting around the chiminea or outdoor fireplace with your glass of wine!

So tell me, what do you think?  A good project for a class?  A total waste of time?  Inquiring minds want to know!

sherry-signature.png

© 2015 Suffusion theme by Sayontan Sinha