
Some time ago, and I can’t remember if it was before CHA or after, Joan Fricker of At Joan’s Garden, asked me to be a Special Guest for one of her blog challenges. So this is what I know (and no, I don’t know what her challenge is). Joan offers up the challenge based on my project and gives you two weeks to complete your project. You can read all about it on Joan’s Blog, At Joan’s Garden . . . how to enter, where you can post, etc. I think there are prizes involved too . . . you need to check it out!
Here’s my project:

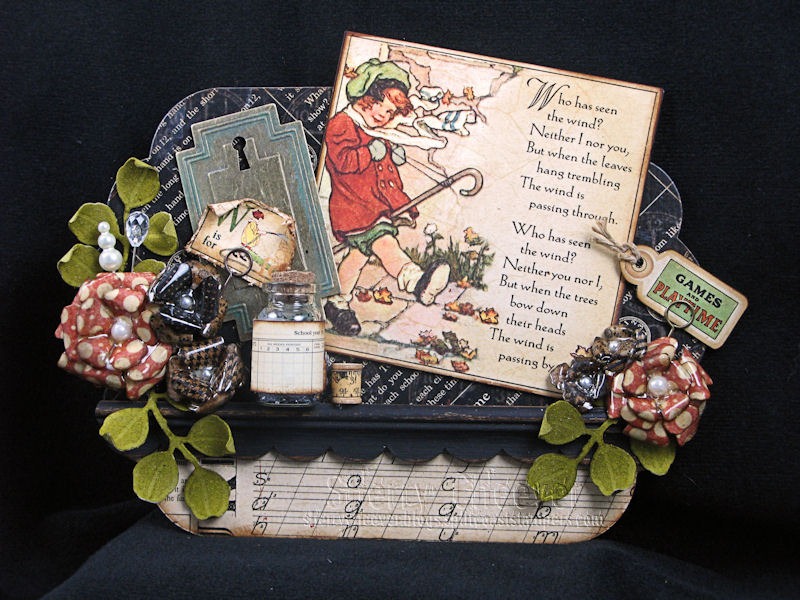
To begin, the base is three pieces of printer’s chipboard that were die cut with Spellbinders LF-246 Grand Labels Eleven and then glued together with Claudine Hellmuth Studio Multi-Medium Matte. A piece of Graphic 45 ABC Primer was then die/cut embossed with Grand Labels Eleven and the bottom 2 inches were cut off and flipped over for the bottom border. Both pieces were then glued to the top of the base. The main image on the wall hanging is an image from the ABC Primer that was trimmed down with Spellbinders LF-126 Grand Squares to fit the base. The shelf is made from hobby wood trim cut to size, painted black and then sanded in various spots to show wear and tear. Vintage Photo Distress Stain was then ran over the sanded areas to highlight the sanded areas. The metal tag in the background is from Graphic 45.

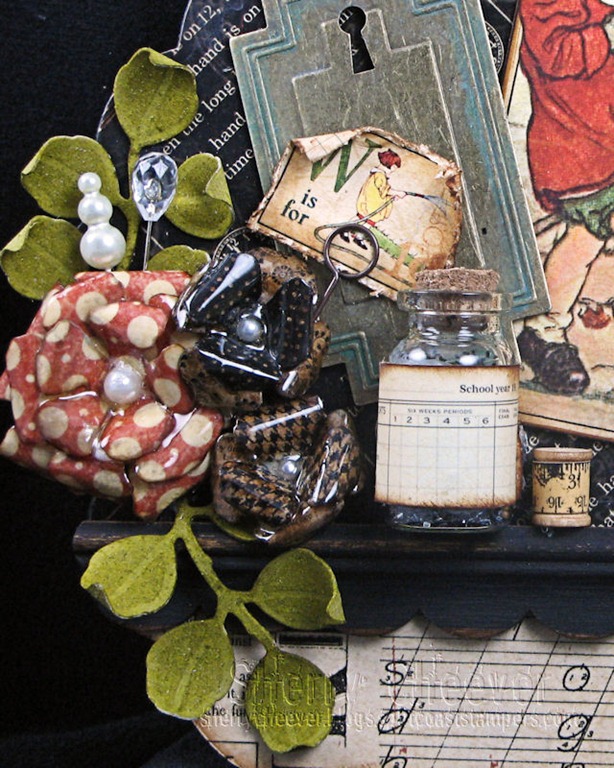
The leaves in the photo above are die cut from GrungePaper using Spellbinders S4-328 Foliage die templates. They were inked on both sides with Crushed Olive Distress Stain and then shaped by rolling the ends of each leave. A strip of a ruler from ABC Primer was wound around a mini spool.
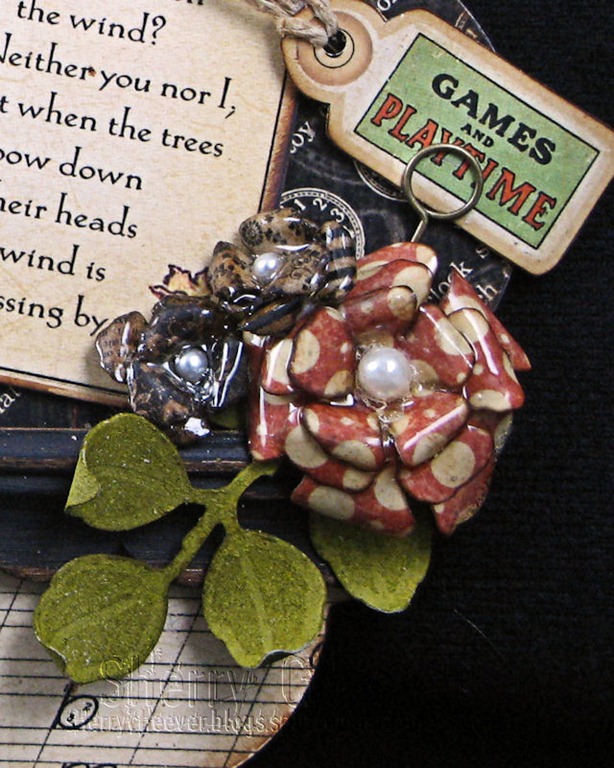
The flowers were made from ABC Primer paper, die cut/embossed with Spellbinders S5-050 Rose Creations, and my Faux Porcelain Technique.
Here is my original Faux Porcelain Flowers video:
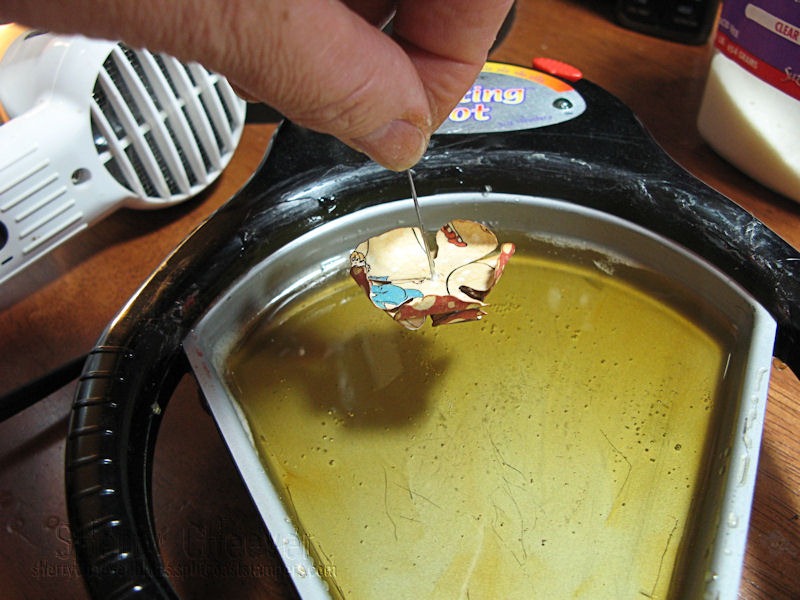
I found for what I make, it was much easier to make the flowers first and then dip them into the UTEE. Here are my flowers made and ready. You’ll notice that I used corsage pins for the center of each flower.

By holding the end of the corsage pin, it is very easy to dip the flowers and then hold them up to drain. I stick the pointed end in a piece of foam then for the flowers to dry.
Here are two that I made from the smallest of the Graphic 45 Flowers.

When I’m ready to attach the flowers, I simply cut the pin off at the back of the flower and glue down with a hot glue gun. I use a hot glue gun on every wall hanging I make . . . especially when using GrungePaper. The hot glue seems to hold embellishments better than anything else.
I’m not going to give the photo links like I normally do on a post because this post is for Joan. All/most items used on this project are available from Joan/At Joan’s Garden.
Project Supplies:
- Paper: Graphic 45 ABC Primer; idea-ology Grunge Paper; Printer’s Chipboard
- Ink/Paint: Ranger Vintage Photo Distress Ink, Vintage Photo and Crushed Olive Distress Stain; Black Acrylic Paint
- Embellishments: Graphic 45 Metal Tags and Flowers; Maya Road Vintage Pearl and Crystal Trinket Pins, Mini Spools; idea-ology Memo Pins; Corsage Pins; Twine; Mini Bottle; Black Glitter; Hobby Wood Trim
- Tools: Spellbinders LF-126 Grand Squares, S5-050 Rose Creations, S4-328 Foliage and LF-246 Grand Labels Eleven; Sanding Tools; Hot Glue Gun; Ranger Matte Accents, Ultra-Thick Embossing Powder (UTEE), Melting Pot, Claudine Hellmuth Studio multi-medium matte
Well, that’s it for me today! Thanks for stopping by and remember . . . life is short, embrace the adventures of your day!

Good morning and welcome to the third day of the Graphic 45 and Want2Scrap Blog Hop! I hope you’ve been following along all week. There have been some outstanding projects posted by the designer for both teams! In case you haven’t and want to catch up, here’s a list of all the designers participating:
- Monday, August 8th:
Elise Durenberger W2S
Laura Denison G45
Tara Orr G45
- Tuesday, August 9th:
Dana Gustafson W2S
Mimi Leinbach W2S - Nicole Eccles G45
- Jane Tregenza G45
- Wednesday, August 10th:
Heidi Blankenship W2S
Jack & Cat Curio G45
Sherry Cheever G45 YOU ARE HERE
Yuka Hino G45
- Thursday, August 11th:
Terre Fry W2S
Gloria Stengel G45
Nancy Wethington G45
Melanie Forbes G45
- Friday, August 12th:
Karen Taylor W2S
Lori Craig W2S - Lynette Carroll G45
- Robin Shakoor G45
I almost forgot to tell you this . . . there are prizes! Randomly chosen design team members from both Graphic45 and Want2Scrap will pick a random winner from their blog, and both Graphic45 and Want2Scrap will be picking a random winner from Facebook. That means there’s 4 chances to win amazing prizes this week!
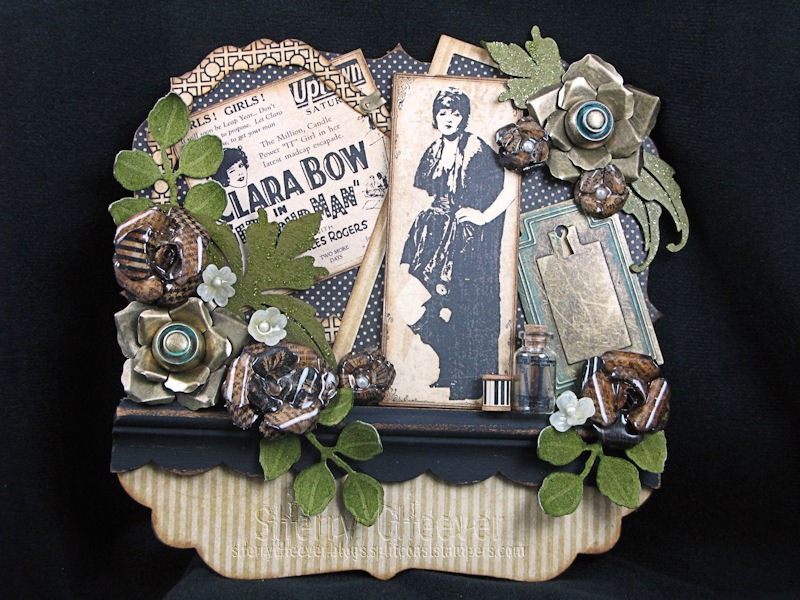
Now for my project!

For my project (wall hanging) I used one page from the 8×8 Decorative Design Chipboard Album from Want2Scrap as the base. It was covered with Graphic 45 Curtain Call paper using matte multi-medium and the excess was sanded off. Vintage Photo Distress Ink was used to sponge all the edges.
The frame in the background (covering the Clara Bow ad), was made by die cutting printer’s chipboard with Spellbinders™ Labels Four. Printer’s chipboard is thin cardboard that I purchase at my local office supply store.
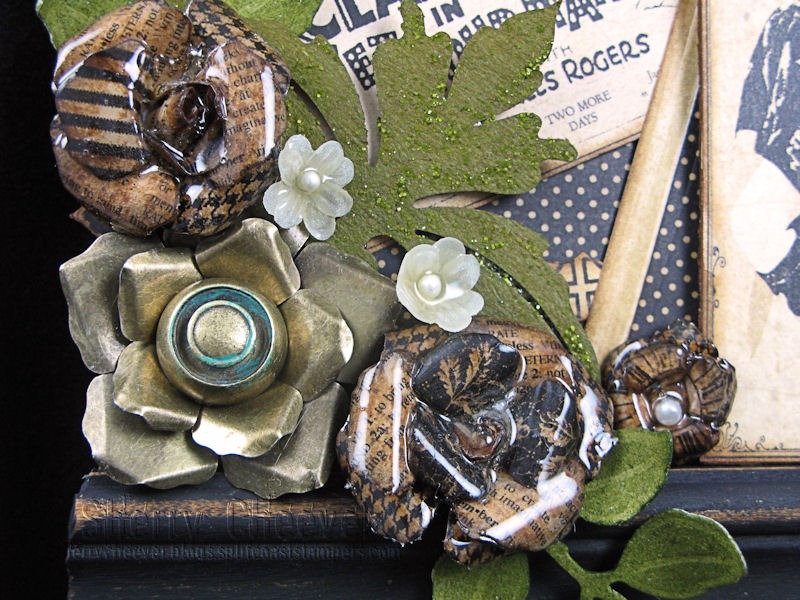
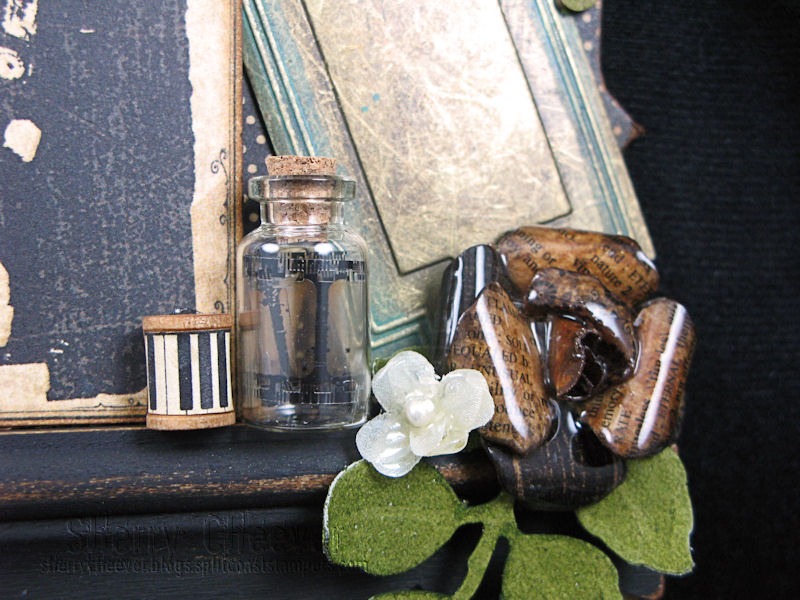
To accent the metal flowers, I made some smaller ones with Graphic 45 Flowers and small white corsage flowers, that were dipped in melted UTEE (Faux Porcelain Flowers). The floral accents pieces are Chipboard Embellishment Style A from Want2Scrap, that were painted with Peeled Paint Distress Stain and then covered with Peeled Paint Distress Stickles.

For trim on the shelf (which is made from hobby wood trim, painted and sanded, and highlighted with Vintage Photo) I added a Maya Road mini spool and a mini bottle.
- PRODUCT/SUPPLIES:
- Graphic 45: Curtain Call, Flowers, Metal Tags, Metal Flowers and Metal Buttons
- Want2Scrap: Chipboard Embellishment Style A, Page from 8×8 Decorative Design Chipboard Album
- Spellbinders: S4-142 Long Classic Rectangles – Large, S4-328 Foliage, S4-190 Labels Four and LF-190 Grand Labels Four
- Ink/Paint: Ranger Vintage Photo Distress Ink, Claudine Hellmuth Studio Charcoal Black Acrylic Paint, Peeled Paint Distress Stain and Distress Stickles
- Embellishments: Maya Road Mini Wooden Spools; 7 Gypsies Paper Fasteners; idea-ology Film Strip Ribbon; Florist Pins and Mini White Flowers; Mini Glass Bottles
- Miscellaneous: Ranger Claudine Hellmuth Studio Matte Multi-Medium, Matte Accents, Melting Pot and UTEE; idea-ology GrungePaper; Tweezers; Scissors; Sanding Tools; Hot Glue Gun; Hobby Wood Molding
Well, that’s all for me today! Thanks for stopping by and don’t forget . . . life is short, embrace the adventures of the day!

Can you believe that it’s  already? The days and weeks are flying by. Heck, it’s already time for school to start again. Kate goes back to work next week and we move Mallory back to school the following week. The school term summer has gone by fast.
I’ve been wanting to make cards with the Karen Lockhart images we worked on Monday and today I got the first one done. The hold up has been that I couldn’t find the right paper to go with the images. Yesterday I found it . . . some old Making Memories paper, Homespun!
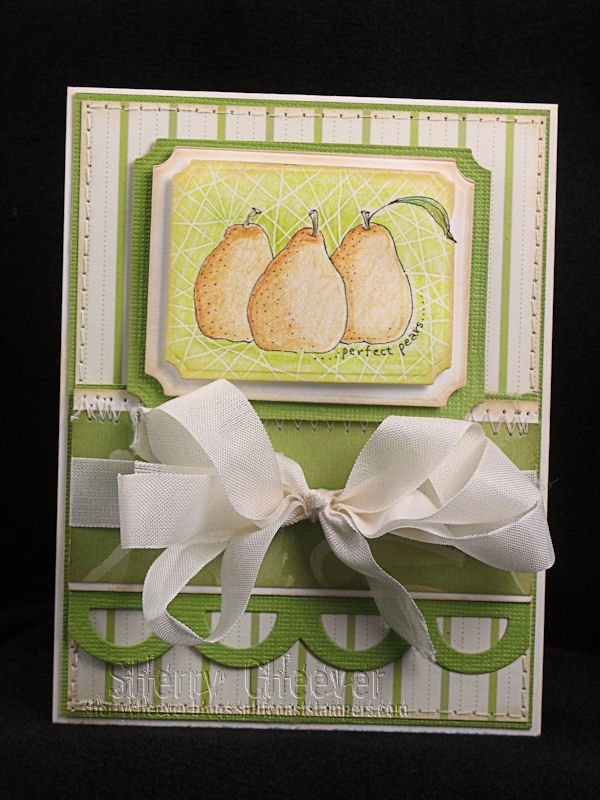
The image on this card was one that we worked with the stylus on and colored with Prismacolor Pencils. It also the one I got jammed in my die cutter and couldn’t get out without some effort. In this close-up you can see all the tiny little lines where it was under too much pressure. I actually think they add to the image and I love the look.
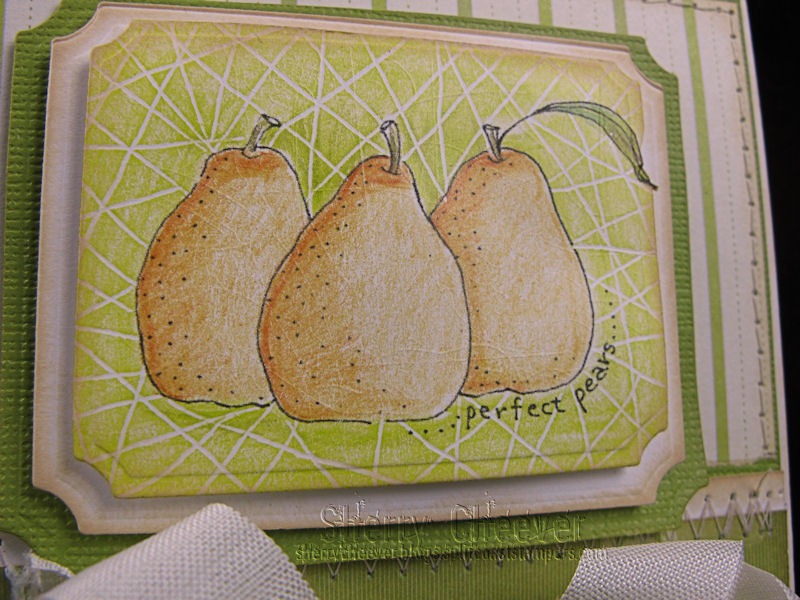
The card is also a size that I haven’t made in a very, very long time. Plain and simple just seem to work with this image. The edges of all the paper was sponged with Antique Linen Distress Ink and then it was all sewn together with a background layer of cardstock. I even have a white base . . . I know! So odd for me. The seam binding is the original color and not even dyed. No I do not have a fever . . . well, at least I don’t think so!
The image is die cut/embossed and layered on Spellbinders Labels. The border is die/cut embossed with the new Spellbinders Classic Scallop Edgeabilities.
I’m heading to the studio to work on some late projects that I need to get done. Thanks for stopping by and remember . . . . life is short, embrace the adventures that come your way!

Project Supplies:
|
|
|
|
|
|
|
|
|
|
|
|
|
|
 Well, I’m later than I wanted to be today in posting. I don’t really know what happened to my day . . . I worked in the studio this morning making this card, but I guess it took me longer than I thought.
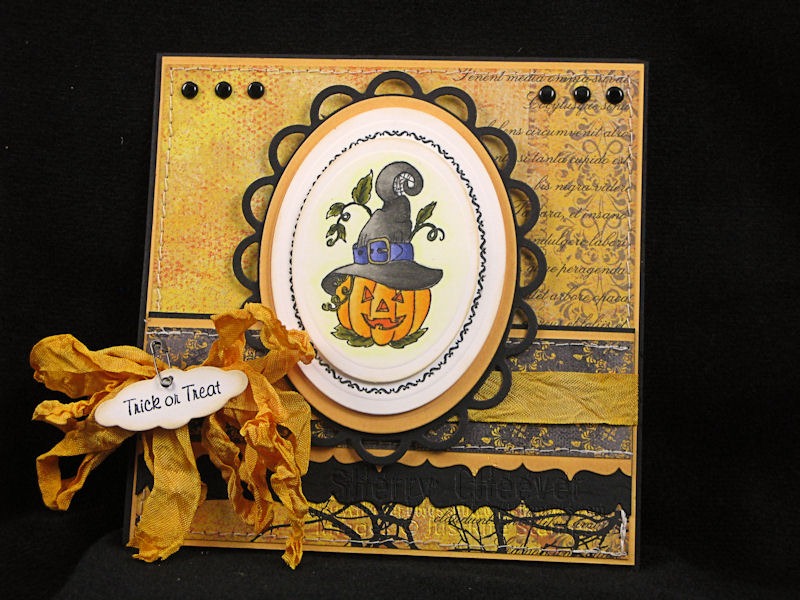
When I was at CHA, I picked up the Halloween sets from JustRite Stampers and couldn’t wait to sit down and do some coloring. The only problem was I didn’t have any Halloween paper. So when I was at Papertrix on Monday I picked up Memory Box’s new pad, Blackbird. By the way, there are things I find at Papertrix that I don’t find anywhere else. If you happen to want to use some of these things I’m picking up (like this Memory Box Paper Pad), you can call Cindy or Wayne and I bet they would take a phone order and ship it out to you. I really can’t help you with another link for the Memory Box paper, because I don’t have any other connection. If someone out there does, and if you/they don’t mind me linking to the site, let me know. I’ll gladly put up a link in my supply list.
Are you ready for the card? 

The image was colored with Copic Markers and the web and the black border were highlighted with a Gelly Roll Stardust Pen. Spellbinders ovals were used to mount the image and the new Edgeabilities were used for the border. The seam binding was dyed with a mixture of Wild Honey and Spiced Marmalade Distress Stains. The image and the remaining papers were sponged with a touch of Antique Linen Distress Ink.
I almost forgot the sentiment. It was stamped in Jet Black Archival and then die cut with Spellbinders new Blossom Tags and Accents. The edges were sponged with Antique Linen and attached to the bow with a mini safety pin.
That’s all I have for now. Thanks for stopping by and remember . . . life is short, embrace the adventures of your day!

Project Supplies:
|
|
|
|
|
|
|
|
|
|
|
|
|
|
|
|
|
|
|
|
|
|
|
|
|
|


